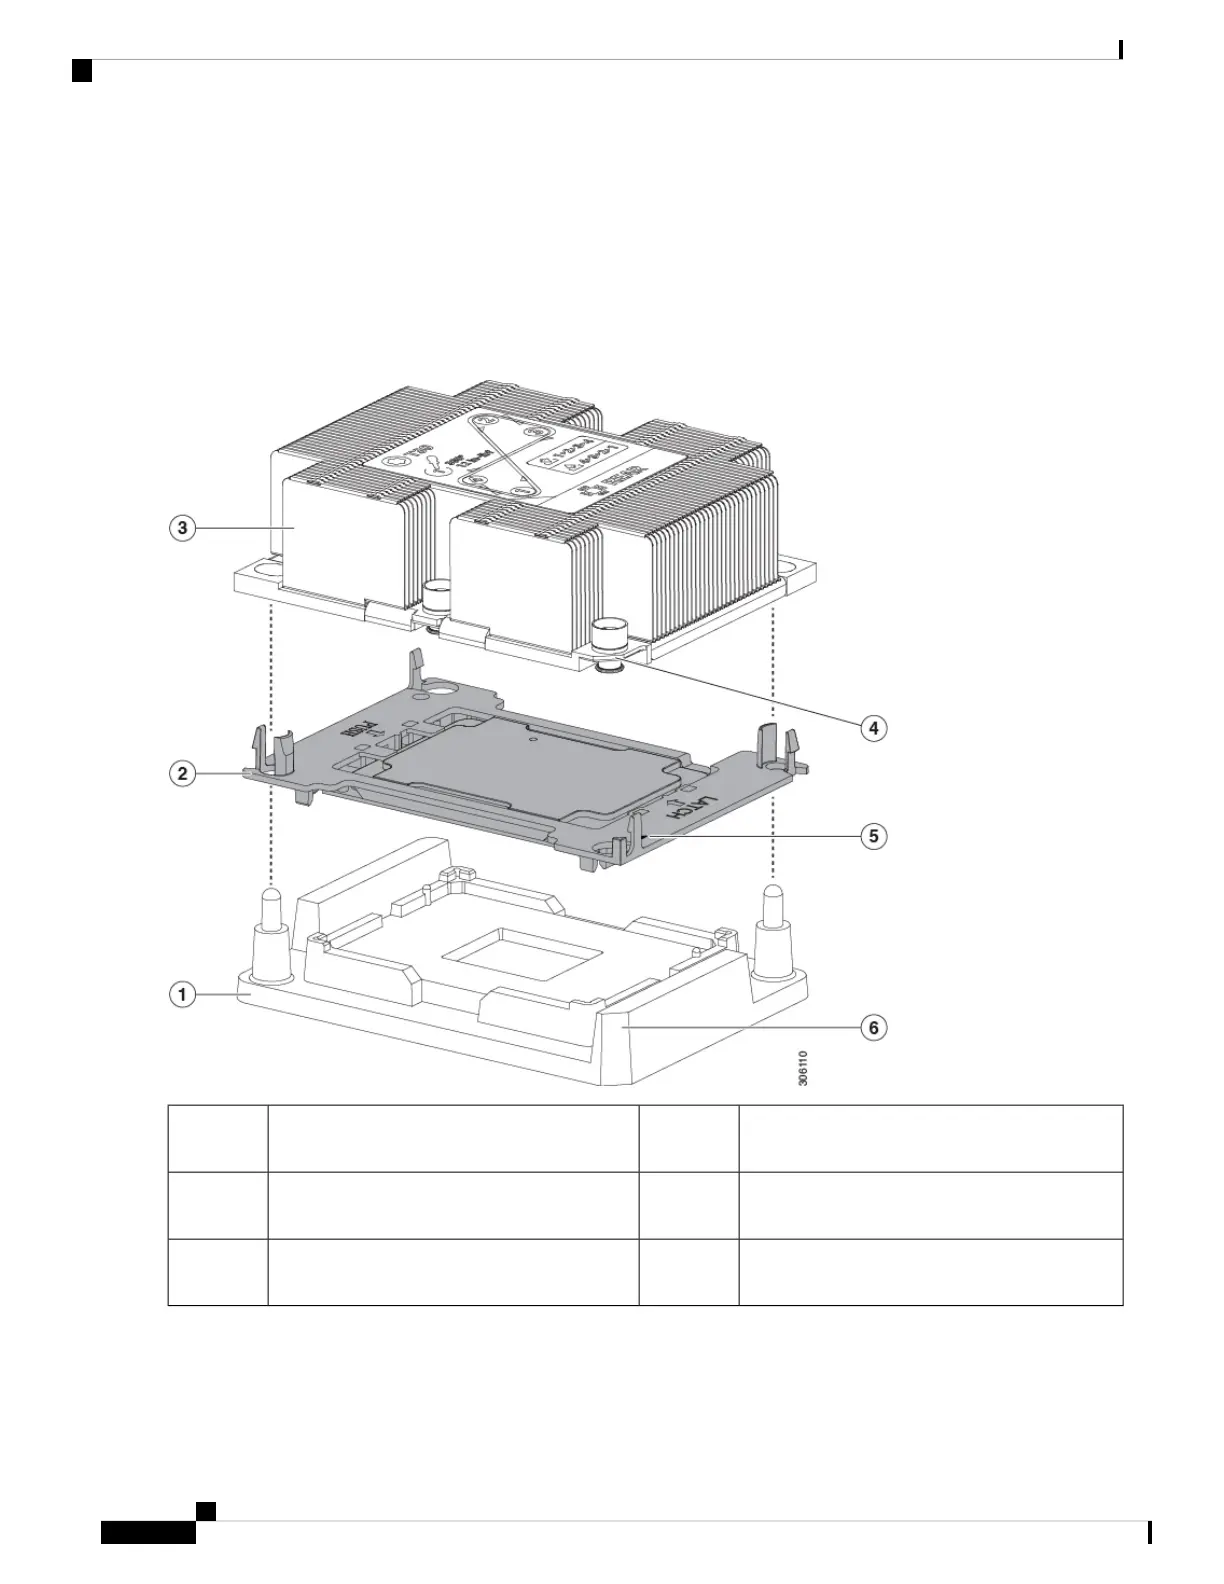
Step 3 The new CPU assembly is shipped on a CPU assembly tool. Take the new CPU assembly and CPU assembly tool out of
the carton.
If the CPU assembly and CPU assembly tool become separated, note the alignment features shown below for correct
orientation. The pin 1 triangle on the CPU carrier must be aligned with the angled corner on the CPU assembly tool.
CPUs and their sockets are fragile and must be handled with extreme care to avoid damaging pins.
Caution
Figure 22: CPU Assembly Tool, CPU Assembly, and Heatsink Alignment Features
Angled corner on heatsink (pin 1 alignment
feature)
4CPU assembly tool1
Triangle cut into carrier (pin 1 alignment
feature)
5CPU assembly (CPU in plastic carrier)2
Angled corner on CPU assembly tool (pin 1
alignment feature)
6Heatsink3
Step 4 Apply new TIM to the heatsink:
The heatsink must have new TIM on the heatsink-to-CPU surface to ensure proper cooling and performance.
Note
Cisco APIC M3/L3 Server Installation and Service Guide
50
Maintaining the Server
Replacing a CPU and Heatsink