EasyManuals Logo

Cisco ASR 9006 Unpacking And Installing

Cisco ASR 9006
98 pages
To Next Page IconTo Next Page
To Previous Page IconTo Previous Page
Page #96 background imageLoading...
Page #96 background image
Procedure
Step 1 Attach the left (if not pre-installed) and right hinge brackets to the chassis using three screws (M4 thread) for
each bracket (see the below figure). Tighten the screws to a torque of 11 in-lb (1.20 N-m).
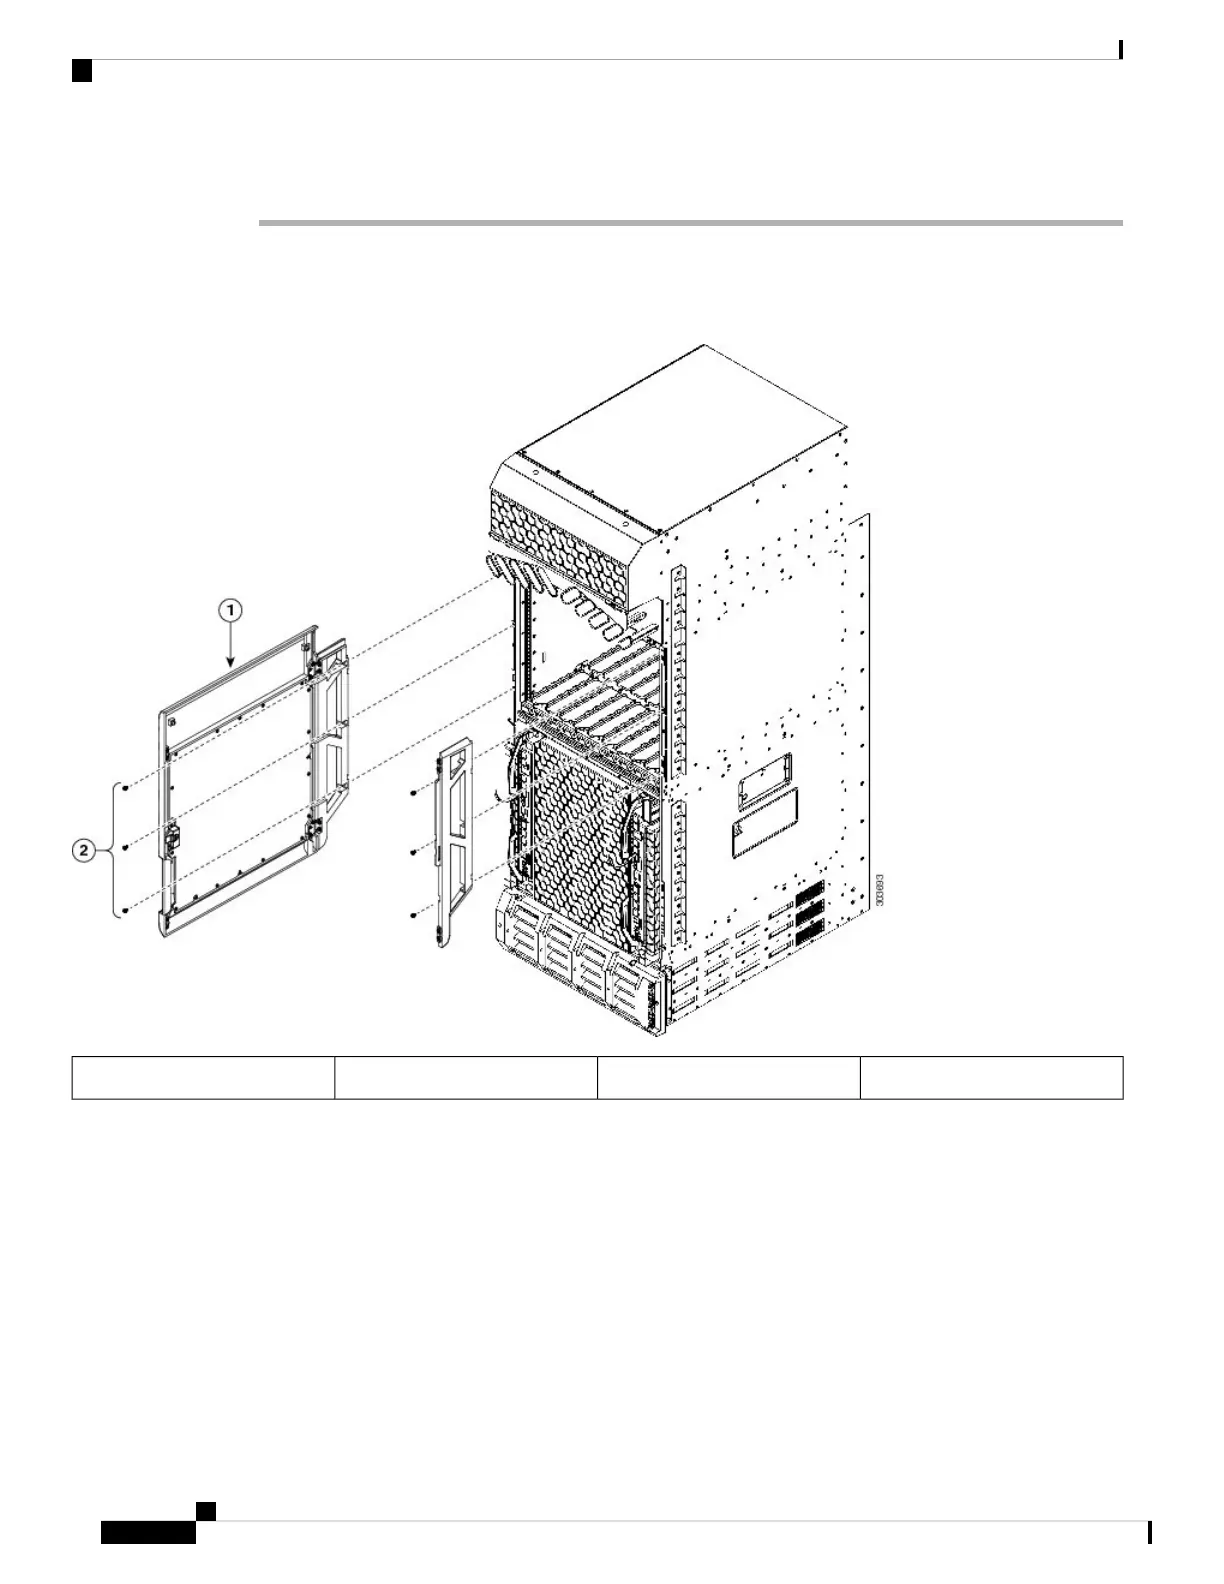
Figure 99: Optional Card Cage Door on the Front of the Cisco ASR 9912 Router
Hinge bracket2Card cage door1
Step 2 Align the exhaust air deflector at the top rear of the chassis above the fan trays (see the below figure), and
use a screwdriver to tighten the two screws, one on each side of the deflector.
Unpacking and Installing the Chassis
96
Unpacking and Installing the Chassis
Installing Optional Chassis Accessories on the Cisco ASR 9912 Router

Table of Contents

Other manuals for Cisco ASR 9006

Questions and Answers:

Question and Answer IconNeed help?

Do you have a question about the Cisco ASR 9006 and is the answer not in the manual?

Cisco ASR 9006 Specifications

General IconGeneral
Chassis TypeModular
Rack Units10 RU
Slots6
Operating Temperature0°C to 40°C (32°F to 104°F)
Storage Temperature-40°C to 70°C (-40°F to 158°F)
Relative Humidity5% to 95% non-condensing
Power SupplyAC or DC
CoolingFront-to-back airflow
Input Voltage100-240 VAC or -48 to -60 VDC
Supported ProtocolsIPv4, IPv6, MPLS, L2VPN, L3VPN
Interfaces10GE, 40GE, 100GE
Management InterfacesEthernet, Console, Auxiliary

Related product manuals