Do you have a question about the Cisco C111 8P Series and is the answer not in the manual?
Details the next-generation, multi-core, branch routers for SMBs and enterprise branches.
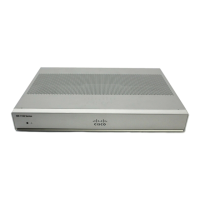
Shows front and back panel views, interface locations, status indicators, and labels.
Summarizes the LED indicators on the bezel and I/O sides of the C111x series.
Explains the function and actuation of the reset button during ROMMON boot.
Details power specifications including AC input voltage and output power.
Explains the 3-tuple notation for slot, sub-slot, and port numbering for interfaces.
Recommends periodic inspection and cleaning to minimize dust impact on the router.
Provides important safety instructions and warnings before working with equipment.
Advises that only trained personnel should handle electrical components.
Details procedures to prevent ESD damage to electronic circuitry.
Outlines site requirements for safe installation and operation, including electrical codes.
Provides guidance on environmental conditions affecting router performance and reliability.
Specifies the need for 19-inch rack brackets for mounting the Cisco platform.
Details site power checks and the need for a power conditioner if necessary.
Describes cables and specifications required for installing Cisco 1100 Series ISRs.
Discusses cabling and connectivity for serial console ports via RJ-45 or USB.
Lists necessary tools and equipment for router installation and component upgrades.
Instructions on unpacking the router and verifying contents.
Guide on positioning the router on a desktop, rack, or wall.
Procedures for securing rack mounting brackets on the chassis for rack installation.
Describes how to mount the router using an optional bracket kit under a desk or shelf.
Instructions for securing DIN Rail brackets on the bottom of the chassis for mounting.
Details on mounting the router chassis on a wall using key-hole slots or DIN rail brackets.
Procedures for connecting the router chassis to earth ground for safety.
Instructions for connecting the external AC to DC power adapter to the router.
Explains how to connect the router to a console terminal or PC for administrative access.
Steps for establishing physical connectivity and configuring a terminal emulator.
Guide for connecting a Mac OS X system USB port to the console via Terminal utility.
Guide for connecting a Linux system USB port to the console via Terminal utility.
Describes how to connect WAN and LAN interface cables to the router.
Summarizes typical WAN and LAN connections and cabling for ISRs.
Steps for connecting WAN/LAN interfaces, including cable routing and bundling.
Basic configuration steps after installing the router and connecting cables.
Instructions for removing and replacing the router chassis covers for module access.
Describes how to install external modules and Field Replaceable Units (FRUs).
Procedures for installing and removing SFP modules for optical connectivity.
Guide on installing LTE pluggable modules and related components like SIM cards.
Instructions for mounting antennas on racks, walls, or ceilings.
Introduction to ROMMON, the bootloader that initializes hardware on power-on/reset.
How to access the ROMMON CLI from a terminal connected to the console port.
Explains the difference between ROMMON mode and Cisco IOS XE software execution.
Details compliance with FCC and Industry Canada regulations for Wi-Fi and LTE radios.
States compliance with RF exposure limits for human health.
Declares compliance with Canadian ICES-003 for digital apparatus.
Outlines IC radiation exposure limits and minimum separation distances.
| Brand | Cisco |
|---|---|
| Model | C111 8P Series |
| Category | Network Router |
| Language | English |


 Loading...