What to Do Next
•
If required, remove the chassis installation brackets after ensuring that all screws are tightly secured to the rack unit.
•
Attach the cable management bracket.
Installing the Cisco cBR in a Two-Post Rack
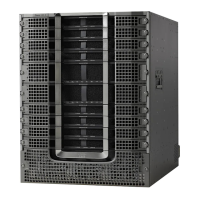
The Cisco cBR chassis can be installed in a two-post 19-inch rack either as a front mount or a mid-mount.
The procedure for the front mount option in a two-post rack is identical to the procedure for front mounting in a four-post rack except
you cannot use the second chassis installation bracket.
If you are using a two-post rack, secure the rack to the floor surface to prevent tipping and avoid bodily
injury and component damage.
Caution
To mid-mount the chassis, follow these steps:
Procedure
Step 1
Ensure that all screw fasteners on the installed components are securely tightened on the chassis.
Step 2
Ensure that your path to the rack is unobstructed. If the rack is on wheels, ensure that the brakes are engaged or the rack
is otherwise stabilized.
Step 3
(Optional) Install the chassis installation bracket into the rack to support the chassis during installation while you secure
it to the rack.
Step 4
With two or more people, lift the chassis (partially unloaded) into position between the rack posts and rest it on the chassis
installation bracket. The chassis can be lifted using the two large side handles, the rear Power entry area handles or by
placing your hands underneath the bottom of the chassis.
Step 5
After the rear weight of the chassis is resting on the installation bracket, one person can hold it in place while the second
person moves to the rear of the rack to help slide it into place and hold the weight while the rack mount screws are tightened.
Step 6
Position the chassis until the rack-mounting flanges are flush against the mounting rails on the rack.
Step 7
Hold the chassis in position against the mounting rails and do the following:
a) Insert a bottom screw into the rack mount ear on each side and use a hand-held screwdriver to tighten the screw to the
rack rail.
b) Insert a top screw into each side rack mount bracket and tighten the screw to the rack rail.
12

 Loading...