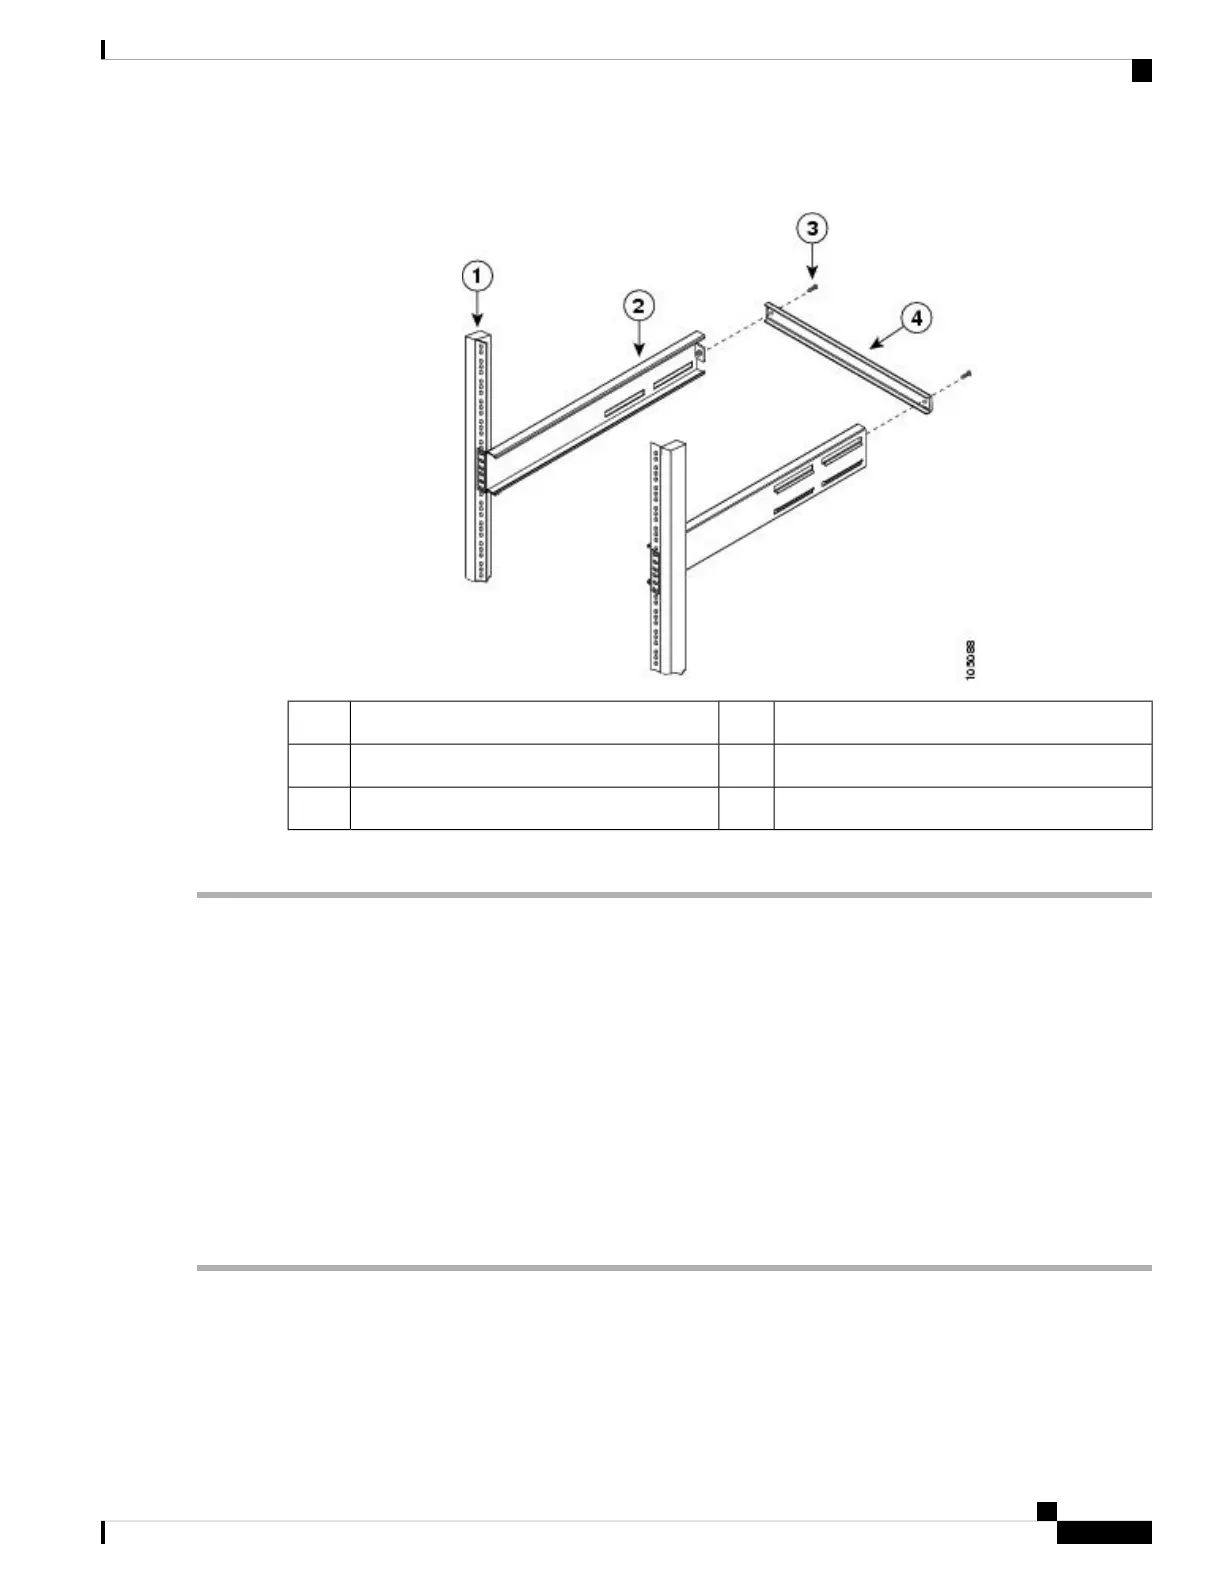
Figure 6: Installing the Shelf Bracket Kit into an EIA Rack
Crossbar4Rack-mounting post1
10-32 screws5Shelf bracket2
Slider post3
To install the shelf brackets in an EIA rack, follow these steps:
Step 1 Position a shelf bracket inside the rack-mounting posts, as shown in Installing the Shelf Bracket Kit into an EIA Rack.
Align the screw holes at the front of the shelf bracket with the holes in the front rack-mounting post. Then, attach the
shelf bracket to the front rack-mounting post using a minimum of four 12-24 or 10-24 screws.
The bottom hole of the shelf bracket should align with the bottom hole (the hole immediately above the 1/2 in.
spacing) of a rack unit on the rack-mounting post.
Note
Step 2 Repeat Step 1 with the other shelf brackets.
Step 3 Verify that the shelf brackets are at the same height (using the level or tape measure, as desired).
Step 4 Attach the crossbar to the shelf brackets, as shown in Installing the Shelf Bracket Kit into an EIA Rack, using the 10-32
screws.
Step 5 Insert the slider posts into the shelf brackets, as shown in Installing the Shelf Bracket Kit into an EIA Rack. Attach them
to the rear rack-mounting posts, using a minimum of four 12-24 or 10-24 screws.
Cisco MDS 9148V-K9 Switch Hardware Installation Guide
19
Installing the Cisco MDS 9148V-K9 Switch
Installing the Shelf Bracket Kit into a Four-Post EIA Rack
 Loading...