Do you have a question about the Cisco MERAKI MR57 and is the answer not in the manual?
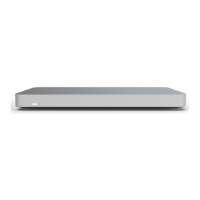
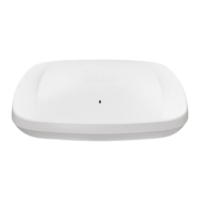
Details the physical characteristics, interfaces, environment, and security features of the MR57.
Details for attaching the universal bracket and mounting on walls, ceilings, and drop ceilings.
Connecting power to the AP and attaching it to the mounted cradle.
Checking LEDs, client connectivity, and network coverage.
The Cisco Meraki MR57 is a high-performance, tri-band enterprise-class Wi-Fi 6E cloud-managed access point designed to meet the demands of high-capacity and high-density network environments. It supports 2.4 GHz, 5 GHz, and the newly opened unlicensed 6 GHz frequency bands, making it suitable for mission-critical applications. Beyond its primary Wi-Fi capabilities, the MR57 incorporates a fourth radio dedicated to optimizing the RF environment and enhancing security, ensuring reliable and secure wireless operations. Additionally, it features a Bluetooth Low Energy (BLE) capable radio, which expands its utility to location-based services and various IoT applications. For further IoT integration, the MR57 is equipped with a USB port, allowing for the connection of external devices.
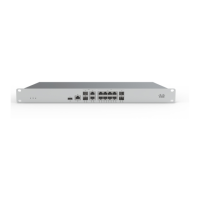
The MR57 offers flexible power options, supporting Power over Ethernet (PoE) through its two RJ45 Ethernet ports, labeled "ETH0, PoE" and "ETH1, PoE." Both ports are capable of accepting 802.3af (in power sharing mode), 802.3at, and 802.3bt power. "ETH0, PoE" typically serves as the primary uplink to the LAN/WAN. "ETH1, PoE" can be utilized for high availability, providing redundancy in case of primary port failure, or for power sharing, where two 802.3af power sources combine to deliver 802.3at power, or two 802.3at power sources combine for 802.3bt power. It's important to note that high availability and power sharing features will be enabled in future firmware versions. A single 802.3af power source is not supported for full operation. For optimal performance with certain pre-standard 802.3at/PoE+ switches, manual configuration to provide 30 watts of power to the switch port connected to the MR57 may be necessary to prevent low power operation and continuous reboots.
The two Ethernet ports can also be configured for link aggregation, forming a bonded connection. This requires plugging the AP into two switch ports on the same Ethernet switch, which must be configured for LACP bonding. This setup allows for a maximum bonded aggregate wired connection of up to 10 Gbps to the switch. When link aggregation is disabled, Eth0 should be used as the primary uplink and PoE port. If only one Ethernet port is used for the AP's connection to the LAN/WAN, the second Ethernet port can be used to connect other devices that lack wireless capability, extending the local area network. This functionality requires a Port Profile to be applied to the AP.
The MR57's tri-band operation is a key feature. Out of the box, the second and third radios operate in dual 5 GHz mode. For 6 GHz operation, this can be enabled through the RF Profile page in the Meraki dashboard under "Wireless > CONFIGURE > Radio Settings > RF Profiles." Existing profiles can be modified, or new ones created, to select the 6 GHz band for tri-band operation. Once enabled, 6 GHz capability can be extended to all SSIDs. The 6 GHz frequency band introduces 59 additional 20 MHz channels, and to facilitate efficient client discovery, the system utilizes Preferred Scanning Channels (PSCs), which are 20-MHz channels spaced every 80 MHz. The MR57's Auto RF configuration for 6 GHz channel selection is restricted to PSC-capable channels to ensure optimal client onboarding. When manually allocating channels, it is crucial to select a PSC-supported channel to avoid substantial delays in client connectivity.
The MR57 is equipped with a multi-color LED indicator on the front, providing visual cues about its system functionality and performance. An orange LED indicates the AP is booting, with a permanent orange suggesting a hardware issue. A rainbow LED signifies initialization or scanning. A blinking blue LED indicates a firmware upgrade is in progress. A solid green LED means the AP is in Gateway mode with no clients, while a solid blue LED indicates Gateway mode with clients. A blinking orange LED suggests the AP cannot find an uplink. A blinking green LED specifically indicates site survey mode. For enhanced security and reduced visibility, the MR57 can be operated in "Run Dark" mode, which disables the LED illumination and can be enabled via the Meraki Dashboard.
For troubleshooting, the MR57 includes a factory reset button. Pressing and holding this button for at least five seconds and then releasing it will reboot the AP and restore it to its original factory settings, deleting all stored configuration information.
Physical security is addressed through multiple options. The universal mounting bracket includes a security hasp, allowing for a padlock to secure the access point to the bracket, preventing accidental dislodging and theft. Additionally, the access point features a Kensington lock hard point, enabling it to be secured to any nearby permanent structure using a standard Kensington lock cable. The concealed mount plate with an anti-tamper cable bay further enhances security.
Installation involves several steps to ensure optimal performance. Before on-site installation, it is recommended to configure the Dashboard Network by logging into dashboard.meraki.com, adding the APs to the network using their order or serial numbers and license key, and placing them on the map/floor plan. A crucial pre-installation step is to check and set the firmware. This involves connecting the AP to power and a wired Internet connection. The LED will glow solid orange during boot-up. If a firmware upgrade is needed, the LED will blink orange until the upgrade is complete, then turn solid green or blue. This process can take several minutes depending on internet speed. It is important to note that if the Networks in the Organization where the MR57 is to be installed have Meraki Sensors, a separate network for the MR57 should be created for staging purposes to allow firmware updates before moving the AP to its operational network.
Upstream firewall settings must allow outgoing connections on specific ports and IP addresses, which can be found on the firewall configuration page in the Meraki dashboard. The MR57 can be assigned a routable IP address either dynamically via DHCP or statically. Static IP assignment can be done through the AP's local web server by connecting a client machine wirelessly or via a wired connection, browsing to http://my.meraki.com or http://10.128.128.128, and configuring the uplink settings. Alternatively, static IP addresses can be assigned via DHCP reservations on the upstream DHCP server, reserving IP addresses for the APs' MAC addresses.
When mounting the AP, a good location with an unobstructed line of sight to most coverage areas is recommended, such as a ceiling or high wall. Power over Ethernet supports a maximum cable length of 300 ft (100 m). In mesh deployments, the AP should have a line of sight to at least two other Meraki devices. The universal mounting bracket (AIR-AP-BRACKET-2) facilitates installation on walls, solid ceilings, or drop ceilings. For drop ceilings, the T-Rail mount attachment (AIR-AP-T-RAIL-R) is used. The MR57 is then gently slid onto the mounting cradle until it clicks into place.
After installation, device functionality and network coverage should be verified. This includes checking the LED status, verifying access point connectivity by connecting a client device and accessing the web browser, and confirming good signal strength throughout the coverage area using a signal strength meter. If connectivity issues persist, basic troubleshooting steps include resetting the access point, trying different cables, or testing cables on other devices. Radio functionality can be checked by disconnecting the Ethernet cable (while powered on) to switch the AP into repeater mode, allowing connection to its "-scanning" SSID. Ethernet port functionality can be checked by connecting a computer directly to the AP's Ethernet port and ensuring the Ethernet LED turns solid green or blue, and the computer obtains an IP address via DHCP. If the AP has a static IP, the green signal LEDs will flash, and no IP will be received via DHCP. In such cases, the MAC address on the back of the AP should be verified against the my.meraki.com Overview page, and the static IP configuration should be checked.
The MR57 comes with a Lifetime warranty for indoor models. For hardware replacements under warranty, access to the original packaging with the device serial number and order information may be required. Support and additional information can be accessed by logging into dashboard.meraki.com and visiting the Get Help section to open a case or find contact information. The equipment is intended for industrial or commercial activities, not domestic use, and should be installed and maintained by qualified specialists. Proper disposal of the device at the end of its service life must comply with state regulations and organizational procedures. Storage and transportation should be in original packaging, in conditions that meet specified temperature and humidity ranges.
| Maximum Data Rate | 4.8 Gbps |
|---|---|
| Frequency Bands | 2.4 GHz, 5 GHz, 6 GHz |
| OFDMA | Yes |
| PoE | 802.3at |
| Bluetooth Low Energy (BLE) | Yes |
| Wireless Standard | 802.11ax |
| 5 GHz Radio | 4x4:4 |
| 6 GHz Radio | 4x4:4 |
| MIMO Technology | MU-MIMO |
| Operating Temperature | 0°C to 40°C |
| Mounting Options | Wall, ceiling |
| Antenna Type | Internal |