In-Room Control on Touch10
for Cisco TelePresence
MX200 G2, MX300 G2,
MX700, MX800,
SX10, SX20, SX80
Collaboration Endpoint
software version CE8.2
D15358.02 - JULY 2016
www.cisco.com
© 2016 Cisco Systems, Inc.
All rights reserved.
11
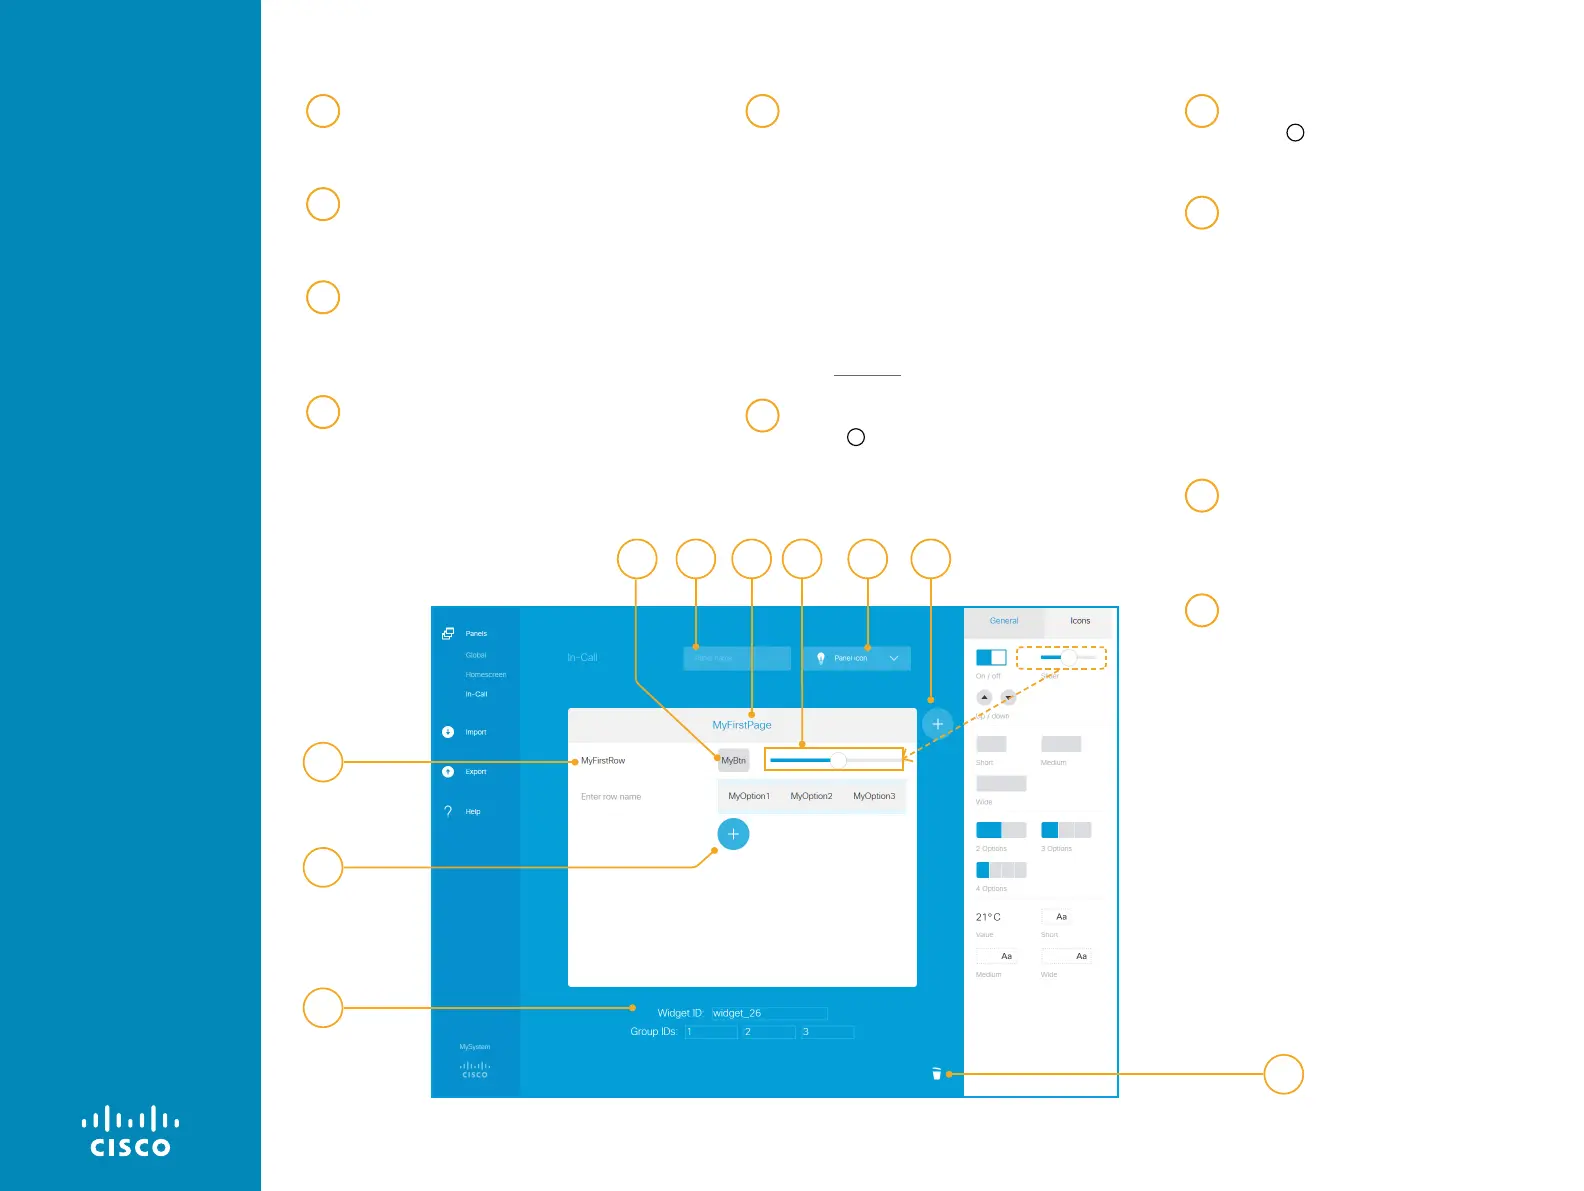
1
Give the page a name
Click the page text, and enter a
name.
2
Give the row a name
Click the row text, and enter a
name.
3
Add widgets from the library
Drag and drop as many widgets as
you need from the widget library
onto a row.
4
Enter custom text on widgets
Click the dummy-text on a button,
group button, or text field, and
enter the appropriate text.
5
Define unique identifiers
Click the widget, and type unique
identifiers in the input fields that
pops up below the design panel.
You can either use the pre-
assigned identifiers or define your
own.
All widgets have a unique
WidgetID. Only Group buttons have
GroupIDs.
Read more about the identifiers in
the Widgets chapter.
6
Add more rows
Click
+
to add a new row.
Repeat steps 2-5 for each row.
7
Add more pages
Click
+
to add a new page.
Repeat steps 1–6 for each page.
8
Choose an entry icon
Click Panel icon and choose a
control icon (entry icon).
If you created a Global panel, the
control icon appears in the status
bar on Touch10. When you tap the
icon, the in-room Global control
panel opens.
For Homescreen and In-Call, the
entry icon will appear as a button to
the right of the call control buttons.
8b
Give the panel a name
Click Panel name and type in a
descriptive name. This field is not
available with the Global panel.
9
Click on the garbage bin icon to
delete the entire panel from the
editor. To remove a panel from the
Touch 10, remove it from the editor
and then push your altered editor
configuration to the video system.
The panel’s icon should disappear
instantly.
88b 1
2
3
6
74
5
9
Tip Drag a page, row,
or widget, and drop it in
a new position. Drop it
outside the design panel
to delete it.
For more on how
to create more
panels, see the
previous page.