8
Contents
Linksys Wireless-N Range Extender
Connecting devices to your network through the
extender
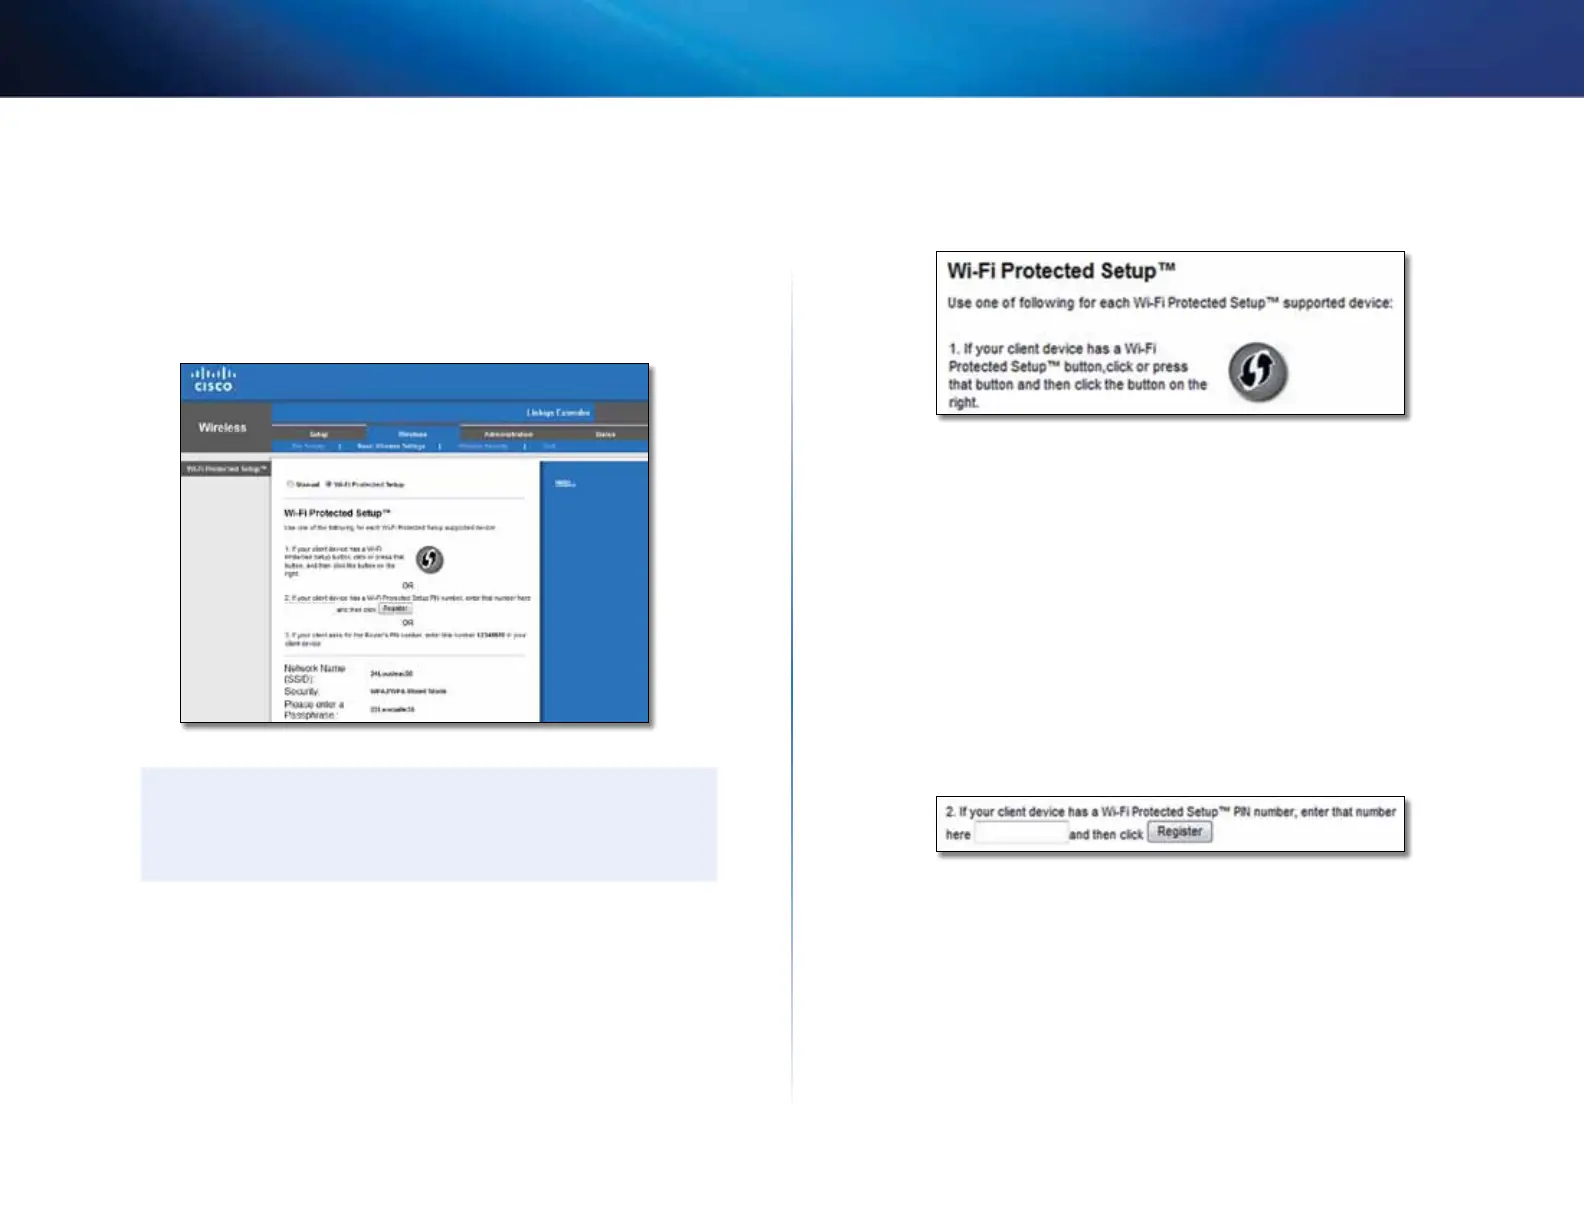
If you have network devices, such as wireless printers, that support Wi-Fi
Protected Setup, then you can use Wi-Fi Protected Setup to connect them to
your wireless network. Choose from the methods below to connect the device
to your network.
NOTE
Wi-Fi Protected Setup configures only one client device at a time.
Repeat the instructions for each client device that supports Wi-Fi
Protected Setup.
Connecting with the Wi-Fi Protected Setup Button
Use this method if your client device has a Wi-Fi Protected Setup button.
1.
Click or press the Wi-Fi Protected Setup button on the client device.
2.
Click the Wi-Fi Protected Setup button on the extender’s Wi-Fi Protected
Setup screen, OR press and hold the Wi-Fi Protected Setup button on
the top panel of the extender for one second. When the connection is
complete, the Wi-Fi Protected Setup light on the extender is continuously
lit.
3.
Click OK on the extender’s Wi-Fi Protected Setup screen within two
minutes.
Connecting with the client device’s PIN
Use this method if your client device has a Wi-Fi Protected Setup PIN (Personal
Identification Number).
1.
Enter the PIN from the client device in the field on the extender’s Wi-Fi
Protected Setup screen.
2.
Click Register on the extender’s Wi-Fi Protected Setup screen. When the
connection is complete, the Wi-Fi Protected Setup light on the extender
is continuously lit.
3.
Click OK on the extender’s Wi-Fi Protected Setup screen within two
minutes.

 Loading...