1
Setup
12
3
2
5
4
1
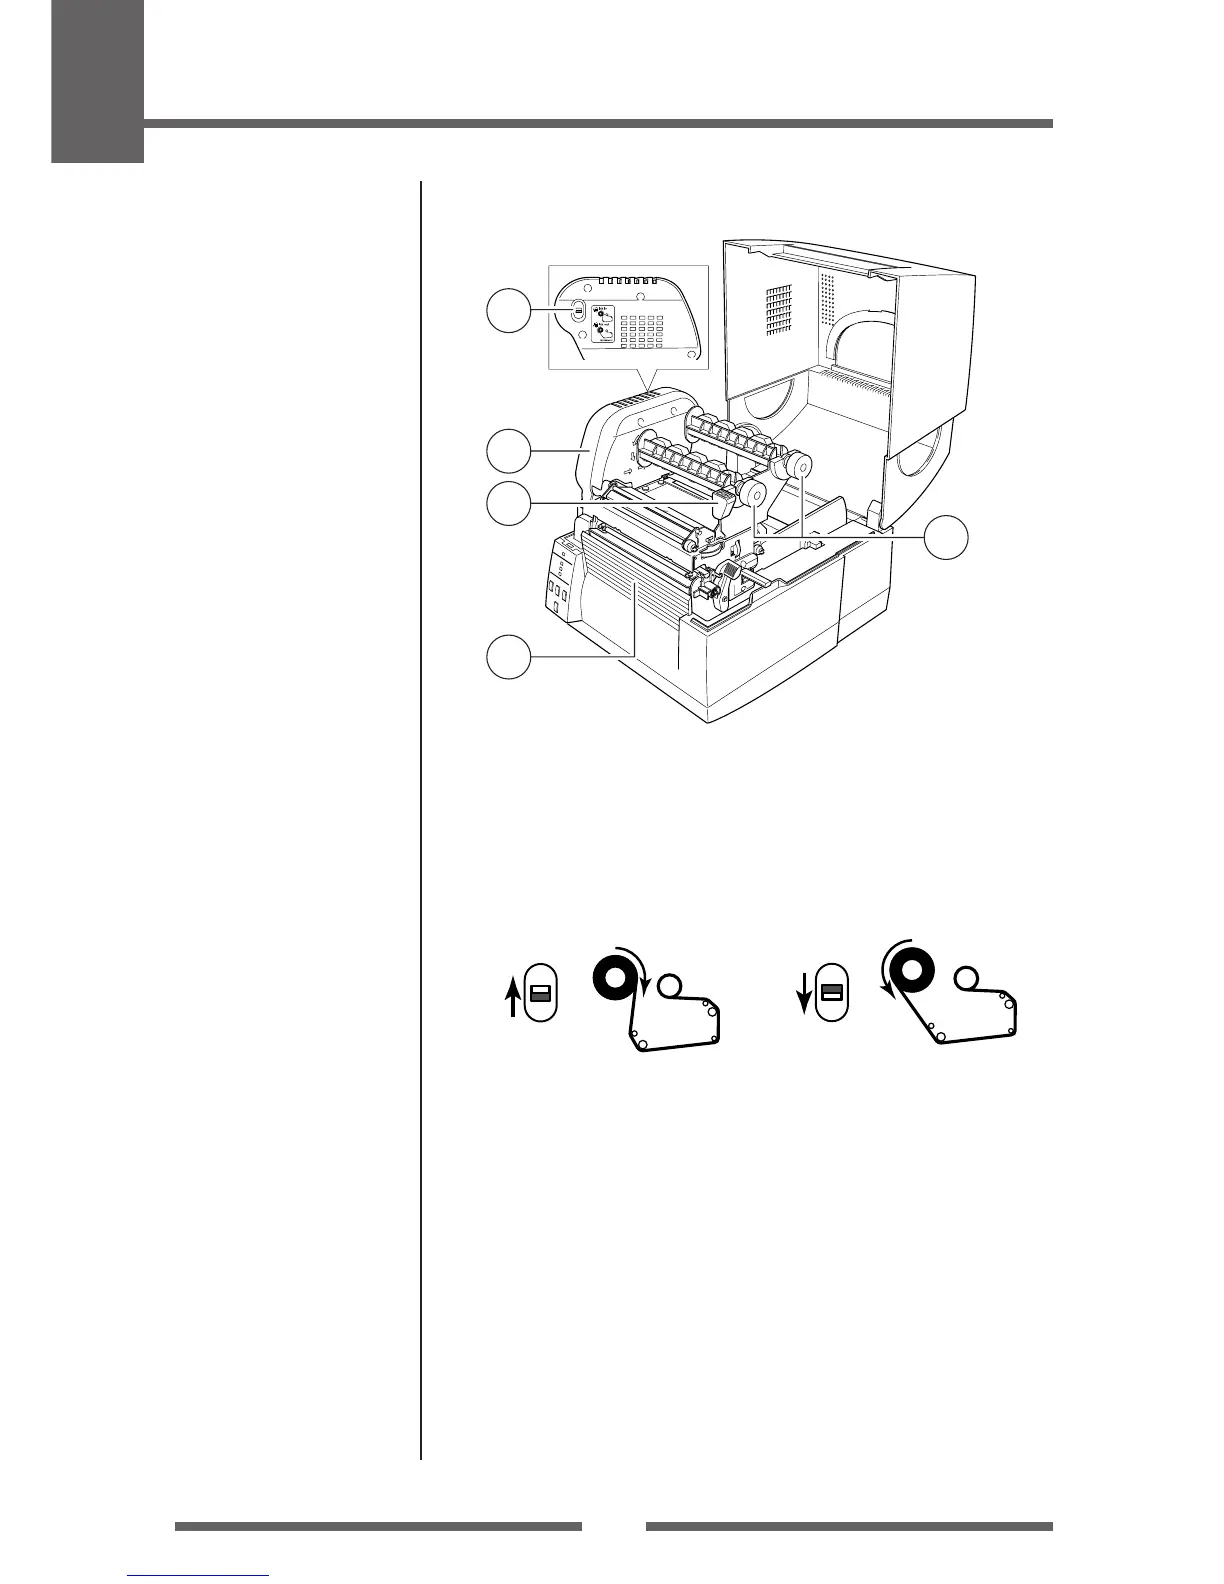
Part Names and Functions
1 Ribbon winding selection switch
This switch allows selection of inside-wound ribbons (also known as "ink
in") and outside wound ribbons ("ink out"). Remember, the inked surface
should be facing AWAY from the printhead surface!
Citizen Hint: To test which surface of the ribbon has ink on it, gently
stick a small piece of adhesive label to the surface of the ribbon.
When you remove the label, you should see ink on the adhesive label - if the
label was touching the inked surface.
2 Ribbon drive unit
3 Head close knob
Push the head close knob to lock the mechanism closed. If you push on
another part of the mechanism, the printer may not lock closed correctly.
4 Ribbon holder
It is used to attach the ribbon and paper core.
5 Front cover
It is removed to install optional units such as the peeler or cutter.
Inside the printer
• To use an inside wound ribbon,
push the switch up.
Setting the Ribbon (p.26)
• To use an outside wound ribbon,
push the switch down.
 Loading...


