Citrix ADC MPX
data‑rate agnostic. Supporting speeds more than 10 Gbps, it is a cost‑eective alternative to optical
links (SFP+ transceivers and fiber optic cables.)
The transceiver with DAC is hot‑swappable. You can insert and remove the transceiver with the at‑
tached cable without shutting down the appliance. The Citrix ADC appliance supports only a passive
DAC.
Important:
• DAC is supported only on 10G ports. Do not insert a DAC into a 1G port.
• Do not attempt to unplug the integrated copper cable from the transceiver and insert a fiber
cable into the transceiver.
Install a direct attach cable
Note: The illustrations in the following figures are only for reference and might not represent the ac‑
tual Citrix ADC appliance.
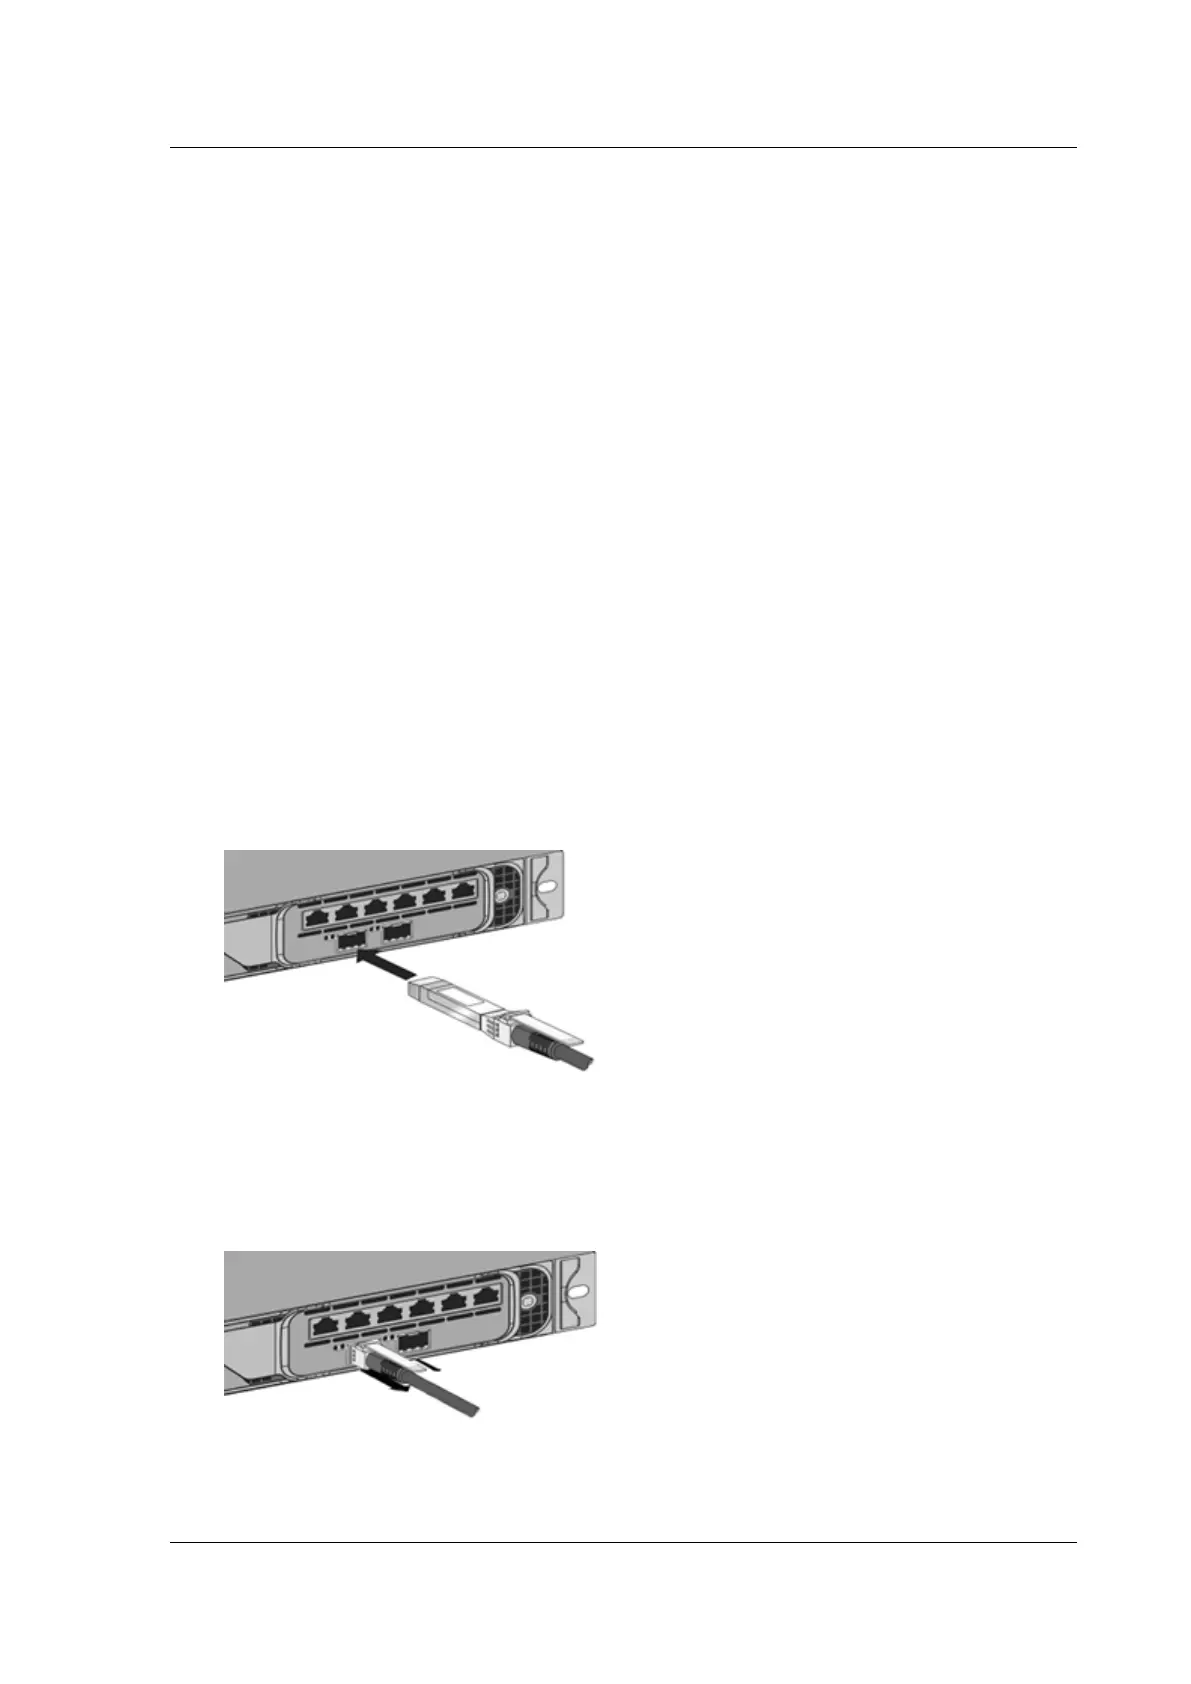
To install or remove a direct attach cable:
1. To install the DAC, slide it into the 10G port on the appliance, as shown in the following figure.
You hear a click when the DAC properly fits into the port.
Figure 8. Insert a DAC into the 10G port
2. To remove the DAC, pull the tab on the top of the DAC, and then pull the DAC out of the port, as
shown in the following figure.
Figure 9. Remove a DAC from the 10G port
© 1999–2023 Cloud Soware Group, Inc. All rights reserved. 121
 Loading...