Citrix ADC MPX
• On an MPX appliance, type:
shutdown –p now
• On a non‑MPX appliance, type:
shutdown
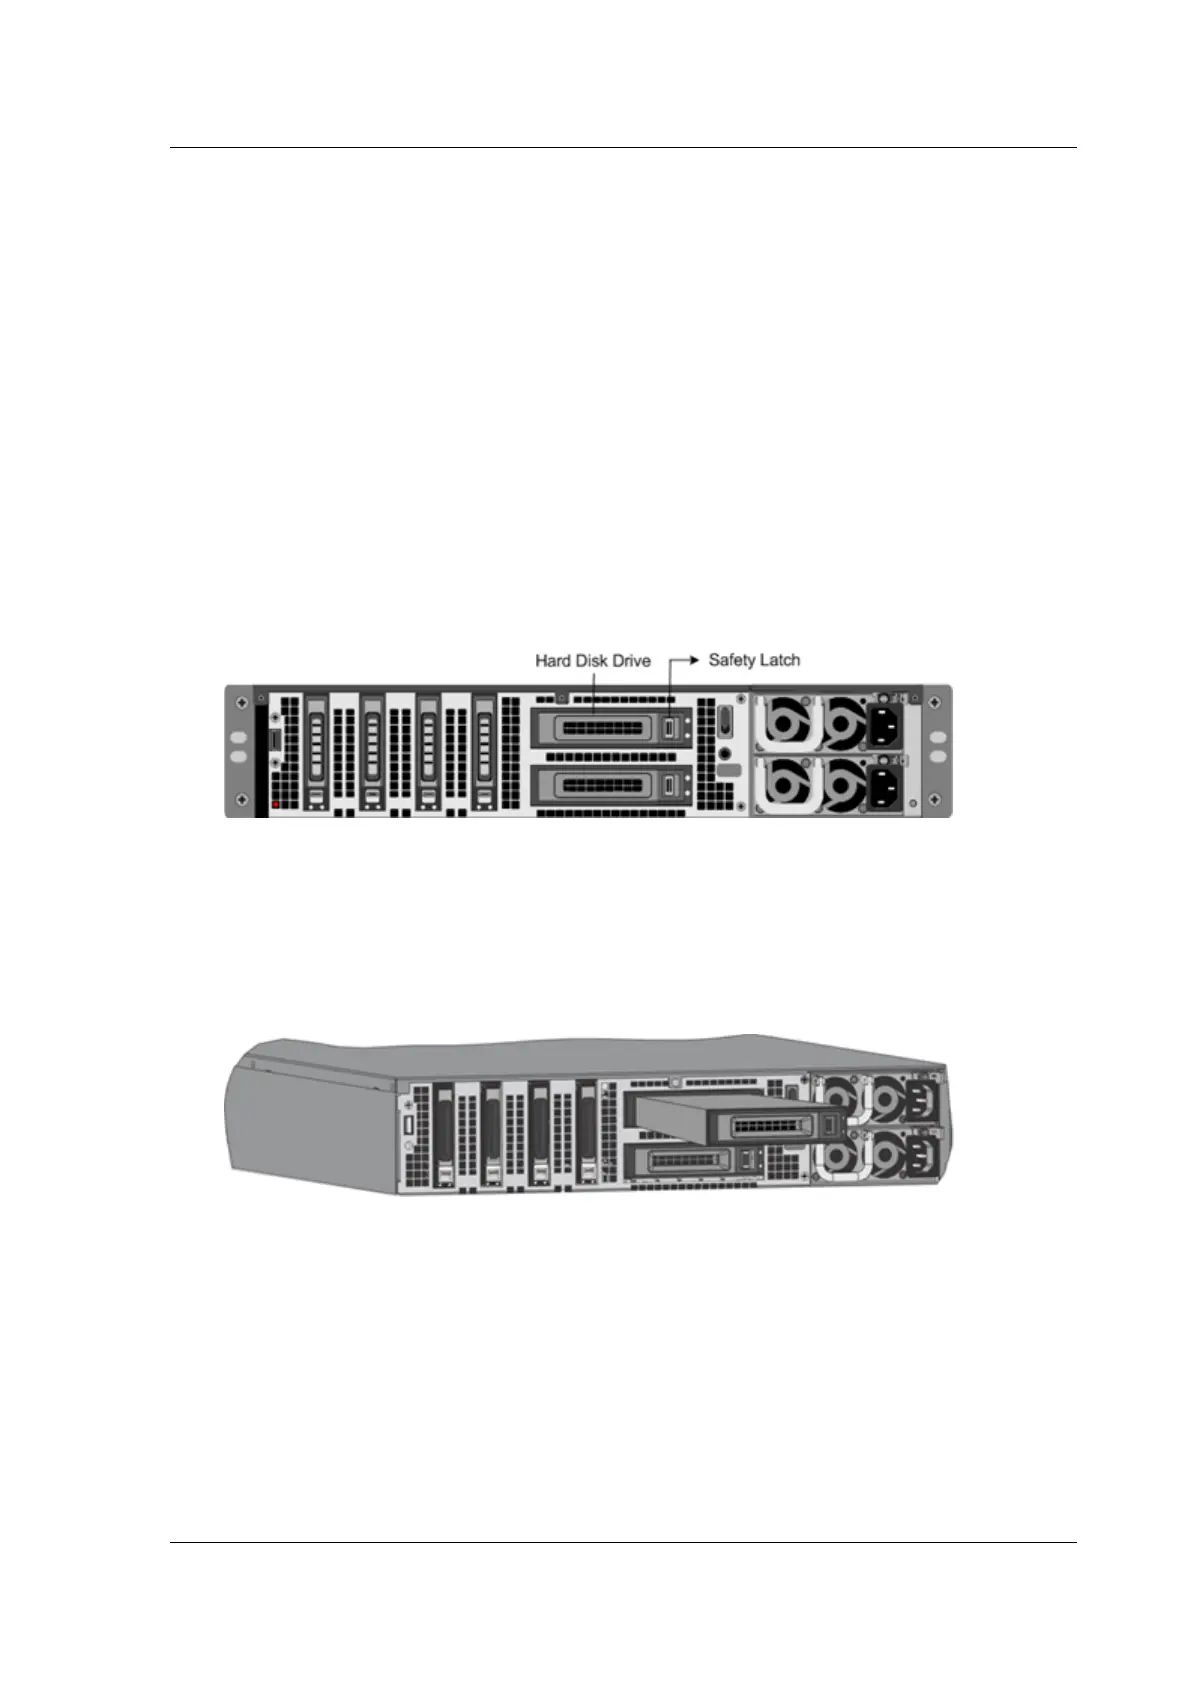
3. Locate the hard disk drive on the back panel of the appliance.
4. Verify that the replacement hard disk drive is the correct type for the Citrix ADC platform.
5. Disengage the hard disk drive by pushing the safety latch of the drive cover to the right or down,
depending on the platform, while pulling out on the drive handle. Pull out the faulty drive.
Note: The illustration in the following figures might not represent the actual Citrix ADC appli‑
ance.
Figure 6. Removing the existing hard disk drive
6. Pick up the new disk drive, open the drive handle fully to the le, and insert the new drive into
the slot as far as possible. To seat the drive, close the handle flush with the rear of the appliance
so that the hard drive locks securely into the slot.
Important: When you insert the drive, make sure that the Citrix product label is at the top.
Figure 7. Insert the replacement hard disk drive
7. Turn on the Citrix ADC appliance. The appliance starts the Citrix ADC soware and reads the
configuration file from the CompactFlash card.
Direct attach cable
A direct attach cable (DAC) assembly is a high performance integrated duplex data link for bi‑
directional communication. The cable is compliant with the IPF MSA (SFF‑8432) for mechanical
form factor and SFP+ MSA for direct attach cables. The cable, which can be up to 5 meters long, is
© 1999–2023 Cloud Soware Group, Inc. All rights reserved. 120
 Loading...