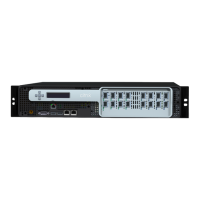
Citrix | ADC Quick Start Guide: MPX 16000T appliance
Connecting the appliance to the network
Connect the interfaces on the appliance to the network ports on the appropriate switches by using
Ethernet/fiber optic cables.
Warning: Connecting multiple network ports to the same switch or VLAN can result in a network loop.
Note: By default, the ADC MPX appliance is configured to use auto-negotiation. When you install a
ADC appliance for the first time, be sure to configure your other equipment to use auto-negotiation for
the ports that are connected to the ADC appliance. After initial logon and configuration, you can
choose to disable auto-negotiation.
Connecting the appliance to a power source
Connect the power cable to one of the inlet receptacles on the back of the appliance and connect the
other end of the power cable to a power outlet. If your appliance has more than one power supply,
repeat this process. The extra power supply serves as a backup. The Citrix logo on the front of the
appliance illuminates after the appliance starts.
Note: If you want to upgrade to the latest release of the system software before proceeding, see
https://docs.citrix.com/en-us/citrix-adc/current-release/upgrade-downgrade-citrix-adc-appliance.html.
Warning (predictive failure)