EasyManua.ls Logo

claber Tempo Select - User Manual

claber Tempo Select
6 pages
Print Icon
To Next Page IconTo Next Page
Loading...
Tempo Select
Tempo Select
Pag. 1
CLEANING THE FILTER. The timer is protected by a wire mesh lter that ensures long-lasting and trouble-free
operation. The lter should be inspected periodically and washed at the beginning of every season.
Simply remove the lter from the connector and rinse clean under running water.
FITTING/REPLACING THE BATTERIES.
To t or replace the batteries, press the locking tab fully in to release the front part of
the timer, which can then be detached. Fit 2 new batteries in the holder, observing the correct polarity. As long as the batteries
are replaced within 2 minutes, the current settings will remain stored. Ret the front part of the timer to the back and press,
ensuring that the locking tab clicks into place. Important: always replace the batteries at the beginning of each season!
For Tempo Select (cod.): 8486
User manual
User manual
44
4
1
1
2
2
3
3
1
1
2
2
3
3
Washing at start
of season
a
a
b
b
b
b
+
AA
+
AA
NEW!
1,5V - AA - Alkaline
click!
Question and Answer IconNeed help?

Do you have a question about the claber Tempo Select and is the answer not in the manual?

Summary

Cleaning the Filter

Filter Cleaning Procedure

Periodically inspect and wash the filter at the beginning of every season.

Fitting;Replacing the Batteries

Battery Installation and Replacement

Fit 2 new batteries observing correct polarity; current settings stored if replaced within 2 mins.

Installation

Tap Connection and Setup

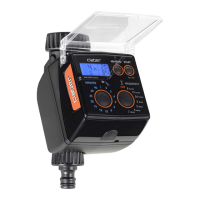
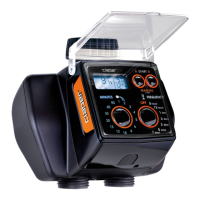
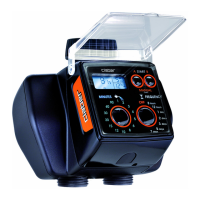
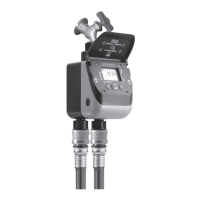
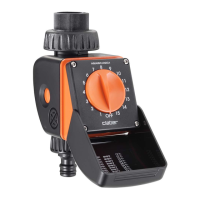
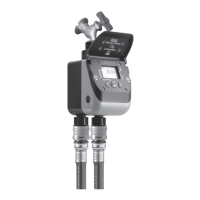
Fit timer to 3/4" tap using hand pressure only. Connect watering line to fitting.

Selection of Watering Programme

Setting Watering Duration and Frequency

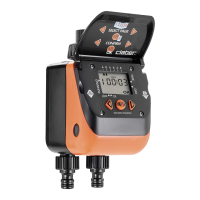
Press 'M' for duration, 'F' for frequency. Values displayed in fields 'D' and 'E'.

Immediate start

Starting Watering Immediately

Press 'START' within 10s of programming; '0h' blinks, then watering starts.

Delayed start

Setting a Delayed Watering Start

Press 'START' repeatedly for a delay (1-23h) before watering starts, shown in field 'C'.

Making changes to the watering programme

Modifying Programme Settings

Repeat programming procedure to change settings. New programme overwrites previous one.

Manual Watering

Activating Manual Watering

Hold 'MANUAL' for 3s to enter mode. Press 'START' for 5 min watering.

Reset

Restoring Factory Settings

Press MANUAL and START simultaneously for 10s to reset timer to factory defaults.

Switching Off The Timer

Disabling the Timer

Press 'F' until 'OFF' appears, then press 'START' to switch off the timer.

Rain sensor

Wired Rain Sensor Connection

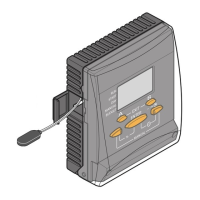
Remove jumper, connect sensor lead, check cable entry at rear housing.

RF Rain Sensor

RF Rain Sensor Interface Setup

Install RF Rain Sensor Interface, routing antenna wire through clips.

Protection In Winter

Seasonal Storage Procedures

Disconnect timer, remove batteries, store indoors protected from frost and damp.

claber Tempo Select Specifications

General IconGeneral
DisplayLCD
Power Source2x AA batteries
Rain DelayYes
Watering duration min1 min
Battery life1 year
Protection ratingIP44
TypeElectronic
Watering duration max120 min
Watering frequency1 to 7 days
Thread size3/4"
Watering Programs15 preset programs

Related product manuals