9Installation instructions & user manual
9120-34373 v4.00 Nov 2018 - ZIP DBX DEX
Technical support
Tel: 0345 6 005 005 email: service@zipindustries.co.uk www.zipwater.co.uk
INSTALLATION
Fig. 1
Fig. 2
Installing the wall bracket
Installing connection pieces
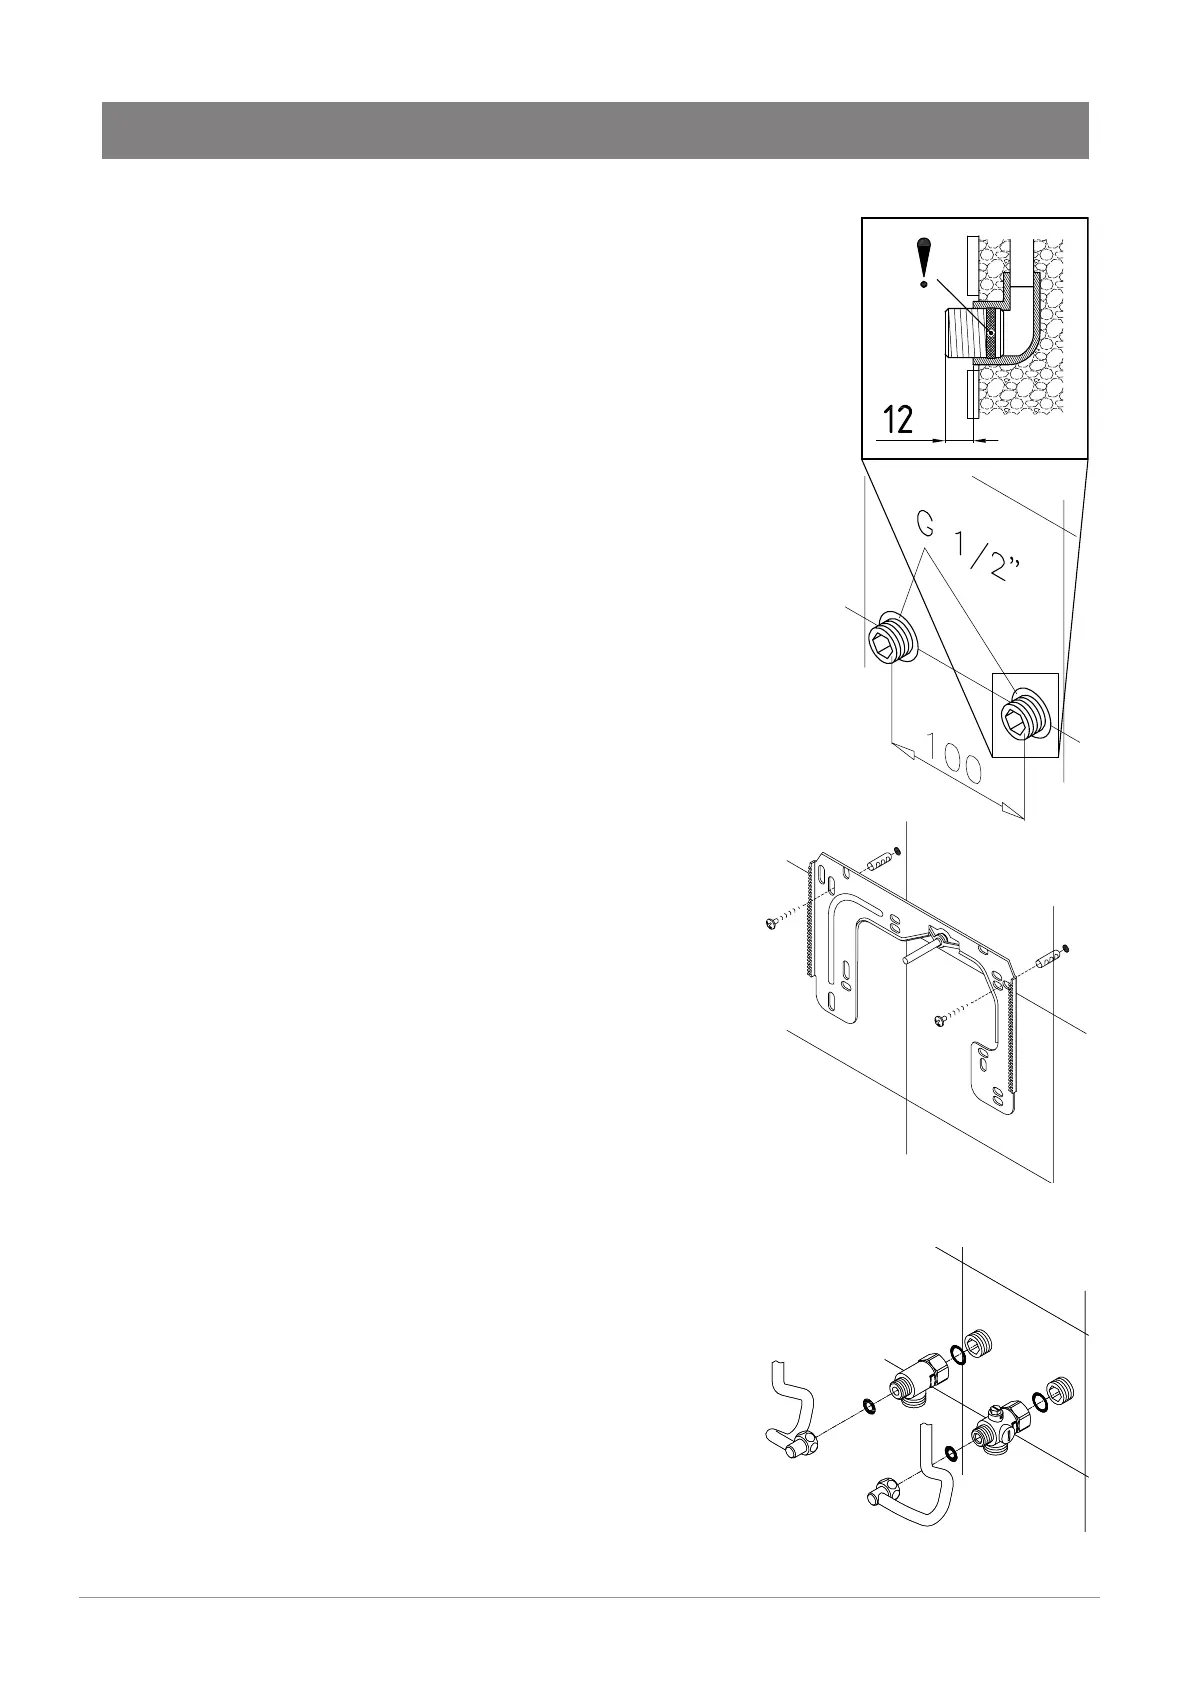
Thoroughly flush the water supply pipes before installation to
remove any water borne debris.
• Using a 12 mm hexagon socket screw key, screw the screw-in
nipples into the wall connections. The seals must be fully screwed
into the thread. After tightening, the double nipples must protrude by
at least 12 mm.
• Hold the mounting template (provided) on the wall and align it so that
the holes in the template fit over the connections. Mark the drill holes
according to the template and drill them using a 6 mm drill. Insert the
dowels (provided).
• Screw in the wall bracket. Offset tiling or uneven surfaces can be
compensated by up to 30 mm with the aid of the spacers supplied.
The spacers are fitted between the wall and the wall bracket.
Note: Fasten the fittings with caution, to avoid damage to the
valves or the piping system.
• As shown in the illustration, screw the cold water connection (A)
piece with the union nut and the ½ inch seal onto the cold water
connection.
• Screw the hot water connection piece (B) with the union nut and the
½ inch seal onto the hot water connection.
B
A