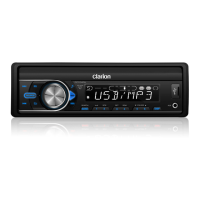
FZ104P
AE
7
Left T
rack
Right Track
Ground
3.5mm Cable (not included)
Portable audio player,
etc.
Connect
1
. Slide the USB socket cover to
left.
2
. Insert the USB device into the USB socket. The
unit starts playing from the USB device.
3. To remove the USB device, you should first
select another source or turn off the power, in
order to avoid damaging the USB device. Then
take off the USB device.
Selecting a
Track
1
. Press the [
] b
utton to advance to the next
track/song.
Press the [
] b
utton to go to previous track/
song.
2. Press and Hold in the [
] b
utton to fast
forward through the track/song.
Press and Hold in the [
] b
utton to fast
backward through the track/song.
Pla
y / Pause
Press the [ ] b
utton to pause the track/song
that is currently playing.
Press the [
] b
utton to resume playing the
track/song that has been paused.
Folder Select
This
function allows you to select a folder
containing MP3/WMA files and start playing from
the first track in the folder.
Press the [ 5 / 6] button to select a folder.
Sear
ch Function
1. Press the [BAND / SEARCH] button on front
panel access the MP3 / WMA file search mode.
2. Rotate the [VOLUME] knob to search through
all folders on the device then press [
/ MUTE ]
to make your selection.
3. Rotate the [VOLUME] knob to select the
desired track within the previously selected
folder and press [
/ MUTE ] to star
t playing.
Displa
y Function
Dur
ing playback, pressing the [DISP] button
will automatically cycle through the following
information on the file being played on the LCD:
FOLDER NAME -> FILE NAME -> ALBUM ->
TITLE -> ARTIST
USB Mode Operation
AUX Mode Operation
Press the [SOURCE] b
utton on the front panel to
select “AUX-1”.
AUX-1 is just for audio content with 3.5mm Jack
connector plugged into audio-in socket on the
front panel.
N
o
te: The detailed connection of AUX-2, please
refer to the rear diagram in chapter
“INSTALLATION AND WIRE CONNECTION”.
English
Owner’
s Manual

 Loading...