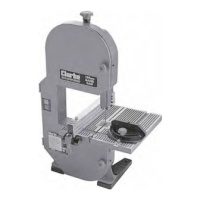
DUST EXTRACTION
A dust extraction outlet is provided which may
be connected to a vacuum cleaner or a dust
extraction device, such as the CLARKE CDE35,
when the need arises.
Please see your CLARKE dealer for details.
TIPS ON USING YOUR BANDSAW
It should be understood that this machine is
primarily designed for freehand cutting - i.e. to
cut shapes in relatively thin wood. It is NOT
designed for cutting plastics, or any other
material. However, to increase its versatility, it is
possible to cut straight lines using either the Mitre
Gauge or Parallel Fence, as described below.
For all cutting operations, the upper guide block
and blade guard assembly should be adjusted
to be just clear of the work being cut. Not only
does this provide the best safety for the operator,
but it also brings the blade guides closer to the
work giving more accurate results and better
control.
Use both hands to feed the workpiece into the
blade. The work must be held
flat on the table at all times
to prevent binding of the
blade. Use a steady
even pressure just
sufficient to keep
the blade cutting.
Always use a rip fence or mitre guide where
possible to eliminate any sideways slip of the
work. This is most important when the table is
tilted to an angle.
Always plan your work ahead, and aim to make
a complete cut in one pass, rather than stopping
a cut, which requires the workpiece to be
withdrawn. The tradesmans’ rule is “measure
twice, cut once”. It is best to finish a cut in one
continuous operation, but frequent backtracking
may be necessary.
If you do have to withdraw the workpiece, switch
off the bandsaw first, by pressing the OFF (O)
button, and allow the blade to come to a
complete stop before backing it out of the cut.
C. Blade Guide Height
The Upper Blade Guide must be adjusted
according to the thickness of the workpiece to
be cut.
Slacken off the Guide Block using knob (L, Fig. 1)
and adjust the height of the guide so that it is no
more that 5mm higher than the workpiece, then
secure in this position.
Check this setting and readjust if necessary
before each cut.
OPERATION
Check to ensure that all safety precautions have
been complied with before switching on the
mains supply and pressing the ON button (1).
Allow the blade to come to full speed.
Ensure the workpiece is held firmly against the
table at all times. (See ‘Tips On Using Your
Bandsaw’ which follows).
Remember that round stock should be clamped
as shown in Fig. 5, to ensure it cannot roll.
Always feed the workpiece at a rate that allows
the blade to cut without difficulty.
Whenever new adjustments are made, you
should always make a trial cut in order to check
the settings.
Parallel Fence and Mitre Gauge
Always use the parallel fence or mitre gauge on
all cuts for which they are intended, to prevent
the blade from running off the cutting guide line,
particularly when working with a tilted table.
When using the parallel fence, there must be
sufficient clearance between the blade and
fence so as to allow the operator to hold the
workpiece firmly, between fence and blade,
without endangering the hand. The other hand
is used as a guide/support ONLY, the hand
between fence and blade being the hand that
feeds the workpiece into the blade.
If the clearance is small, then a push stick should
be used; i.e the workpiece is fed into the blade
with a pushstick.
NOTE:
Remember that the blade removes
material during the cut. This gap
created by the blade is called the
‘kerf’, and must be allowed for
when cutting to exact sizes. Plan
your cut so that the kerf is the scrap
side of the lines you wish to cut. If
necessary, allow a little more for
finish sanding.
Pushsticks can easily be made using a piece of wood
1/2”x1” x 12” , with a 1/4” notch cut in one end, as
shown below.
Fig. 6
Fig. 5
8

 Loading...