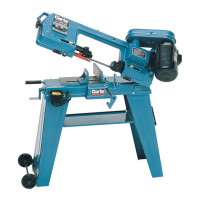
Grasp the Arm and attempt to lower it, whilst simultaneously turning the knob ‘A’,
anticlockwise. Turn the knob until the required rate of descent is achieved.
The nut on the stem of Knob ‘A’ may be used to lock the valve in any particular
position, thereby ensuring the rate of descent, and hence cutting pressure is
constant - for repetitive work.
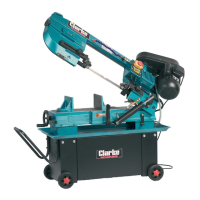
Preparation for Use
Warning! Do not attempt to start the machine until ALL the following checks
and adjustments are carried out. Ensure the plug is disconnected from mains.
To achieve the best performance, and to maintain the maximum level of safety,
the blade must be set up correctly.
a. Blade tension must be correct to ensure the blade circulates correctly and
to prevent the blade from wandering during the cutting operation
b. The blade cutting area is fitted with blade guides, which support the blade
whilst cutting. It is VITAL that these guides are correctly adjusted.
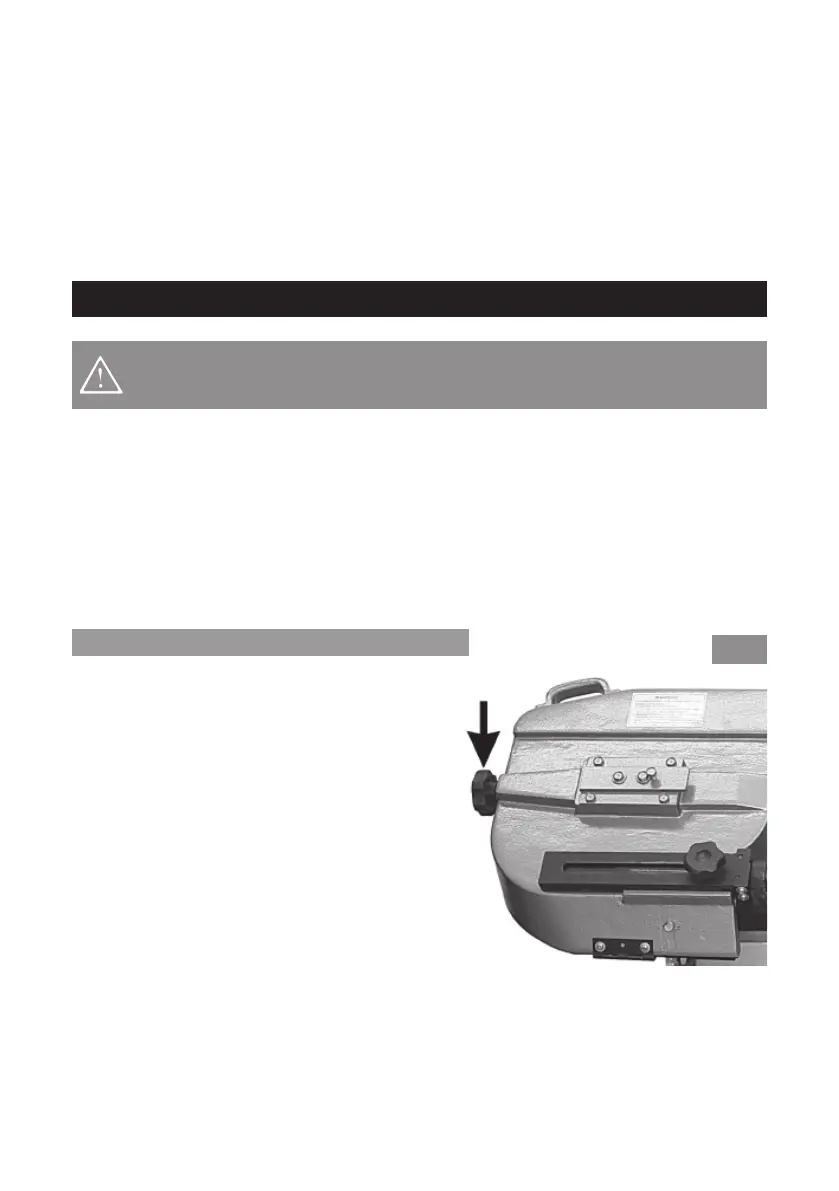
A. Tensioning the Saw Blade
Turn the Blade Tension Adjusting Knob,
arrowed in Fig. 6, clockwise to increase
tension, anticlockwise to decrease.
The knob is provided with a spring lock to
ensure it does not move during use or
whilst the bandsaw is being moved.
The blade needs to be tight enough to
give a straight cut without allowing it to
wander or slip, but must not be too tight
so that it is rigid, there must be a certain
degree of flexibility.
The correct tension is 700-900kgs, as
measured with a blade tension gauge.
Fig.6
To tension without a gauge, slacken off adjuster so that the blade sags, then
screw in again (clockwise) until all sag has been eliminated. Finally, turn the
adjuster a further two complete turns. See ‘Maintenance’ for blade installation
and tensioning a new blade.
If the saw is not being used for some time, eg. at the end of a working day, we
recommend that you relieve the tension on the blade.
10