If it does become necessary to adjust the
guide bearings, it is best carried out with
a new blade installed. The blade MUST
be correctly tensioned before any
adjustments are made.
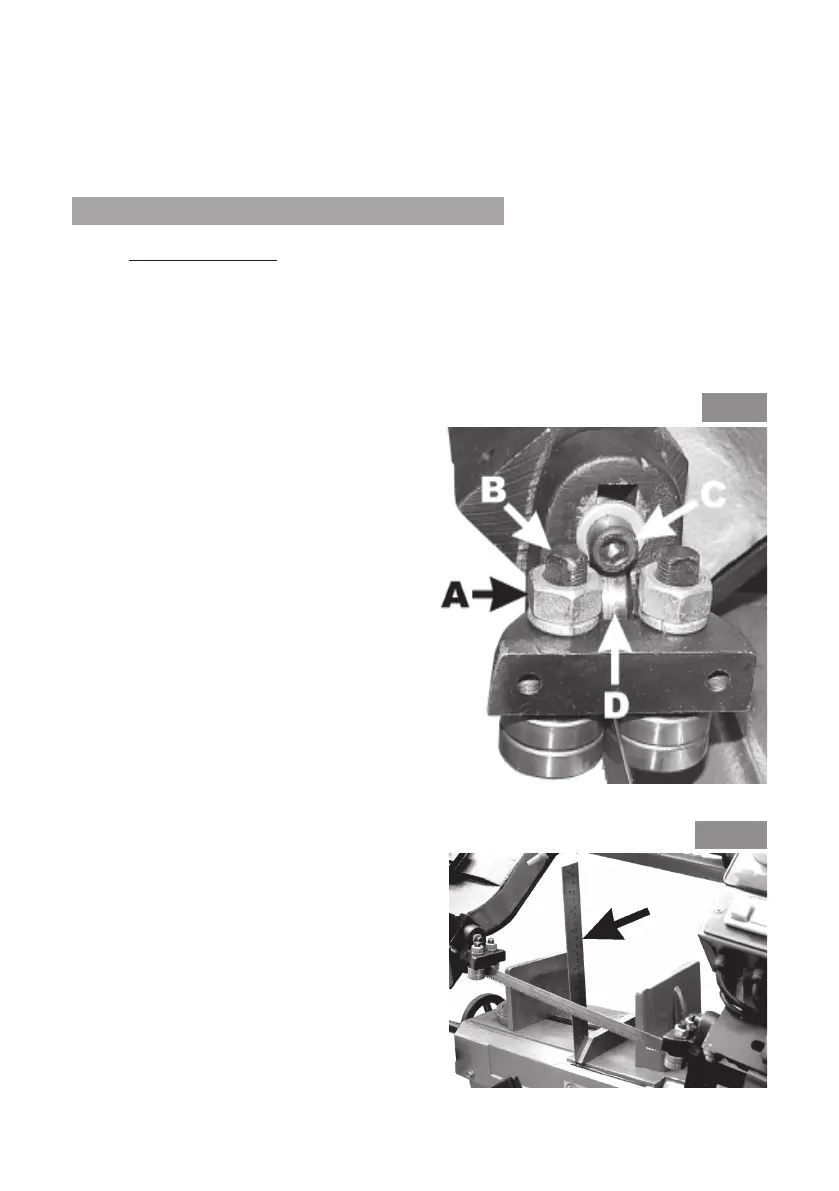
With the Arm in the horizontal position,
slacken bearing securing nut ‘A’, then turn
the bearing using the flats on the threaded
shaft ‘B’, until it pinches the blade - the
bearing is eccentrically mounted.
Back off very slightly so that contact with
the blade is light, then tighten nut ‘A’
whilst holding the threaded shaft firmly
in place.
The guide bearings must not pinch the
blade, but must NOT be loose enough to
allow the blade to wander
NOTE: Guide Bearings support the blade to
prevent it from twisting, and a roller is located
at the top edge of the blade to prevent vertical
movement, i.e. from being forced upwards,
away from the workpiece. This is shown at ‘D’.
It is now necessary to ensure this adjustment
is correct.
It is also IMPORTANT to ensure that the blade
runs in the right plane with relation to the bed
(and therefore the workpiece), i.e. at right
angles to the bed.
The two adjustments just described are carried
out by moving the complete carrier sub-
assembly, as follows:
16
B. Adjusting the Blade Guides
(i) Guide Bearings (Ref: Fig 18)
Blade Guide bearing adjustment is critical in ensuring the blade runs true. This
adjustment is carried out at the factory, and the need for readjustment should
rarely occur. If cutting results are unsatisfactory, it is strongly recommended that
you try a new blade before readjusting the guide bearings. If a blade becomes
dull on one side for example, it will cause the blade to run off line. A new blade will
correct this.
Fig. 18
Fig. 19
If the pulleys have not been interfered with, the blade should run evenly , running
just off the lip on the back of each pulley. If it wanders off the pulleys, or bears
heavily on the lip at the back of the pulley, evidenced by a harsh scraping sound,
then tracking adjustment will be necessary - see page 17