QUICK START
1 Unpack the unit and inspect for any damage that may have occurred in shipping. Connect the
proper AC Mains cable.
2 Install the MS-232. (For additional information, refer to the Clear-Com PL-Pro
TM
System Installa-
tion Manual.)
3 Connect the AC to the Mains circuit. Connect the intercom lines.
4 Set the two termination switches on the rear panel to ON.
5 Set the Option switches to the default (up) position.
6 Switch POWER ON. The green power light should be ON and the two red short lights should be
OFF.
7 Set Listen Levels and Sidetones. (Refer to the Listen Level and Sidetone setting topics in the
Operation section of this manual.)
8 The intercom system should now be operating properly.
Read the rest of this manual for further information.
OPERATION
Normal operation of the MS-232 Main Station only requires access to the front panel controls. The
controls located elsewhere on the unit are intended to be set-and-forget in nature. For intercom opera-
tion, set the Listen level controls for each channel to the desired level and press the Talk buttons when
talking. If a headset is used, set the Sidetone control for each channel for the desired amount of side-
tone in the earphone. If the Panel Mic and Speaker are being used, set the sidetone controls for mini-
mum feed-through to the speaker to prevent feedback.
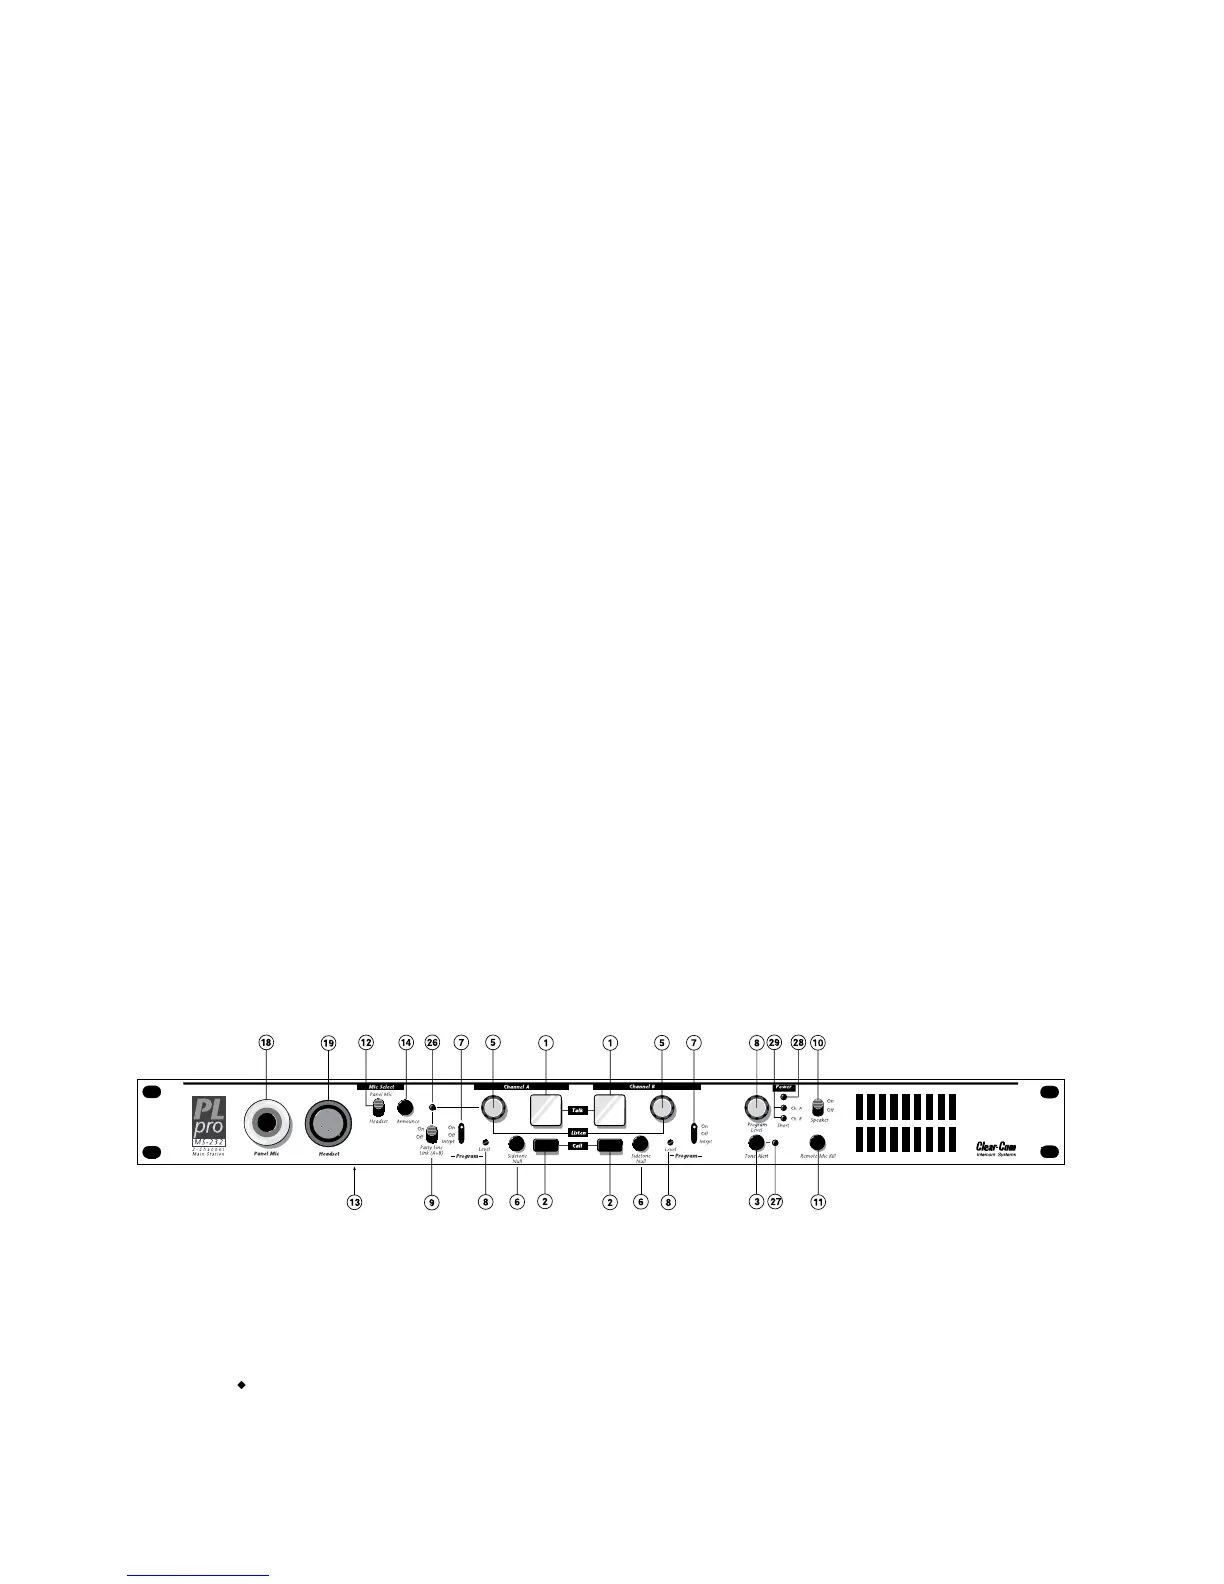
Front Panel
The controls, indicators, and connectors found on the MS-232 front panel are shown in the following
figure and are described by the following text. The numbers in the left column refer to Figure 1.
Figure 1 - Front Panel
1 Talk Buttons: Each channel has an illuminated Talk button for activating the microphone
feed to that channel. Each Talk button has a dual action (momentary or latching) depending
upon how the button is pressed. If desired, the latching function for each channel can be de-
feated using the option switches on the rear panel. The following describes the various func-
tions of these multi-purpose buttons.
MOMENTARY: Press and hold the Talk button while you are speaking. Release it when
you are finished.
Clear-Com MS-232 Two-Channel Main Station
2