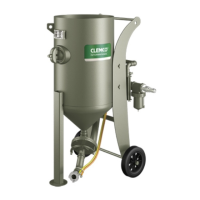
This document serves as the owner's manual for Clemco single chamber blast machines, designed for one operator, and equipped with either manual or pneumatic media metering valves. These machines are suitable for various abrasive types, with a 60-degree conical bottom available as an option for fine mesh abrasives.
Function Description:
The core function of the Clemco single chamber blast machine is abrasive blasting. When connected to an air supply, compressed air flows through a moisture separator to a remote control valve (RMS-2000A or RMM-50A). Depressing the deadman handle seals the filling port, pressurizing the blast pot. An abrasive metering valve controls the flow of abrasive into the air stream, which is then guided to a nozzle via a blast hose. Releasing the deadman handle or opening the petcock depressurizes the pot and stops the blasting process.
The pneumatic remote control system allows the operator to start or interrupt blasting from a remote position, enhancing safety. It consists of a remote control valve, a deadman handle, and a twinline hose. When the deadman handle is depressed, air flows from the remote control valve to the handle and then back, pressurizing the pot and initiating blasting. Releasing the handle stops the process.
Optional electric remote controls (RME-1 electric panel) replace the twinline hose with an electric cord, converting an electric signal into a pneumatic one via a magnetic valve. This reduces stopping time, especially with long blast hoses.
Dual function remote controls, available only with pneumatically operated media metering valves, offer an additional switch on the deadman handle. This allows the operator to open or close the metering valve while the deadman handle is depressed, enabling "air only" blasting for cleaning purposes. In the pneumatic dual function, a 3-way slide valve controls the metering valve. In the electro-pneumatic dual function, a magnetic valve on the RME-2 electric control panel converts the electric signal.
An optional configuration includes a pneumatic metering valve, a compressed air regulator governed by pilot air, and an RMS remote control valve. In this setup, compressed air is supplied via a water separator to the RMS 2000 remote control valve, then to the deadman handle, pressure regulator, and a 2/3-way valve. Depressing the deadman handle opens the blast media metering valve and pressurizes the blast machine, initiating blasting. The blasting pressure can be adjusted at the pressure regulator. Releasing the deadman handle depressurizes the system and closes the metering valve.
The Quick Stop System (SSAS1) is an accessory designed to reduce the blasting stop time to less than 1 second, a requirement under German law and recommended by Clemco for blast pressures ≥ 5 bar, blast hose lengths ≥ 20 m, and hard structure abrasives like steel grit. This system incorporates a slide valve on the deadman handle to open or close the blast media metering valve while the handle is depressed.
Important Technical Specifications:
The manual provides a table outlining the scope of various blast machine models based on their volume (liters) and maximum pressure (bar). For example, a 20-liter model (1028) has a max pressure of 10 bar, while a 300-liter model (2460) has a max pressure of 10 bar. The table also indicates which models are compatible with RMS-2000A (RMS 1500+500) or RMM-50A remote control valves, and whether they use pneumatic or manual metering valves.
Air consumption is detailed in a table based on nozzle size (mm) and pressure at the nozzle (bar). For instance, a 6.5 mm nozzle at 6 bar consumes 2.0 m³/min, while at 12 bar it consumes 4.7 m³/min. A 12.5 mm nozzle at 6 bar consumes 8.4 m³/min, and at 12 bar it consumes 15.4 m³/min.
Usage Features:
- Set-up: Requires an even and firm ground. The compressor should be placed upwind to prevent contaminated air from entering. The air supply must be sufficient for the working pressure indicated on the pot. Proper airline connection with gaskets and safety lock couplings is crucial. An air supply free of oil and water (with an air cooler and automatic drain) is recommended for trouble-free blasting. Blast hoses and nozzles must be securely attached with gaskets.
- Protective Equipment: Operators must wear abrasive-resistant clothing, an airfed helmet with a breathing air supply and air control valve, leather gloves, safety shoes, and ear protection.
- Daily Set-up: Includes checking the moisture separator, remote control, and removing moisture from the blast machine. This involves opening the petcock and choke valve, fully opening the abrasive metering valve, opening the compressor's air valve, then closing the petcock while depressing the deadman handle to pressurize the pot and expel air from the nozzle. The moisture separator's drain should be adjusted for a constant stream of liquid and air.
- Operation: Involves closing the abrasive metering valve, opening the petcock, pouring abrasive into the pot, closing the petcock, pointing the nozzle at the surface, depressing the deadman handle to start blasting, adjusting the choke valve, and opening the abrasive metering valve for the proper air/abrasive blend. Blasting should continue until the pot is nearly empty, but not completely, to minimize wear.
- Shut-down: All abrasive should be emptied if the machine will not be used for more than one day to prevent moisture absorption.
Maintenance Features:
Regular maintenance is essential for safe operation and high efficiency due to wear. Before any maintenance, the compressor's air valve must be closed, and the entire system depressurized.
- Daily Check List:
- Pot: Check and replace the filling port gasket and pop-up valve at the first sign of wear.
- Airline and blast hose: Inspect for sharp bends and ensure no vehicles pass over hoses.
- Nozzle and nozzle holder: Check and replace gaskets, nozzle, and nozzle holder for wear.
- Remote control valve and accessories: Open the petcock to check for water (indicating a moisture separator issue). Check the deadman handle's rubber button and remote control valve fittings for tightness. Inspect all electric and pneumatic connections for electric remote controls.
- Weekly Check List:
- Moisture separator: Remove, check, and clean the filter element and sight glass. A dirty filter causes pressure loss.
- Muffler: Check for wear or blockage and clean or replace the interior body.
- Air hoses and blast hoses: Inspect all couplings and screws for wear or breakage. Check the entire blast hose for soft spots (reduced wall thickness) and replace immediately if found.
- Monthly Check List:
- Remote control valve (RMS-2000A/RMM-50A): Check all fittings and connections for leakage.
- Muffler: Check its condition and corresponding piping.
Trouble-shooting:
The manual includes a comprehensive trouble-shooting guide for common issues:
- Neither abrasive nor air comes out of nozzle: Check if the compressor's air valve is closed, if the moisture separator is blocked, if the remote control valve (RMS-2000A/RMM-50A) is defective or has loose connections, or if the magnetic valve of the electric panel RME is blocked. Remedies include opening the air valve, cleaning the moisture separator, checking/disassembling/cleaning the remote control valve, and disassembling/cleaning the magnetic valve.
- Air but no abrasive comes out of nozzle: Check if the abrasive metering valve is closed, if moist abrasive blocks the flow, or if there is no screen or cover. Remedies include opening the metering valve, rapidly opening and closing the choke valve several times (though this increases wear on the rubber nipple of the FSV valve), cleaning the pot, and installing an after cooler.
- Irregular flow of abrasive: Check for incorrectly adjusted abrasive metering valve, clogging, or incorrectly adjusted choke valve. Remedies include adjusting the metering valve, checking/replacing the nozzle and gasket, cleaning the metering valve's inspection plate, and correctly adjusting the choke valve.
- Too much abrasive: Check if the abrasive metering valve is too open or the choke valve is not fully open. Remedies include correcting adjustments and opening the choke valve completely.
- Pop-up valve does not remain closed: Check for insufficient air volume or pressure. Remedy is to check the compressor's air pressure with a gauge.
- Pop-up valve does not seal off filling port after pressurization: Check for worn pop-up valve/gasket or blocked guide. Remedies include replacing the pop-up valve/gasket and cleaning the blast machine.
- Blast machine does not depressurize or is blocked: Check for a clogged deadman handle, incorrectly connected remote control hose, or a defective remote control valve (RMS-2000A/RMM-50A). For electric remote controls, ensure the magnetic valve is in the "0" (automatic control) position. Remedies include cleaning the deadman handle, exchanging connections, disassembling/repairing the remote control valve, and setting the switch to "0" for electric controls.