Disassembly
2 - 6 Removing the Hard Disk Drive
2.Disassembly
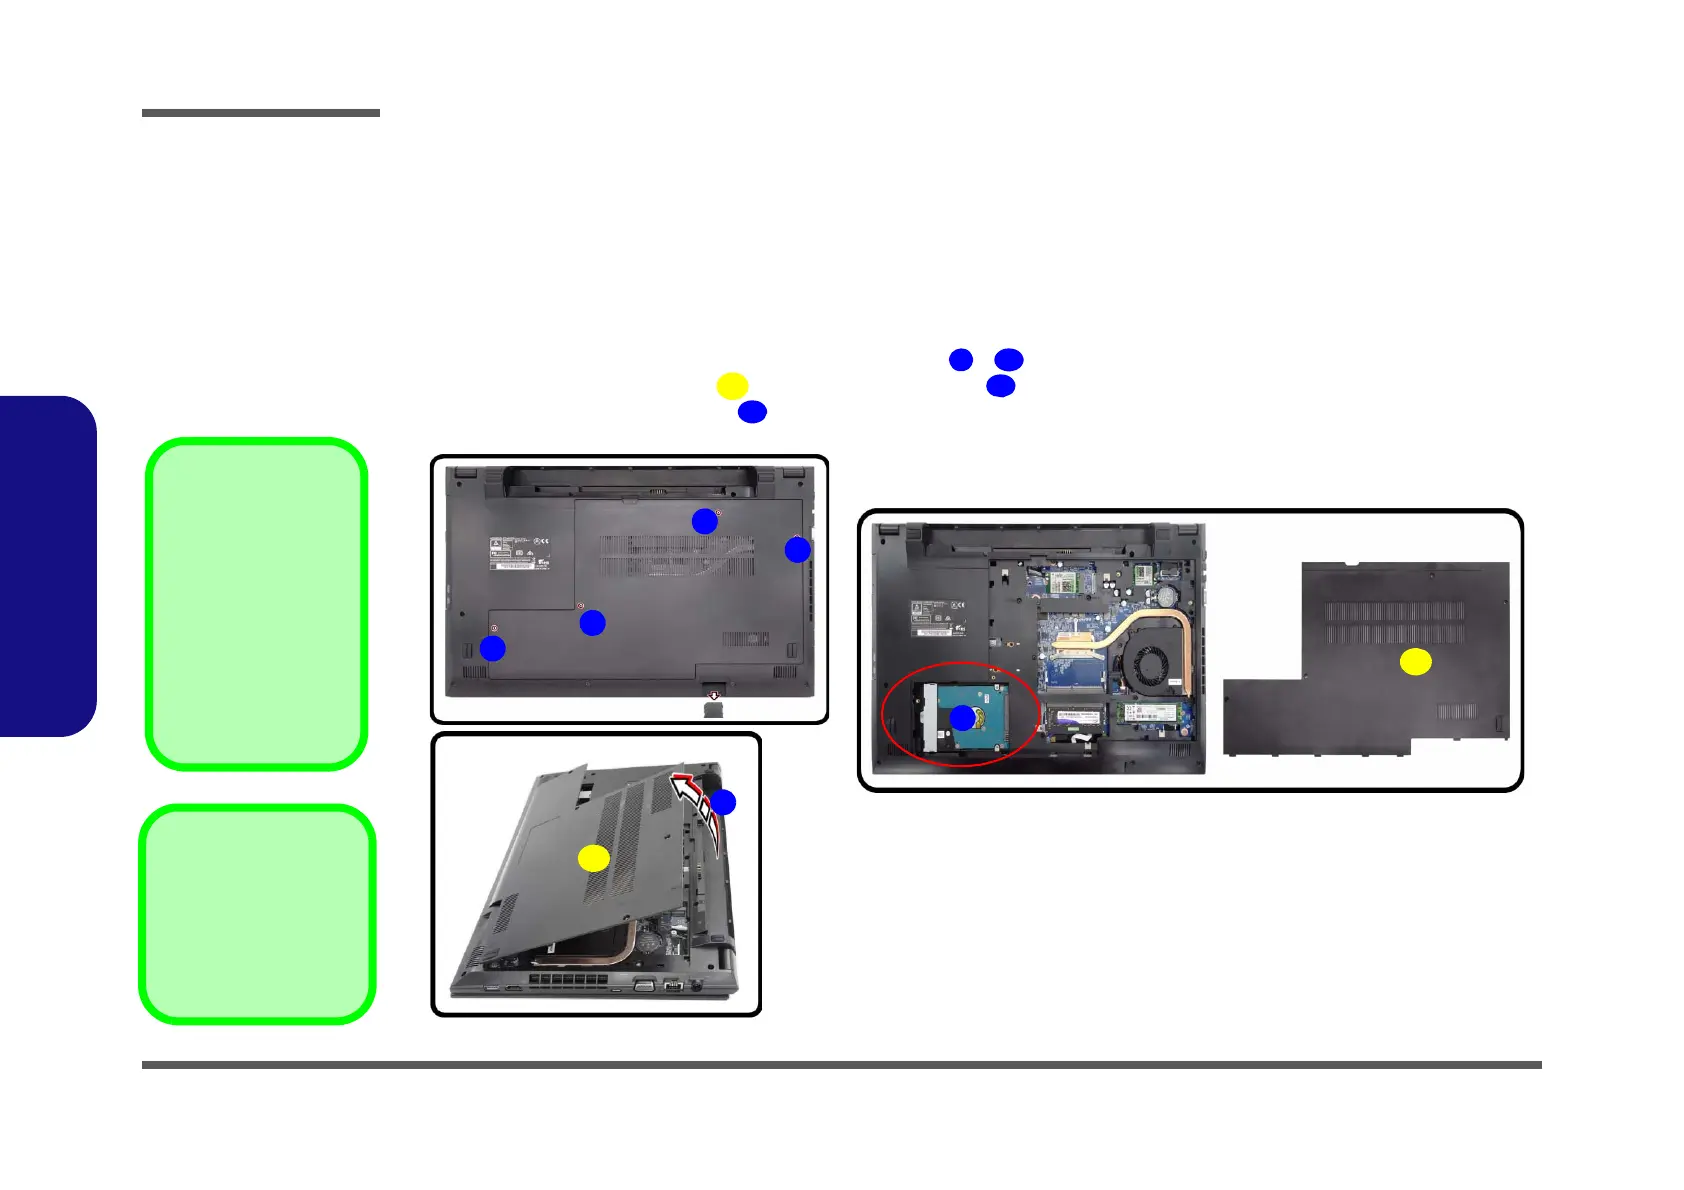
Removing the Hard Disk Drive
The hard disk drive can be taken out to accommodate other 2.5" serial (SATA) hard disk drives with a height of 7.0mm
(h). Follow your operating system’s installation instructions, and install all necessary drivers and utilities (as outlined in
Chapter 4 of the User’s Manual) when setting up a new hard disk.
Hard Disk Upgrade Process
1. Turn off the computer, and remove the battery (page 2 - 5).
2. Locate the component bay cover and remove screws - (Figure 2a).
3. Lift the component bay cover
as shown by the arrow (Figure 2b).
4. The HDD will be visible at point on the mainboard (Figure 2c
).
Figure 2
HDD Assembly
Removal
a. Remove the screws.
b. Remove the bottom
case.
c. Locate the HDD.
4. Component Bay
Cover
•4 Screws
Powering the
Computer On
After every disassem-
bly, make sure that the
bottom case’s screws
are all inserted and
tightened before open-
ing the Lid/LCD and
turning the computer
on.
 Loading...