Disassembly
Removing and Installing the Video Card 2 - 15
2.Disassembly
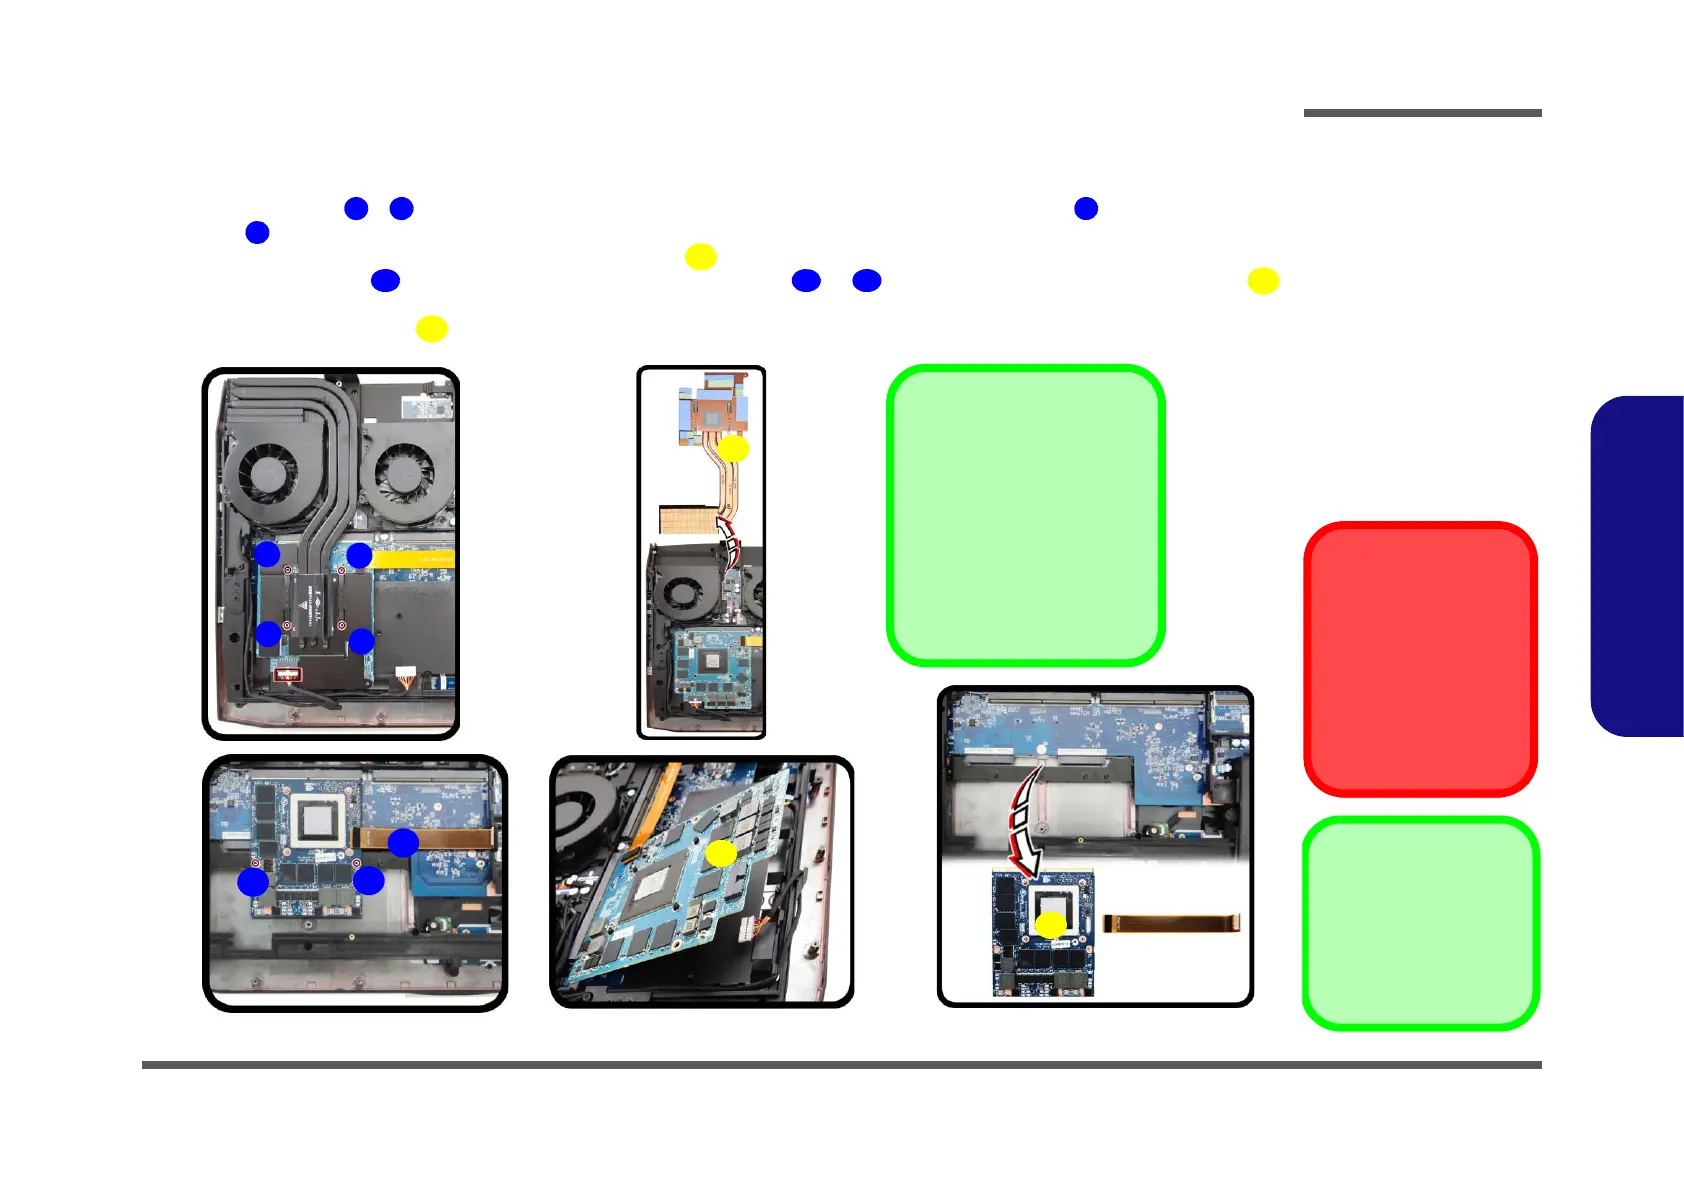
Video Card-1 Removal Procedure
1. Turn off the computer, turn it over and remove the battery (page 2 - 5) and Video card-2 (page 2 - 14).
2.
Remove screws - from the heat sink unit in the order indicated on the label (i.e screw first through to
screw last)
(Figure 10a).
3.
Carefully (it may be hot) remove the heat sink unit (Figure 10b).
4. Remove connector (in case of two video cards) and screws & from the video card. The video card
will pop up (Figure 10c).
5. Remove the video card (Figure 10d).
5. Heat Sink Unit
9. Video Card
•6 Screws
Caution
The heat sink, and video
card area in general,
contains parts which are
subject to high tempera-
tures. Allow the area
time to cool before re-
moving these parts.
Figure 10
Video Card-1
Removal Procedure
a. Remove the screws in
the correct order.
b. Carefully remove the
heat sink units.
c. Remove the video card
cable connector and
screws. The video card
will pop up.
d. Remove the video card.
4
a.
2
1
3
9
c.
Heat Sink Screw Removal
and Insertion
Remove the screws from the heat
sink in the order indicated here:
4-
3-2-1
.
When tightening the screws,
make sure that they are tightened
in the order:
1-2-3-4
.
5
7
8
b.
d.
9
6
 Loading...