Climbing Technology by Aludesign S.p.A. via Torchio 22
24034 Cisano B.sco BG ITALY www.climbingtechnology.com
11/24
IST12-2D651CT_rev.8 10-21
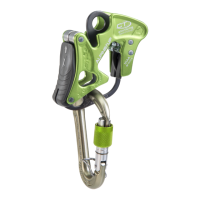
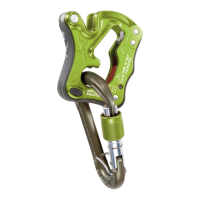
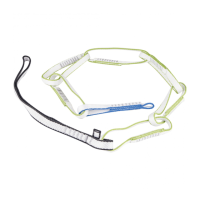
the bar and insert the loop (Fig. 12.1). Insert the loop of rope in the slots B in the
Alpine Up, referring to symbols 2-7-8 on the device (Fig. 12.2). Insert the karabi-
ner at right angles to the lever H in the hole G with the rope inside (Fig. 12.3).
The system is now ready for use (Fig. 12.4).
13) DYNAMIC MODE - BELAYING THE LEAD CLIMBER. Before setting out, the
lead climber must be safely anchored and check that the Alpine Up works cor-
rectly. Make sure the leader’s knot is correct and the rope is uncoiled. Stand in a
convenient position so as not to hinder operations. Warning! Remember to hold
the free end of the rope in your hand at all times! Risk of death! When ascending
a multi-pitch route, before setting up on a new pitch, the leader’s rope must pass
through a directional anchorage on the belay point. If not, it is not possible to
arrest a fall (figs. 5.6 and 5.7).
13.1 - Feeding the rope (Fig. 13.1). With one hand, bend the free end of the
rope and feed it through the Alpine Up. With the other pull and feed the climber’s
rope through the device. Always hold firmly the free end of the rope in one hand!
13.2 - Taking up slack (Fig. 13.2). With one hand pull and feed the free end of
the rope through the Alpine Up. With the other pull the climber’s rope towards the
device. Always hold firmly the free end of the rope in one hand!
13.3 - Arresting a fall (Fig. 13.3). Hold firmly the free end of the rope in one hand
and pull it downwards.
13.4 - Lowering the climber (Fig. 13.4). Grasp the rope firmly with both hands
and move them alternately downwards to lower the climber to the ground.
14) DYNAMIC MODE - ALWAYS SAFE, EVEN IN THE EVENT OF AN ERROR.
If either of the installation errors is committed (Fig. 14), follow the instructions under
point 7.
15) DYNAMIC MODE - BELAY ON TOP ROPE.
Warning! Remember to hold the free end of the rope in your hand at all times
(Fig. 15.3).
15.1 - Installation (Fig. 15.1). Install the system as instructed under point 12.
15.2 - Belaying (Fig. 15.2). With one hand pull and feed the free end of the rope
through the device, with the other accompany the climber’s rope towards it, taking
up slack during ascent.
16) DYNAMIC MODE - ABSEIL. Before descending, belay yourself to the belay
station using a longe fixed securely onto the harness. Prepare the descent rope
and make sure it is properly unwound and there is knot at the end.
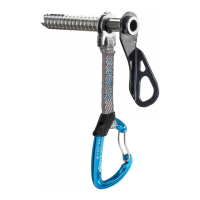
16.1 - Installation (Fig. 16.1). Install the karabiner in the sling at a minimum
distance of 20 cm from the harness. Insert the loop of rope in the slots B in the
Alpine Up, referring to symbols 2-7-8 on the device. Insert the karabiner at right
angles to the lever in the hole G with the rope inside. Tie a Prusik knot on the rope
below the device.
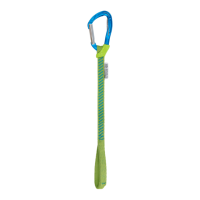
16.2 - Sling tensioning / release. Tension the Prusik knot (Fig. 16.2) so that you
can release the sling karabiner (Fig. 16.3).
16.3 - Abseiling (Fig. 16.4). Control the Prusik knot with one hand to prevent it
tightening round the rope. Control the rate of descent with the other hand, accom-
panying the free end of the rope towards the device.
17) BELAYING 1 OR 2 SECONDS.
17.1 - Installation. Insert the loop of the rope in slots B in the Alpine Up, referring
to symbols 15-16 on the device (Fig. 11.1). Insert a wide-base HMS belay kara-
biner in the hole G, at right angles to the lever, with the rope inside (Fig. 11.1).
Hook up the Concept SGL HMS karabiner in the hole I, than connect it at the top
of the belay point, so that the ropes are below it, held correctly inside the device
(Fig. 11.2). Warning! Make sure the climber’s rope is above the free end of the
rope and both the branches are below the karabiner in the hole I.
17.2 - Function test (Fig. 11.3). Pull the rope at the climber end to make sure the
self-locking system works.
17.3 - Belaying 1 or 2 seconds (Fig. 11.4-11.5) Use both hands to take up slack
at the climber end through the Alpine Up. Warning! Hold the free end of the rope
firmly in both hands and taut. Warning! When using half or twin ropes, always
hold both free ends of the ropes firmly in your hands and taut (Fig. 11.6).
17.4 - Releasing (Fig. 11.7). You can use the Alpine Up to gradually release
the rope of a second climber even under tension. Insert a quickdraw karabiner
in the hole L with the longest side at right angles to the device so that the belay
karabiner is below it. Hold both free ends of the rope firmly and taut in your hand
and push your palm up on the belay karabiner so that it comes into contact with
the other karabiner, creating leverage and allowing you to release the rope and/
or lower the climber.
18) LEGEND. Leader (Fig. 2.1); Hand (Fig. 2.2); Second (Fig. 2.3); Anchor (Fig.
2.4); Fall (Fig. 2.5); Lowering (Fig. 2.6).
 Loading...