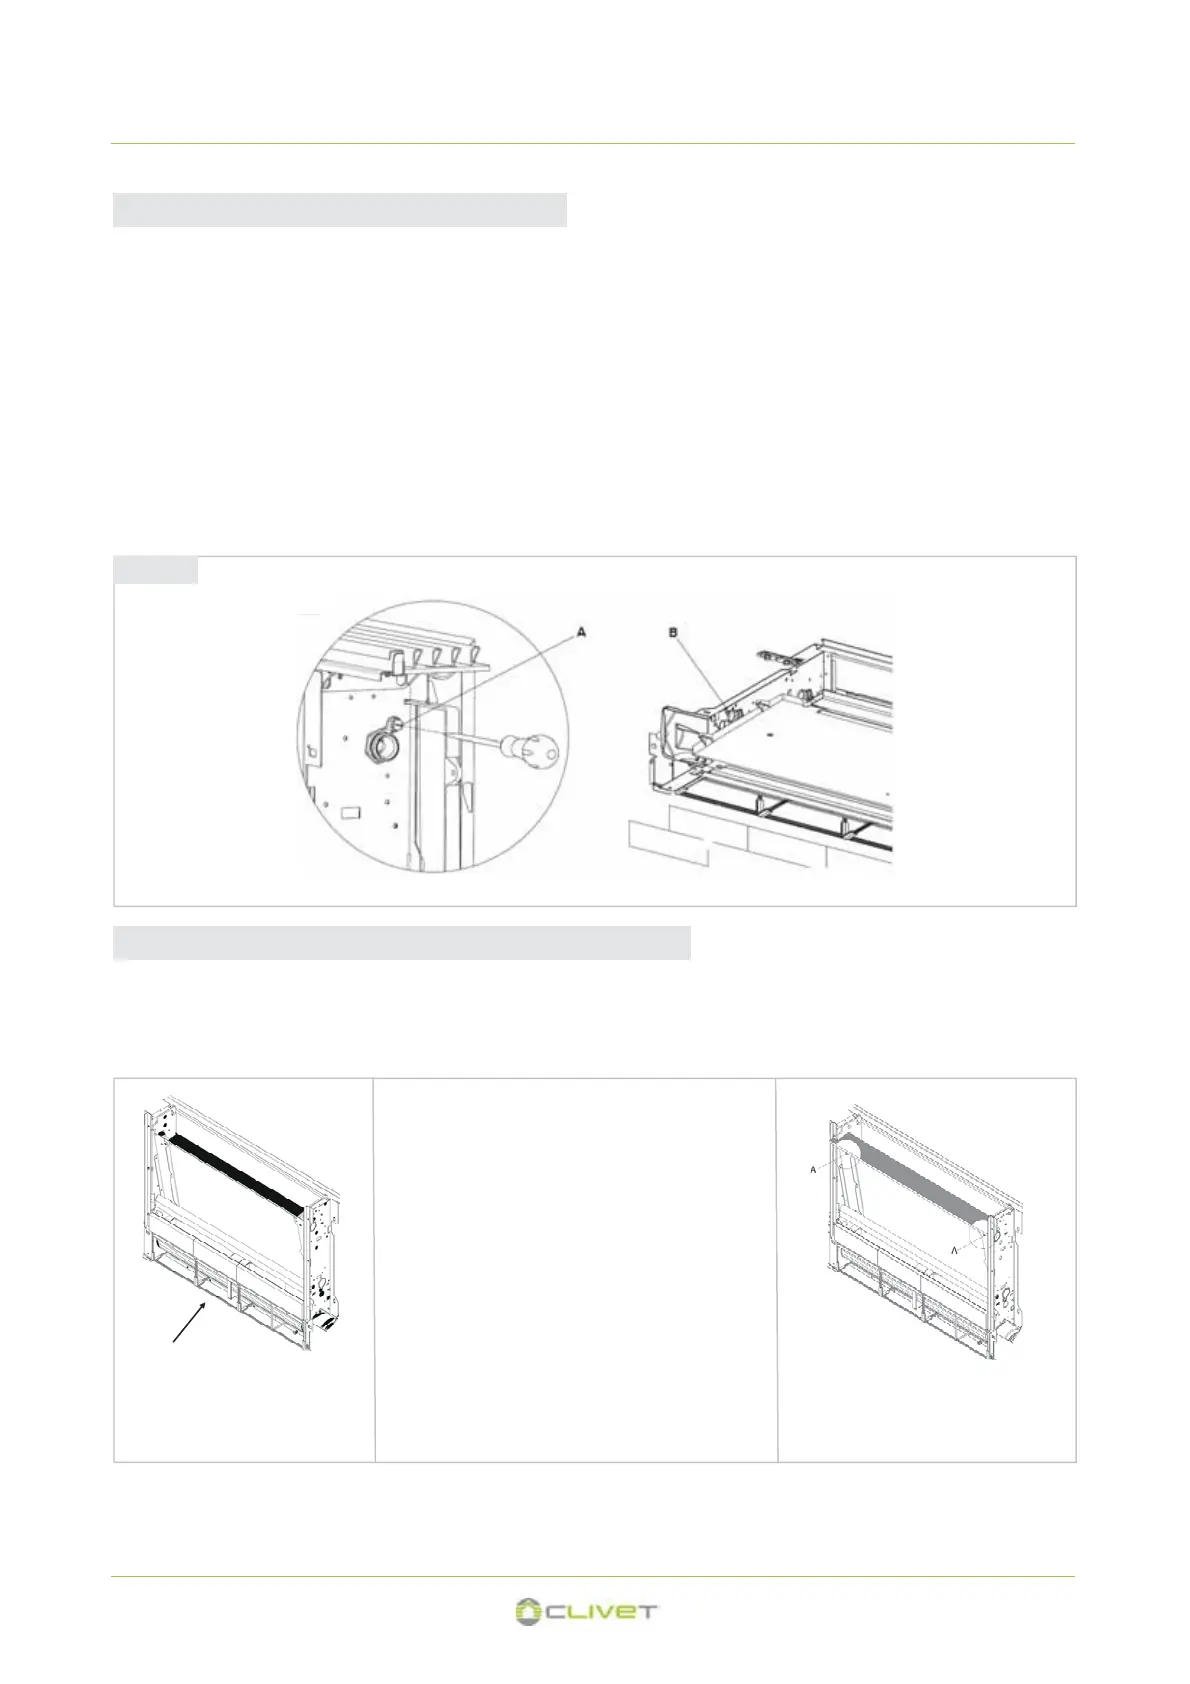
fig 4.8
The insulating bracket must be in the shown position , otherwise the battery is not crossed by air. When all the operations described
have been completed, remount all the components dismounted previously following the dismounting operations in the opposite order.
4.4.6 Mounting insulating bracket
4 - WATER CONNECTIONS
4.4.5 Filling the system
When starting up the system, make sure that the hydraulic
unit lockshield is open. If there is no electric power and the
thermo-valve has already been powered use the special cap
to press the valve stopper to open it.
• Open all the system interception devices (manual or
automatic);
• Start the filling by slowly opening the system water filling
tap;
• For the models installed in a vertical position, take a
screwdriver and act on the highest breather of the battery
(fig.4.8 rif.A);
• for appliances installed in a horizontal position, act on the
highest positioned breather (fig.4.8 rif.B);
• When water starts coming out of the breather valves of the
appliance, close them and continue filling until reaching the
nominal value for the system.
• Check the hydraulic seal of the gaskets.
• It is advisable to repeat these operations after the appliance
has been running for a few hours and periodically check the
pressure of the system.
Front view
Glue the drop-breaking strip abo-
ve the battery
Insert the insulated bracket above the drop-breaking
strip
Secure the insulated bracket using the
screws (A)
60
 Loading...