3. INSTALLATION
3.1 Installation Preparation
WARNING
Keep all the accessories and tools until installation work is
completed.
● Leave the unit inside its packaging while moving, until
reaching the installation site. Where unpacking is
unavoidable, use a sling of soft material or protective
plates together with a rope when lifting, to avoid damage
or scratches to the unit.
● Hold the unit by the hanger brackets when opening the
crate and moving it, and do not lift it holding on to any
other part (especially the duct connecting flange).
NOTE
Be sure to instruct customers how to properly operate the unit
(especially maintenance of air filter, and operation procedure)
by having them carry out operations themselves while looking
at the manual.
3.2 Select The Installation Site
CAUTION
When moving the unit during or after unpacking, make sure to
lift it by holding its hanger brackets. Do not exert any pressure
on other parts, especially duct connecting flange.
● Select an installation site where the following conditions
are fulfilled and meet with your customer’s approval.
HRV should be installed far away from office, recreation
or any other places where silent environment are
required. (install that in special machine room or wash
room is recommended)
install in a place which has sufficient strength and
stability. (Beam, ceiling and other locations capable of
fully supporting the weight of the unit.) Insufficient
strength is dangerous. It may also cause vibration and
unusual operating noise.
Do not install the unit directly against a ceiling or wall. (If
the unit is in contact with the ceiling or wall, it can cause
vibration.)
Where sufficient clearance for maintenance and service
can be ensured.
CAUTION
● Install the units, power supply wiring and connecting wires
at least 1 meter away from televisions or radios in order to
prevent interference or noise. (Depending on the
radio waves, a distance of 1 meter may not be sufficient
enough to eliminate the electric interference.)
● The bellows may not be able to be used in some districts,
so exercise caution. contact your local government office
or fire department for details.
● When discharging exhaust air to a common duct, the
Building Standard Law requires the use of fire proof
materials, so attach a 2m copper plate standing duct.
● Do not install the unit in the following locations:
● Place subjected to high temperature or direct flame. May
result in fire or overheating.
● Place such as machinery plant and chemical plate where
gas, which contains noxious gas or corrosive components
of materials such as acid, alkali organic solvent and plaint,
is generated. Place where combus tible gas leakage is
likely.
Copper piping and brazed joins may corrode, causing
refrigerant to leak or poisoning and fore due to leaked gas.
● Place such as bathroom subjected to moisture.
Electric leak or electric shocks and other failure can be
caused.
● Near machinery emitting electromagnetic waves.
Electromagnetic waves may disturb the operation of the
control system and result in a malfunction of the
equipment.
3.3 Preparations Before Installation
Confirm the positional relationship between the unit and
suspension bolts.
Leave space for servicing the unit and include
inspection hatches. (Always open a hole on the side of
the electric parts box so that the air filters, heat
exchange elements, fans, be easily be inspected and
serviced.)
Make sure the range of the unit’s external static
pressure is not exceeded.
Open the installation hole (Pre-setting ceilings)
Once the installation hole is opened in the ceiling where
the unit is to be installed, pass transmission wiring, and
remote controller wiring to the unit’s wiring holes.
After opening the ceiling hole, make sure ceiling is level
if needed. It might be necessary to reinforce the ceiling
frame to prevent shaking.
Please consult architect or woodworker, if necessary.
Install the suspension bolts. (Use M10 to M12
suspension bolts.) Use a hole-in anchor, sunken insert
anchor for existing ceilings, or other parts to be
procures in the field to reinforce the ceiling to bearing
the weight of the unit.
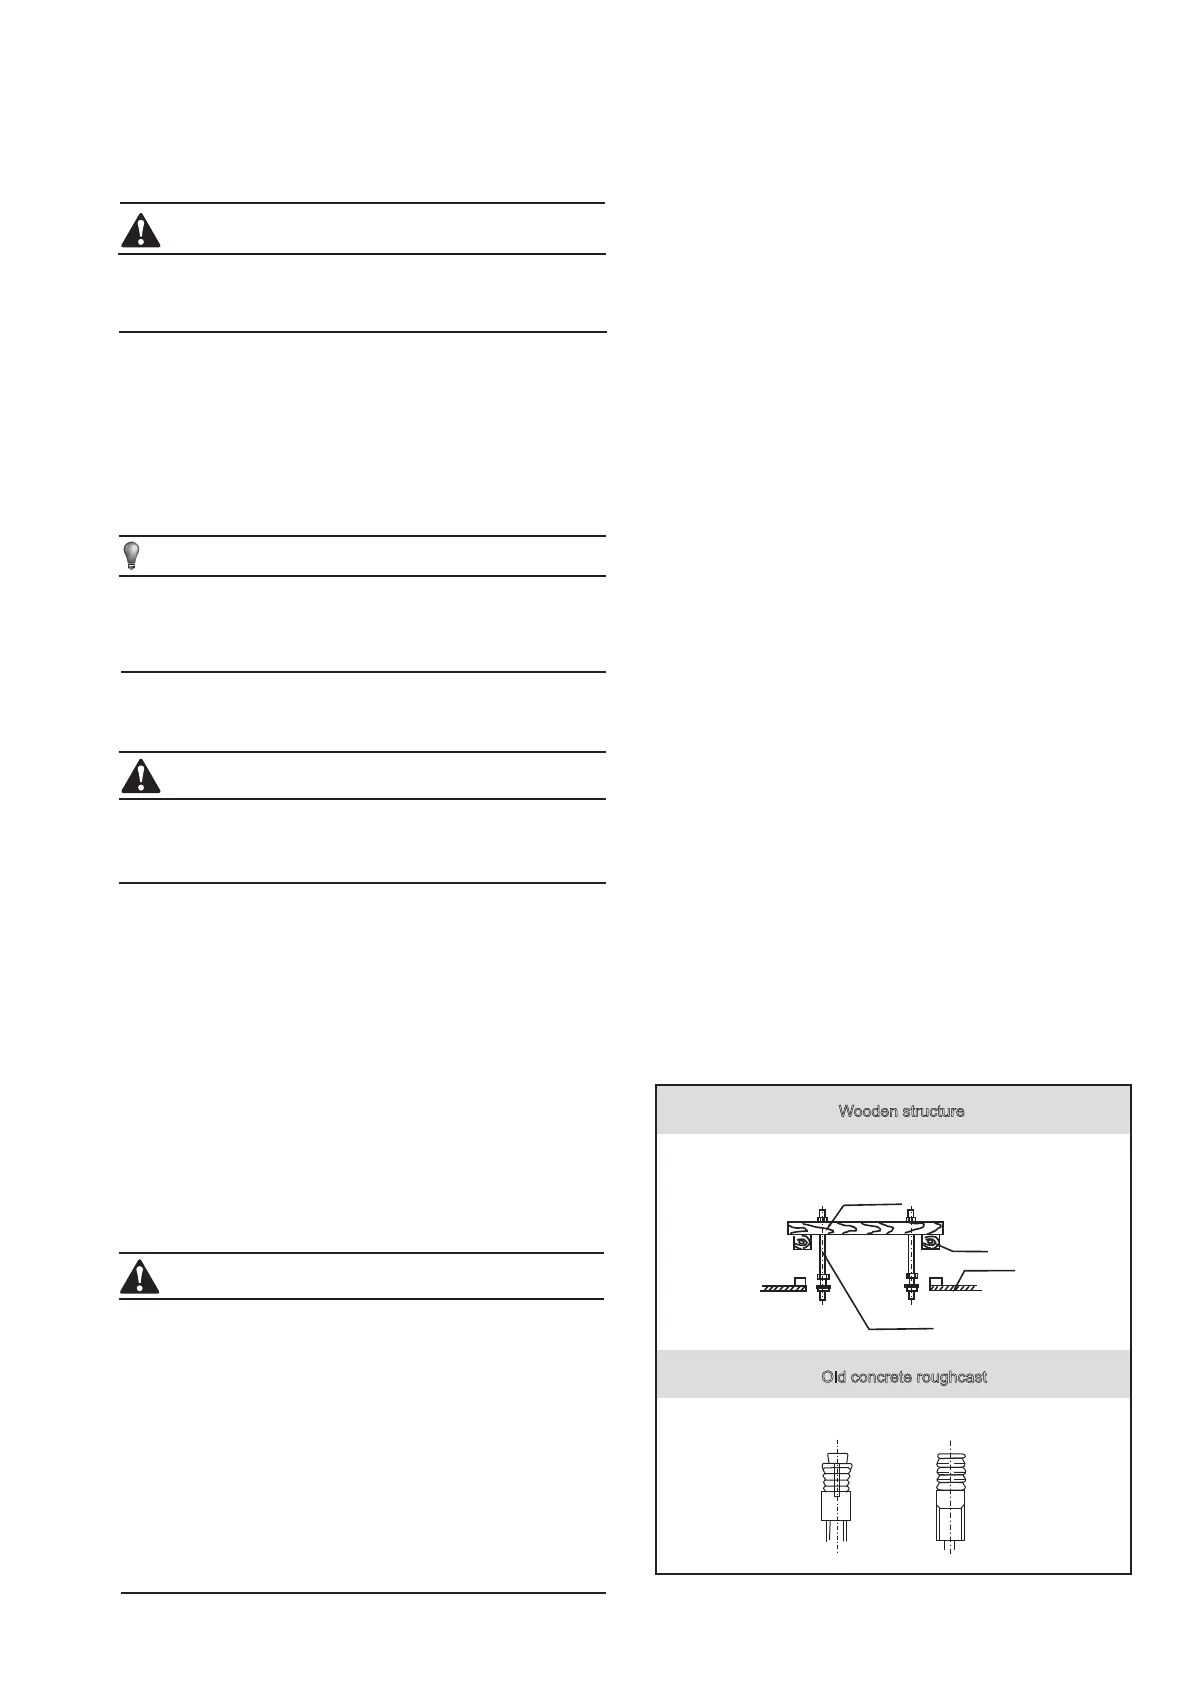
Install vibration damping feet. (For vibration damping)
Wooden structure
Put rectangular sticks across the beams, and set pendant bolts.
Wooden span
Beam
Ceiling
Pendant bolt(M10 to M12)
Old concrete roughcast
Use embedded bolts and embedded pulling plugs.
Fig. 3-1
●
●
●
●
●
●
●
●
●
 Loading...