12
Installation
2.4.2 Mounting the indoor unit
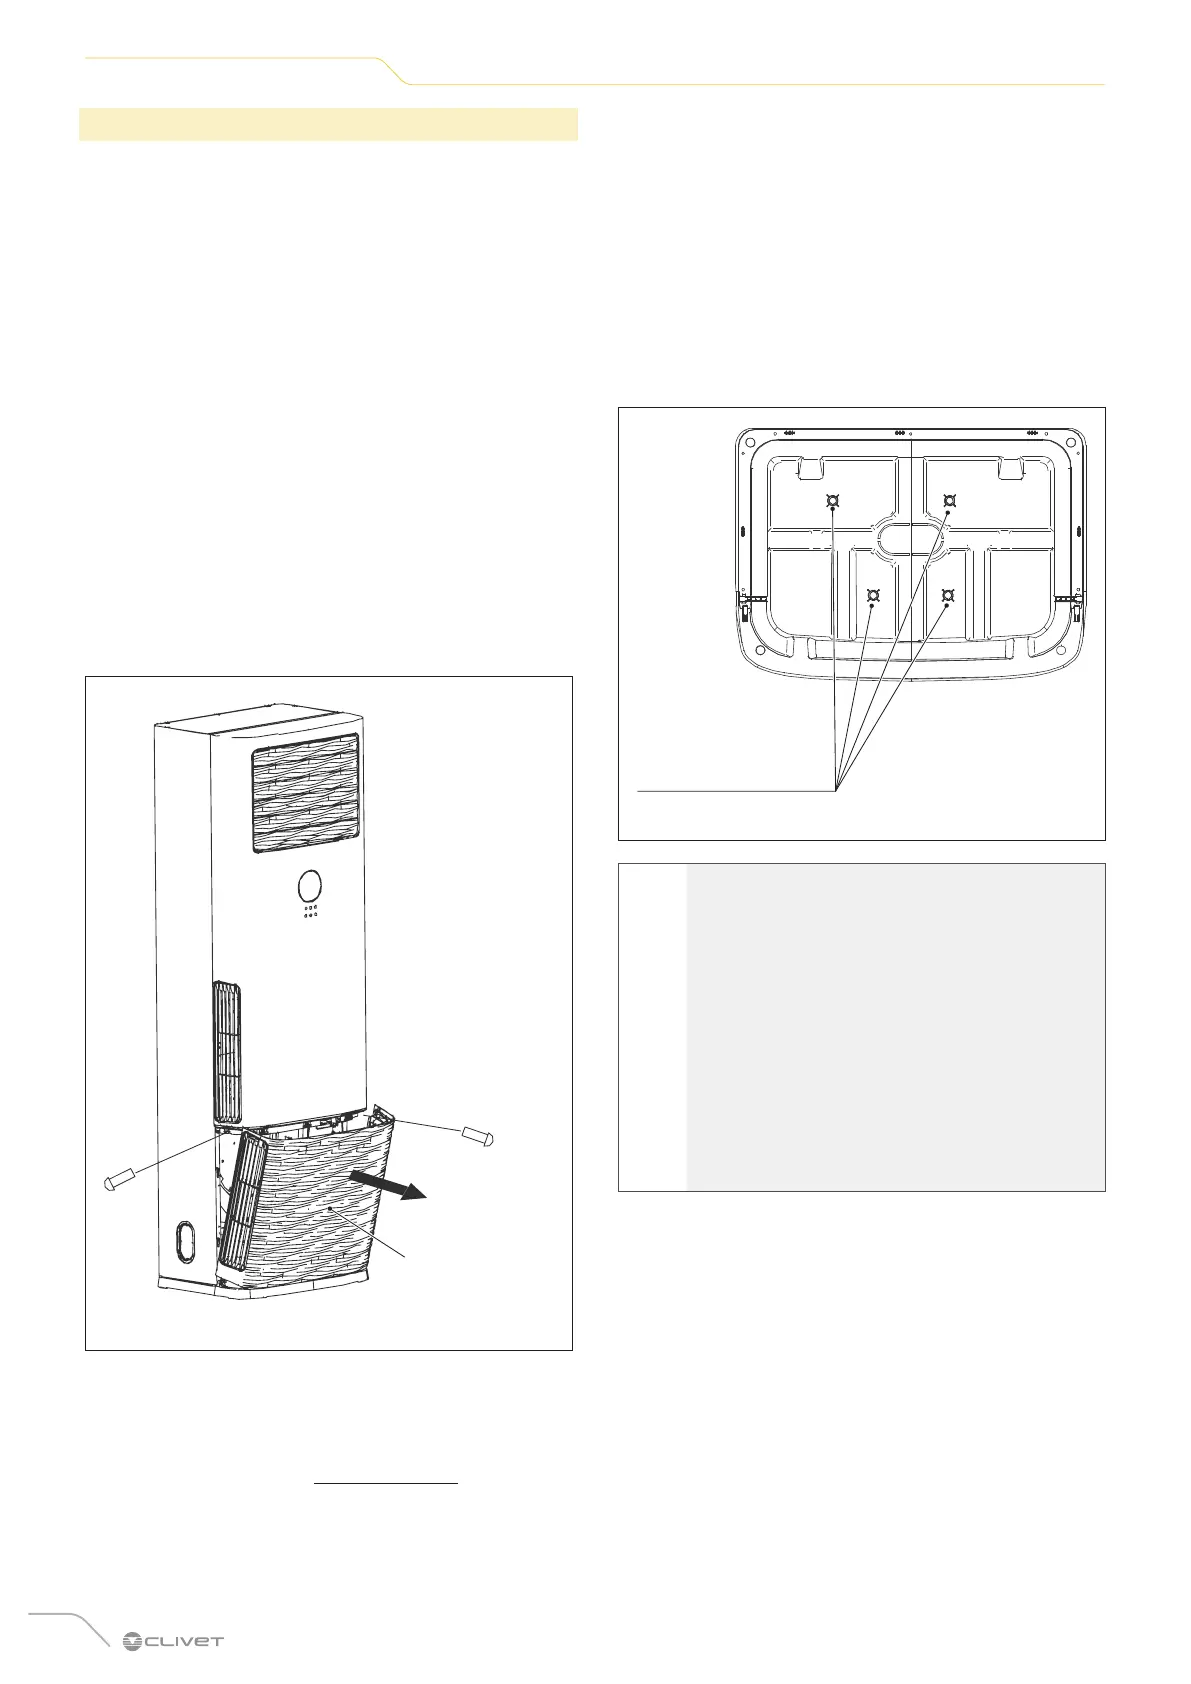
1 Remove the control panel and remove the filter.
– Open the packaging and take out the indoor unit.
Remove the protective tape and any components.
– Open the two boxes to store the remote control
located on both sides of the indoor unit, then
unscrew the screws on the control panel.
– Gently hold the decorative part at the top of the
control panel with both hands, then lift it upwards
to remove it together with the cable terminal
connected to it.
– Unscrew the two screws on the front of the filter.
– Use both hands to hold the two recessed areas
on both sides of the filter and move away from the
unit. Lift the filter upwards to remove it.
– Remove the air inlet grille before
connecting the pipes/wires.
Remove the screw cover first, then the screws on
the air inlet grille, and then remove the grille.
Air inlet grille
Fig. 4
– Take all of the accessories out of the bottom cavity
of the indoor unit.
– Check that all of the accessories match those
indicated in section “1.3 Accessories”.
2 Remove the fastening devices from the roller
– Check if the indoor unit’s roller has fastening
devices holding it in place and remove the warning
sticker.
– Remove the fastening elements from the roller
following the instructions on the sticker.
3 Fixing the indoor unit (to prevent it from falling)
– Measure the position of the installation holes.
– Insert M8 bolts into the unit while it is still on the
floor (the amount of bolts used depends on the
number of holes on the unit’s frame).
– Lift the indoor unit so that the installation holes
cover the bolts, then fasten the nuts on the bolts
and tighten them.
Fixing holes for
screw bolts
Fig. 5
m
CAUTION
If additional support is required to prevent the
unit from falling, a protection wedge can be
installed. The installation procedure for this
wedge is as follows:
– Extract the protection wedge and measure
its correct size.
– Use self-tapping screws to fasten the
protection wedge to the upper cover of the
indoor unit.
– Firmly fasten the other end of the wedge to
the wall with the self-tapping screws.