33
Installation
5.7.1 DHW tank
As an option, the unit can be connected to a DHW storage tank of suitable volume, by fitting the system with
a 3-way diverter valve controlled by the unit. To optimise the eciency of the system, it is advisable to install
the 3-way valve and the DHW storage tank as close as possible to the unit. Use fast-switching valves with
low pressure drop and reduced leakage.
Refer to the DHW storage tank manual for installation details.
Measure the connection pipes properly and thermally insulate them, especially if the unit is far away from
the DHW storage tank.
Nevertheless, it is advisable to connect the storage tank at no more than 10m from the unit.
O
WARNING
Use CLIVET tanks and accessories to ensure compatibility with the unit.
On 200 l to 500 l storage tanks, a flanged solar pipe kit is available for on-site assembly. Whereas 1000 l
tanks have a dedicated coil built in.
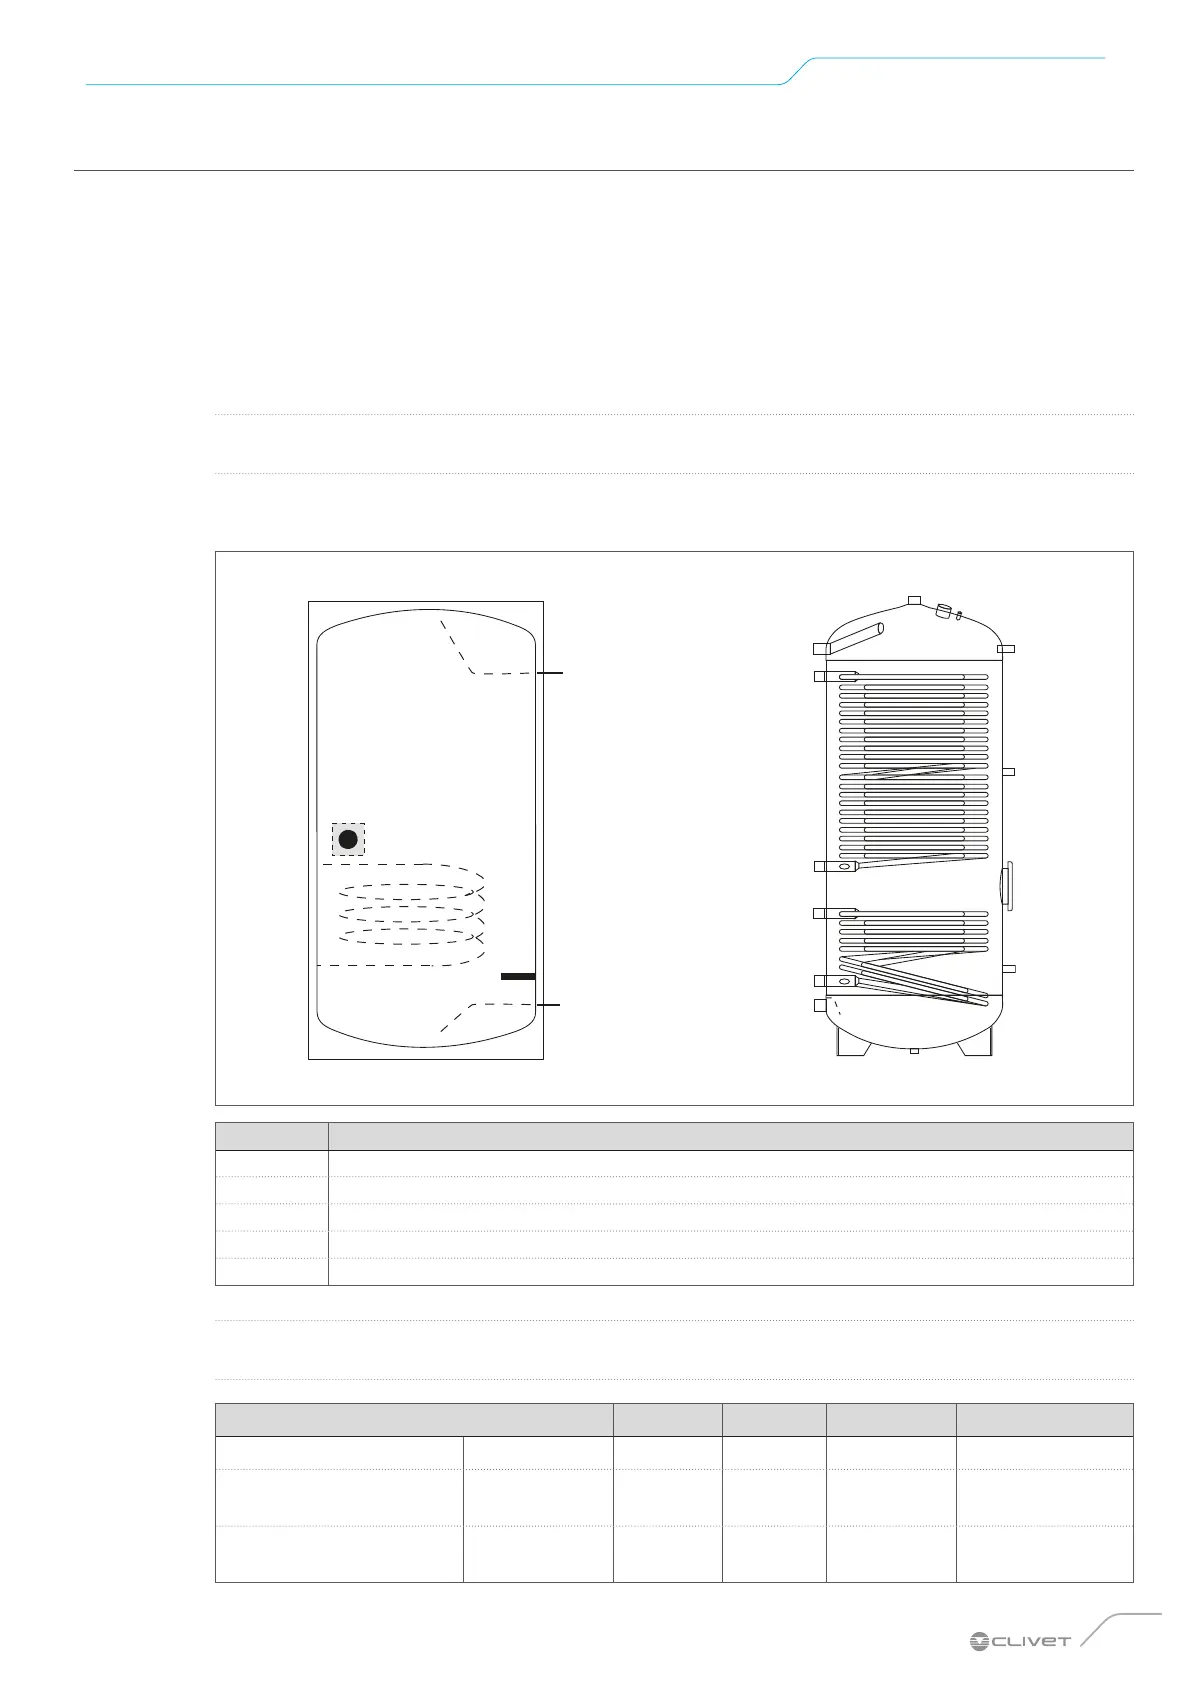
Tank
3
5
4
Fig. 29
Reference Description
1 Heat exchanger
2 Temperature probe (accessory required for boiler management by the unit)
3 Outlet
4 Tank heater (to be installed under the temperature probe)
5 Inlet
O
WARNING
The length of the pipe between the unit and the tank must be less than 10 metres.
Size 2.1 ~ 3.1 4.1 ~ 5.1 6.1 ~ 7.1 ~ 8.1 9.1 ~ 10.1 ~ 12.1 ~ 14.1
Tank volume / L Recommended 100 ~ 250 150 ~ 300 200 ~ 1000 500 ~ 1000
Heat exchanger
size / m
2
(stainless steel)
Minimum 1.4 1.4 1.6 2.5
Heat exchanger
size / m
2
(enamelled)
Minimum 2.0 2.0 2.5 3.5
 Loading...