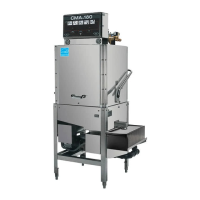
CMA-180/180Tall
Quick Setup
Instructions
1
STEP
WALL
DRAIN
8"
FLOOR DRAIN
Connect a 2" drain pipe (not supplied) from
scrap accumulator to floor or wall drain.
Connect dishmachine to hot water source-
minimum 140°F if unit is equipped with a
booster heater. If 140°F is not available,
order a 2 minute time cycle (120°F minimum
temperature required). A minimum of 180°F
is required if unit is not equipped with a
booster heater.
3 Phase: Connect power supply wires, L1, L2
and L3 to the appropriate terminals marked
L1, L2 and L3 on the power block. Important:
If one of the three wires has higher voltage it
must be inserted as L-2.
Remove the plug from the mixing chamber
and install the rinse injection fitting (rinse
injection fitting provided by your dispenser
supplier; CMA does not supply).
Remove the plastic plug to install the
detergent fitting (provided by your
dispenser supplier; CMA does not
supply).
3
STEP
L2
L3
L1
208/240
3 PHASE OR SINGLE
PHASE
L1 OR L3
FOR SINGLE PHASE
DRAIN
CONNECTION
1
DETERGENT
FITTING INLET
4
WATER INLET
2
MIXING
CHAMBER
5
POWER
BLOCK
3
CMA-180
REAR VIEW
4
STEP
PLASTIC
PLUG
PLUG
5
STEP
WARNING: Electrical and plumbing connections
need to be made by a licensed service person
and comply with all Federal, State and Local
Health, Electrical, Plumbing and Safety codes.
2
STEP
11-2016
PN: 10130.15