Step 1 Pair your Mini Microphone
You first need to pair your Mini Microphone with your sound
processor(s), so they can communicate.
To pair your Mini Microphone:
1. Remove your sound processor(s).
2. Turn OFF your sound processor(s).
3. Turn ON your Mini Microphone by pressing and holding the ON/
OFF button on your Mini Microphone for 2 seconds until the LED
turns green.
4. Use a pen to press the pairing button once. The LED on top of
the Mini Microphone will blink yellow once every 2 seconds
for 20 seconds. You must turn on your processor(s) during this
20 second window to pair it with the Mini Microphone.
5. Turn ON your sound processor(s). It briefly flashes a blue
indicator light to tell you pairing has been successful.
6. You can now replace your sound processor(s).
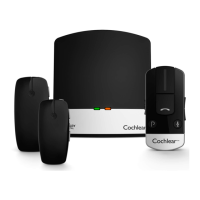
Mode button & icons (2+)
B.
A.
Figure 4 (A) Mini Microphone 2 (B) Mini Microphone 2+
Pairing button
NOTE
After pairing, if you are not wearing
your sound processor, the blue
flashing light will change to orange.
© Cochlear Limited 2015 True Wireless Accessories - 11
Mini Microphone 2 & Mini Microphone 2+