11
CLOCK PROGRAMMING PROCEDURE:
Contacts 1, 2, & 3 are for programming sequences.
To begin the programming sequence:
1. Turn the unit on;
2. Using a coin or other conductive metal object,
briefly bridge Contacts 1 and 2 until a short beep
is heard and the Clock Menu is seen on the
display.
3. To enter the Clock submenu, bridge Contacts 1
& 2 with wetted fingers. This will cause the unit
to display the Clock Alarm selection – On or
OFF. To Toggle the selection, bridge contacts
1&2 with wetted fingers.
4. Using a coin or other conductive metal object,
bridge Contacts 1 & 2 to access the Clock Time
or Alarm setting screen.
5. Shorting Contacts 1 & 2 with a coin will cause
the first digit of the minutes to flash.
6. Shorting Contacts 2 & 3 with a coin will
increment the numeric value, continue until the
required value is displayed. A confirmation beep
will sound with each increment.
7. Next using wetted finger, bridge Contacts 1 & 2
to select the next digit, once selected the digit
will flash to identify that it is being programmed.
Bridge Contacts 2 & 3 till the desired value is
displayed.
8. To select Hours short Contacts 1 & 2 with a coin,
increment as in step 6 and 7.
9. Repeat step 5 through 7 until all digits have been
programmed.
10. To save the changes that have been made
bridge Contact 1 & 2 with a coin or other
conductive metal object. Once the next
programming option is displayed the changes
have been saved.
To exit the Clock Mode Bridge contacts 1 & 2 with
wetted fingers and the computer will return to the Dive
Computer Mode’s Surface Display.
NOTE: Ensure that the COMMANDER is in the
Dive Computer Mode before commencing a
dive.
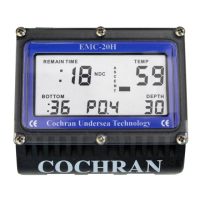
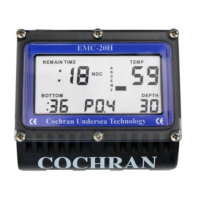
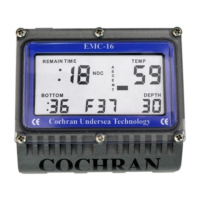
Figures 40, 41a, 41b, 42 and 43 show how the Clock
display screens appear.