23
3.5 Remote control inputs (Ethernet)
The Ethernet link network connector allows you to access the LINUS12C from a host computer for remote control, rmware
update and downloading DSP presets. Please note that for setting up proper network connection you need to use the
CODA Audio LINUS Control software.
3.6 Power outputs
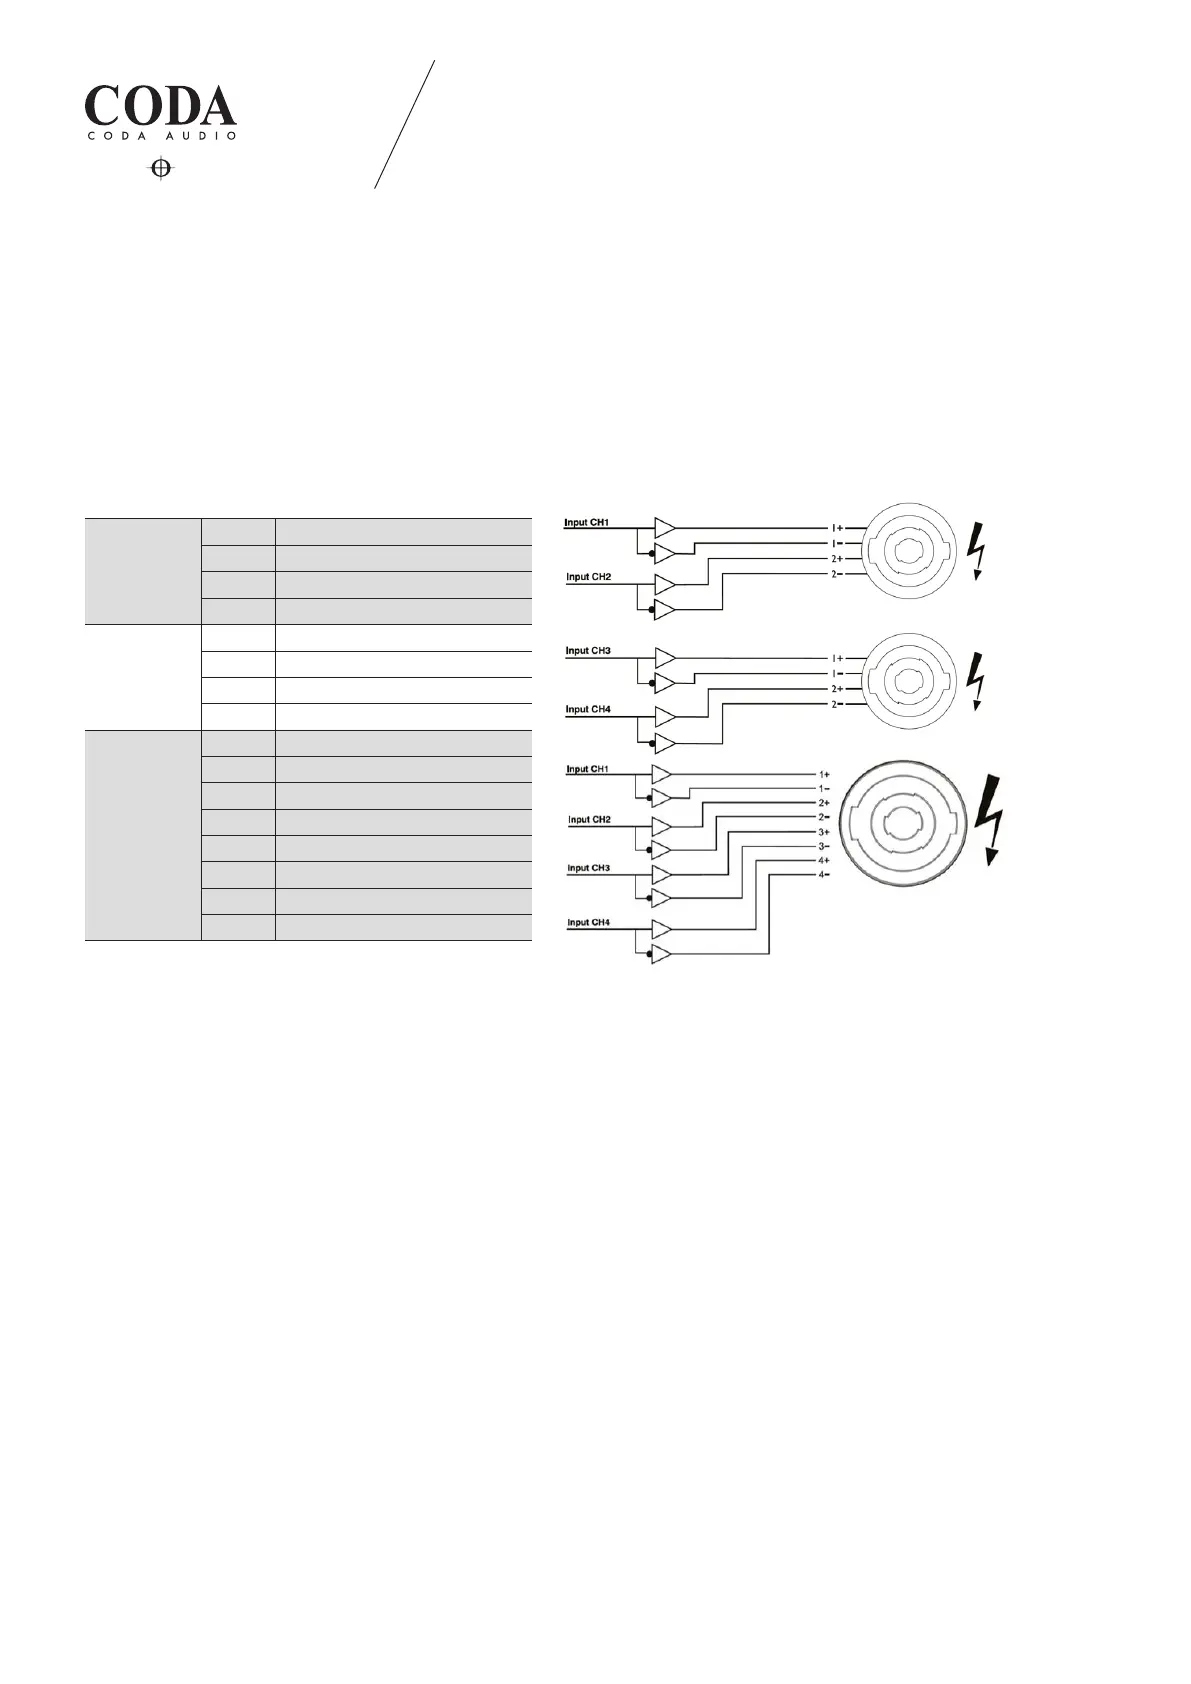
3.6.1 SPEAKON® Connection: SPEAKON® output 1 connector is connected to the channel 1 and 2 amplier outputs.
SPEAKON® output 2 connector is connected to the channel 3 and 4 amplier outputs. SPEAKON® output 3 connector is
connected to the channel 1, 2, 3 and 4 amplier outputs.
The pin conguration of the SPEAKON® connectors is as follows:
LINUS12C 3. INSTALLATION
SPEAKON®
Output 1
Pin 1 + Channel 1 amplier output
Pin 1 - Channel 1 inverted
Pin 2 + Channel 2 amplier output
Pin 2 - Channel 2 inverted
SPEAKON®
Output 2
Pin 1 + Channel 3 amplier output
Pin 1 - Channel 3 inverted
Pin 2 + Channel 4 amplier output
Pin 2 - Channel 4 inverted
SPEAKON®
Output 3
Pin 1 + Channel 1 amplier output
Pin 1 - Channel 1 inverted
Pin 2 + Channel 2 amplier output
Pin 2 - Channel 2 inverted
Pin 3 + Channel 3 amplier output
Pin 3 - Channel 3 inverted
Pin 4 + Channel 4 amplier output
Pin 4 - Channel 4 inverted
WARNING!
SPEAKON® connector marked with the lightning ashes indicate high voltages that are potentially life threatening.
Wiring to these terminals requires installation by an instructed person or the use of ready-made leads or cords.
Custom wiring should only be carried out by qualied personnel.
To prevent electric shock, do not operate the amplier with any of the conductor portion of the speaker wire exposed.
NOTE: For reasons of safety and performance do only use high-quality fully insulated speaker cables of stranded copper
wire. Use the largest wire size that is economically and physically practical. Make sure that the cables are not longer
than necessary.