920-0505-00 Rev. B
Page 1 of 12
Installation and Operation Instructions
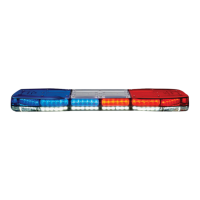
Pursuit Lightbar
Introduction
The Pursuit™ Lightbar is a versatile, powerful, high output
warning device suitable for a range of vehicle types and
duties. There are numerous options and lengths available.
The lightbar can either be mounted permanently to the
vehicle or mounted using the vehicle roof gutters. It also
utilizes individual top lenses for easy internal access with
a provision to disconnect the lightbar cable to allow easy
removal of the lightbar.
The unique shape of the Pursuit Lightbar ensures a sleek,
low prole body hugging t for many vehicle applications.
In addition to the long, maintenance free service life
and low current draw benets of LED technology, the
dual deck Pursuit also supports additional auxiliary
lighting options. Featuring an aluminium chassis and
clear, weatherproof, polycarbonate lenses along with
encapsulated electronic control modules, the lightbar is
strong, durable and protected against the environment.
Contents
IMPORTANT! Read all instructions before installing and using. Installer: This manual must be delivered to the end user.
WARNING!
Failure to install or use this product according to manufacturers recommendations may result in property damage, serious injury,
and/or death to those you are seeking to protect!
1. Proper installation combined with operator training in the use, care, and maintenance of emergency warning devices are essential to
ensure the safety of emergency personnel and the public.
2. Emergency warning devices often require high electrical voltages and/or currents. Exercise caution when working with live electrical
connections.
3. This product must be properly grounded. Inadequate grounding and/or shorting of electrical connections can cause high current arcing,
which can cause personal injury and/or severe vehicle damage, including re.
4. Proper placement and installation is vital to the performance of this warning device. Install this product so that output performance of the
system is maximized and the controls are placed within convenient reach of the operator so that s/he can operate the system without losing
eye contact with the roadway.
5. It is the responsibility of the vehicle operator to ensure daily that all features of this product work correctly. In use, the vehicle operator
should ensure the projection of the warning signal is not blocked by vehicle components (i.e., open trunks or compartment doors), people,
vehicles or other obstructions.
6. The use of this or any other warning device does not ensure all drivers can or will observe or react to an emergency warning signal. Never
take the right-of-way for granted. It is your responsibility to be sure you can proceed safely before entering an intersection, drive against
trafc, respond at a high rate of speed, or walk on or around trafc lanes.
7. This equipment is intended for use by authorized personnel only. The user is responsible for understanding and obeying all laws regarding
emergency warning devices. Therefore, the user should check all applicable city, state, and federal laws and regulations. The manufacturer
assumes no liability for any loss resulting from the use of this warning device.
Do not install and/or operate this safety product unless you have read and understand the safety information con-
tained in this manual.
Introduction 1
Installation & Mounting 2
Wiring Instructions 2,3
Junction Box Instructions 3,4,5
Warning Signal Modules 6
Controller Features and Functions 6,7
Exploded View 7
Replacement Parts 8
Maintenance 9
Troubleshooting 9
Notes 10,11
Warranty 12

