EasyManua.ls Logo

Coleman 16'X13' User Manual

Coleman 16'X13'
2 pages
To Next Page IconTo Next Page
Page #1 background imageLoading...
Page #1 background image
16'X13' WHITE PINE
with SCREEN ROOM
1
Layout & Positioning of Tent
–Layout and position tent with screen room
facing desired direction. (illus. 1)
–Stake down tent corners. Do not stretch
too tight. Angle the stakes slightly toward
the tent. (illus. 2) Keep the floor taut.
–Stake down the remainder of the
stake loops and unzip doors.
–Assemble main tent poles (black)
and side tent poles (gray) by interlocking
the shock-corded sections.
–Insert the main tent poles (black) diagonally
through the pole sleeves. This will form an
“X” in the center of the tent. (illus. 1)
–Insert side tent poles (gray) through the pole
sleeves at the ends of the tent. (illus 1)
When You Are Ready To Set
Up Your Tent
–Select a level campsite clear of
rocks, branches and other hard
or sharp objects.
–Do not set up your tent
under trees.
–For best results in windy
conditions, position the end of
tent into the wind.
–See owners manual for more tips.
Main Tent Poles
Part No. 9271-166
Side Tent Poles
Part No. 9271-167
Screen Room Ridge Pole
Part No. 9271-162
Screen Room Upright Pole
Part No. 9271-168
Rainfly Part No. 9271-164
Rainfly Pole
Part No. 9271-161
Instructions apply to Part Number 9271-163
Illus. 2
Stake loops
properly staked
Front of
Screen Door
Main poles through pole sleeves
Illus. 1
Chain shock-corded
POLE ASSEMBLY PARTS
Connect Frame to Tent
–Insert one end of main tent pole end onto pin of pin &
ring system, nearest the middle of the tent. (illus. 3, 4)
–Go to opposite end of pole and gradually apply
pressure to the pole forming an arch until you are
able to insert the pin into the pole. (illus. 3, 4)
–Repeat for second pole.
–Insert one end of side tent pole end onto pin of
pin & ring system, at the corner of the tent. (illus. 3)
–Go to opposite end of pole and gradually apply
pressure to the pole forming an arch until you
are able to insert the pin into the pole.
–Repeat for second pole.
–Attach frame clips on the tent tent to frame poles.
(illus. 3, & 5)
2
illus. 5
Frame clips
illus. 3 Tent shown with
main and side tent poles in
place.
illus. 4
Pin & ring system located
on the front & rear of tent
Side tent
pole
Question and Answer IconNeed help?

Do you have a question about the Coleman 16'X13' and is the answer not in the manual?

Coleman 16'X13' Specifications

General IconGeneral
BrandColeman
Model16'X13'
CategoryCamping Equipment
LanguageEnglish

Summary

When You Are Ready To Set Up Your Tent

POLE ASSEMBLY PARTS

Layout & Positioning of Tent

Layout and Position Tent

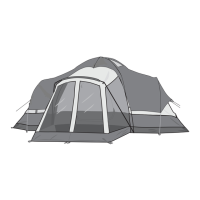
Position tent with screen room facing desired direction.

Stake Down Tent Corners

Stake down tent corners, keeping floor taut and angling stakes.

Stake Remaining Loops & Unzip Doors

Stake remaining loops and unzip doors.

Assemble Main and Side Tent Poles

Assemble main and side tent poles by interlocking shock-corded sections.

Insert Main Tent Poles

Insert black main tent poles diagonally to form an X.

Insert Side Tent Poles

Insert gray side tent poles through sleeves at tent ends.

Connect Frame to Tent

Connect Main Tent Poles

Connect main tent poles to pin & ring system, forming an arch.

Connect Side Tent Poles

Connect side tent poles to pin & ring system, forming an arch.

Attach Frame Clips

Attach frame clips on the tent to the frame poles.

Raise Screen Room

Assemble Screen Room Roof Pole

Assemble shock-corded roof pole to form a continuous arch.

Insert Upright Poles

Insert upright poles into curved roof poles and raise tent.

Attach Upright Poles to Tent Body

Angle upright poles back, insert pin into system on tent body.

Attach Rainfly

Assemble and Insert Rainfly Pole

Assemble rainfly pole and insert into reinforced pockets.

Secure Rainfly Pole

Tie underside of rainfly to the rainfly pole with pole ties.

Drape and Position Rainfly

Drape rainfly over tent, ensuring pole points correctly.

Connect Rainfly Corners

Connect elastic loops with S-hooks to tent rings.

Secure Rainfly to Frame

Secure rainfly with frame ties located on underside.

Stake Out Guylines

Stake out tent with four side guylines.

Things You Should Know

Related product manuals