STITCH LINE
Before you begin
• Read all instructions before set up.
• Select a level site clear of rocks, branches, and other hard or
sharp objects, to install your shelter.
WARNING: Keep clear of overhead power lines.
• Do not set up your shelter under trees because of potential
lightning strikes or falling tree limbs in inclement weather.
• Secure with all stakes and guylines provided to prevent property
damage or personal injury.
• For best results in windy conditions, position narrow end of
shelter into the wind.
• Do not drop shelter.
• Do not bounce shelter bag on its end to remove shelter, as these
actions may damage the frame.
• THIS RECREATIONAL PRODUCT REQUIRES A MINIMUM OF TWO
PEOPLE TO ASSEMBLE.
• Under no circumstances should this product be used to cover
automobiles, marine products or similar items.
Mark Locations
IMPORTANT: All four pad feet of the shelter must be located
apart. For accurate placement, use the rings on the corner
locator to mark locations (Fig. 1)
• Place ring on corner locator at point “A” and mark with a stake.
• Extend rings “B” & “C” out to form a 90° angle and mark
both points with a stake
• To locate corner “D”, unhook white ring from corner “A” and
move diagonally as shown and mark.
• Remove and stow corner locator for future use.
1
(Continued on other side)
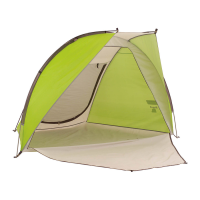
SHELTER SETUP INSTRUCTIONS
Peak Pole with Center Hub
Peak Connector Pole
Leg Pole with Ridge Hub
1
2
4
1
2
3
Pole Descriptions
Description Qty.No.
Fig. 1
Fig. 6
Fig. 5
MODEL 2000014788 / 2000014789 / 2000015678
Set up the Shelter
Attach Canopy
• Assemble peak pole with center hub.
• Assemble both peak connector poles.
• Insert ends of the peak connector poles marked with the
arrows into the peak pole. (Fig. 2)
2
3
• Partially assemble the four leg poles with ridge hub.
NOTE: Do not assemble the last pole on two ends of the
leg pole at this time. (Fig. 3)
• Insert ends of peak pole and peak connector pole into ridge hubs
on leg poles. (Fig. 4)
NOTE: Make sure metal pin locks into slot on top of ridge hub, you
may have to twist peak connector from side to side.
• Unfold canopy and pull over frame. Fold back one flap on
canopy to allow easy access to inside of shelter frame
and underside of canopy. (Fig. 5)
• Secure canopy with straps located on the underside of
canopy. (Fig. 6)
Canopy
Strap
Fig. 3
Fig. 4
Last Pole
Ridge Hub
3
3
3
Center Hub
Fig. 2
1
2
2