Do you have a question about the Coleman Cimmaron 9260A107 and is the answer not in the manual?
Identifies the main tent poles and their associated part number for assembly.
Identifies the rainfly pole and its associated part number for assembly.
Explains condensation formation and how to minimize it through ventilation.
Guidelines for drying, cleaning, and storing the tent to prevent damage.
Instruction on proper stake removal to avoid damaging tent fabric.
Advice against storing tent poles while telescoped together.
Recommends seam sealing for additional weather protection.
Warns against leaving the tent set up for extended periods due to UV damage.
Keeps flame and heat sources away from tent fabric; meets flammability standards.
| Capacity | 6-person |
|---|---|
| Material | Polyester |
| Water Resistance | WeatherTec system |
| Number of Poles | 3 |
| Rainfly | Yes |
| Door | 1 |
| WeatherTec system | Yes |
| Pole Material | Fiberglass |
| Windows | Yes |
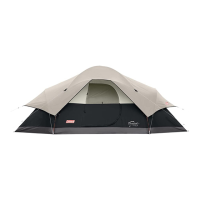
| Type | Dome |
| Peak Height | 72 in |
| Center Height | 72 in |