EasyManua.ls Logo

Coleman CHALET 9 CV - User Manual

Coleman CHALET 9 CV
2 pages
Print Icon
To Next Page IconTo Next Page
Loading...
30
Tent Set up Instructions
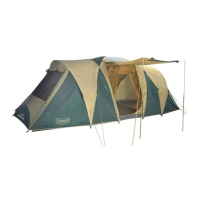
Coleman CHALET 9 CV
To familiarise yourself with your new Coleman tent, it is recommended to set it up at home first
before your camping trip. Please follow these set up instructions to obtain the best
performance and longest life from your new Coleman Tent.
1. When you have selected your tent site, ensure that there are no sharp sticks or objects
to puncture the tent floor and lay the inner tent on the ground.
2. Lay the inner tent in the position you want it, taking into account the fall of the land and
the prevailing wind direction. Always place the tent with the front opening away from
the wind. Be careful not to set up under trees which might drop sap or branches which
can fall in heavy weather.
3. Sort the tent poles and assemble them making sure that the pole end fully inserts into
the metal ferrule end to avoid splitting or breaking poles.
4. The Coleman Pin and Ring construction method makes it easier to connect the poles
to the tent before pegging the inner tent to the ground. This means that you can erect
the inner tent and then move it to your preferred position.
5. Leave the doors fully closed (zipped up) before pegging out the inner tent.
6. The pole sleeves on your tent have coloured tape at the end of the sleeve to indicate
which colour pole to insert into each sleeve.
7. Insert the two GREY poles into the central pole sleeves with the Grey end tape and
connect them to the pins marked with GREY webbing on both sides of the tent. This
will form the main central body of the tent.
8. Insert two of the YELLOW poles into the sleeves with the yellow tape at each end of
the tent’s main room and insert the pin into the pole ends.
9. The two remaining YELLOW poles need to be inserted through the end pole sleeves to
form the bedroom end. Connect the pole end to the pin on each connection point and
this completes the inner tent set up.
10. You can now position the tent where you want it and secure the inner tent by pegging
down all points provided, drive the pegs into the ground at an angle of 45 degrees to
the horizontal and sloping away from the tent pegging point.
11. Pull the fly over the frame and peg out the corner points of the fly. Do not overstretch
the fly as this can damage a seam which may cause leaks.
12. Attach the velcro attachments on the inside of the fly to the poles and guy out the
attached guy ropes to complete the set up of your tent. These guy ropes assist in
keeping the tent stable during windy conditions and should always be pegged out
when the tent is erected.
13. Your tent is fitted with Coleman’s Circle Ventilation. It is important to guy out the
appropriate points at the base of the fly to ensure maximum ventilation to the tent. You
can control the flow of air into the tent by adjusting both the angle at which you guy out
and how much you zip open the vent from the inner tent.
14. Use the two steel awning poles and extra pegs and guy ropes to set up either of the
rear or front awning, make sure to let down awnings when raining to avoid water
ponding and subsequent fabric damage.
15. Your tent is fitted with Coleman’s AirPort System and is specifically designed to be
used with a Coleman Cool Zephyr Window Fan. Refer to the instructions on how to
attach your fan located on the inner of the tent at the AirPort. You can mount your fan
inside your tent to pull in cool fresh air, or outside your tent to force hot still air out.
Question and Answer IconNeed help?

Do you have a question about the Coleman CHALET 9 CV and is the answer not in the manual?

Summary

Tent Setup Instructions

Site Selection and Preparation

Choose a suitable campsite, clear sharp objects, and position the tent away from wind and falling debris.

Inner Tent Pole Assembly

Assemble poles correctly and insert into sleeves, connecting to tent pins for inner tent structure.

Securing the Tent and Flysheet

Peg down the inner tent at a 45-degree angle and attach the flysheet, ensuring it's not overstretched.

Ventilation, Awnings, and Special Features

Utilize ventilation systems, set up awnings carefully, and understand special features like the AirPort System.

Dismantling Your Tent

Overview

This document provides instructions for setting up and dismantling a Coleman CHALET 9 CV tent, along with general care and usage information.

Function Description:

The Coleman CHALET 9 CV is a tent designed for camping, offering shelter and living space. The instructions detail a systematic approach to assembly, ensuring stability and optimal performance. It features a main central body, bedrooms, and options for front or rear awnings. The tent is equipped with specific design elements for ventilation and compatibility with Coleman accessories.

Important Technical Specifications:

  • Pole System: Utilizes a Coleman Pin and Ring construction method for easier pole connection. It incorporates fiberglass poles, with specific color-coded poles (GREY and YELLOW) for different sections of the tent.
    • Two GREY poles are used for the central pole sleeves, forming the main central body.
    • Four YELLOW poles are used: two for the main room and two for the bedroom end.
  • Pegging: Requires pegs to be driven into the ground at a 45-degree angle, sloping away from the tent pegging point, to secure the inner tent and fly.
  • Awning Poles: Includes two steel awning poles for setting up either the rear or front awning.
  • Ventilation: Features Coleman's Circle Ventilation system, which requires guying out specific points at the base of the fly to ensure maximum airflow. Airflow can be controlled by adjusting the guy-out angle and the extent to which the inner tent vent is zipped open.
  • Accessory Compatibility: Fitted with Coleman's AirPort System, specifically designed for use with a Coleman Cool Zephyr Window Fan. The fan can be mounted inside to pull in cool air or outside to push out hot air.

Usage Features:

  • Pre-Setup Recommendation: It is recommended to set up the tent at home first to familiarize oneself with the process before a camping trip.
  • Site Selection: Emphasizes choosing a site free of sharp objects to prevent punctures and avoiding setting up under trees that might drop sap or branches in heavy weather. The tent should be positioned with the front opening away from the prevailing wind.
  • Assembly Process:
    1. Lay the inner tent on the ground in the desired position.
    2. Assemble poles, ensuring full insertion of pole ends into metal ferrules.
    3. Insert GREY poles into central sleeves and connect to GREY-webbed pins.
    4. Insert YELLOW poles for the main room and connect to pins.
    5. Insert remaining YELLOW poles for the bedroom end and connect to pins.
    6. Peg down all points of the inner tent at a 45-degree angle.
    7. Pull the fly over the frame and peg out its corner points without overstretching.
    8. Attach Velcro fasteners on the inside of the fly to the poles.
    9. Guy out all attached guy ropes to enhance stability, especially in windy conditions.
    10. Set up awnings using steel poles, extra pegs, and guy ropes, ensuring they are lowered during rain to prevent water pooling.
  • Ventilation Control: Users can adjust the angle of guy-outs and the zipper opening of the inner tent vent to manage airflow.
  • Fan Integration: The AirPort System allows for easy attachment of a Coleman Cool Zephyr Window Fan, which can be used to either draw in fresh air or expel hot air.

Maintenance Features:

  • Dismantling: The dismantling process is the reverse of setup.
  • Peg Removal: Emphasizes using a peg remover and never pulling on the tent material to remove pegs.
  • Cleaning and Drying: Crucial to ensure all pegs and tent materials are dry and clean before packing away to prevent mildew, which voids the warranty.
  • Pole Removal: It is easier to PUSH fiberglass poles out of sleeves rather than PULL them.
  • Floor Protection: Suggests placing a separate tarp under the tent floor before setup to prolong its life.
  • Awning Care: Awnings should be let down when raining to avoid water ponding and subsequent fabric damage.
  • General Care: Adherence to simple instructions for cleaning and drying ensures many pleasant camping experiences and extends the tent's lifespan.
  • Additional Instructions: Refers to separate "tent care instructions" attached inside the tent for more detailed guidance.

Coleman CHALET 9 CV Specifications

General IconGeneral
BrandColeman
ModelCHALET 9 CV
CategoryTent
LanguageEnglish

Related product manuals