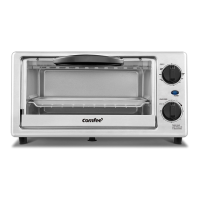
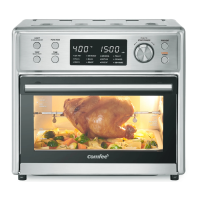
This document describes the Comfee 6-Slice Toaster Oven (CFO-CC2501), a versatile kitchen appliance designed for baking, broiling, toasting, and roasting.
Function Description
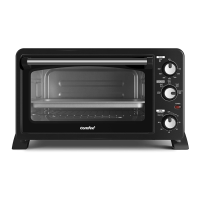
The Comfee Toaster Oven is equipped with multiple functions to cater to various cooking needs. It features a TEMP. control knob for setting the desired temperature, a FUNCTION control knob to select the operating mode (BAKE, BROIL, TOAST, CONVECTION, OFF), and a TIME control knob for setting the cooking duration or selecting "STAY ON" for continuous operation. A POWER indicator light illuminates when the appliance is in use.
Operating Modes:
- BAKE: Ideal for less tender cuts of meat, soups, and stews. In this mode, only the lower heating elements are used.
- BROIL: Suitable for fish, beef, steak, vegetables, and similar items. This mode utilizes only the upper heating elements, which continuously cycle on and off to maintain a maximum temperature.
- TOAST: Designed for corn, bread, cookies, and heating food. All heating elements are used in this mode.
- CONVECTION: For toasts, steaks, baking pizza, and bread. This mode circulates hot air around the inside of the appliance using a convection fan, and all heating elements are engaged.
- OFF: Turns off the appliance.
Important Technical Specifications
- Rated Voltage: 120V~60Hz
- Rated Power Input: 1500W
- Volume: 25L
- Temperature Range: 150°F - 450°F (65°C - 230°C)
- Timer: 10-60 minutes (marked in 10 min. intervals) with a "STAY ON" option.
Usage Features
The toaster oven is designed for ease of use with clear control knobs and an indicator light.
Before First Use:
- Remove all packaging materials, labels, and stickers.
- Check for completeness and damage; do not operate if incomplete or damaged.
- Operate the appliance for at least 15 minutes on its highest setting with the door open to eliminate production residues, ensuring ample ventilation.
- Allow the appliance to cool completely and then clean it.
- Always use the appliance with the crumb tray in place.
General Operation:
- Place the appliance on a clean, flat, and heat-resistant surface.
- Insert the plug into a properly grounded wall outlet. The appliance should be operated on a separate 120V ~ 60Hz wall outlet to prevent circuit overload.
- Preheating is recommended to reduce cooking times.
- The POWER indicator turns on when the TIME and FUNCTION control knobs are set to a position other than OFF.
- A bell rings at the end of a timed cycle, and the appliance switches off.
Specific Function Usage:
- Bake Function: Place the baking rack on the middle oven rails and the baking tray on the bottom rails if needed. Set the TEMP. and FUNCTION knobs to BAKE. Preheat by setting the TIME knob. After preheat, place food and set the TIME knob to STAY ON or a specific time.
- Broil Function: Set the TEMP. knob to 450°F and the FUNCTION knob to BROIL. Preheat the appliance. Place food on the baking rack on the highest possible oven rail, ensuring it doesn't touch the upper heating elements. Set the TIME knob to STAY ON or a specific time. It is recommended to leave the door slightly ajar during broiling.
- Toast Function: Set the TEMP. knob to 450°F and the FUNCTION knob to TOAST. Place food on the baking rack on the middle oven rails (baking tray on lower rails if needed). Set the TIME knob to the desired browning level (LIGHT, MED, DARK, corresponding to about 4, 5, or 7 minutes).
- Convection Function: Set the TEMP. and FUNCTION knobs to CONVECTION. Preheat the appliance. Place food on the baking tray. Set the TIME knob to STAY ON or a specific time.
- Baking Pizza: The appliance can accommodate pizzas up to 12 inches. For one pizza, use the baking rack on the middle rails. For two pizzas, place one on the baking rack on the top rails and the second on the oven rack on the bottom rails. Set TEMP. to 450°F and FUNCTION to CONVECTION. Preheat for 15 minutes. Adjust temperature after preheat according to pizza package instructions.
Accessories:
- Crumb Tray: For easy removal of crumbs and food residues.
- Baking Tray: For rotisserie, broiling, roasting, and collecting food residues. Use on middle and bottom oven rails.
- Baking Rack: For broiling, baking, toasting, and general cooking with other containers. Use on top, middle, and bottom oven rails.
Safety Precautions:
- Always read all instructions before use.
- Do not touch hot surfaces; use handles or knobs.
- Do not immerse the cord or plug in water.
- Unplug when not in use, before cleaning, and allow to cool.
- Do not operate with a damaged cord, plug, or if the appliance malfunctions.
- Use only manufacturer-recommended accessories.
- Do not use outdoors or in damp areas.
- Do not let the power cord hang over the edge of a table or touch hot surfaces.
- Do not place on or near a hot gas, electric burner, or in a heated oven.
- Use extreme caution when moving an appliance containing hot oil or liquids.
- Ensure the TIME control knob is set to OFF before plugging in.
- Do not insert oversized foods or metal utensils.
- Avoid covering the appliance or placing it near flammable materials during operation.
- Use extreme caution when removing trays or disposing of hot grease.
- Do not clean with metal scouring pads.
- Do not store materials other than recommended accessories in the appliance.
- Do not place paper, cardboard, or plastic in the appliance.
- Do not cover the crumb tray or any part with metal foil.
- Always use oven mitts when inserting or removing items.
- Never let the power cord come into contact with the housing or be trapped by the door during use.
- This appliance must be grounded while in use; do not remove the grounding pin.
Maintenance Features
Proper maintenance ensures longevity and optimal performance.
Cleaning:
- Always turn the TIME control knob to OFF and disconnect the plug from the wall outlet.
- Allow all parts to cool down completely before cleaning.
- All accessories (baking tray, baking rack, crumb tray) can be washed in hot soapy water or in a dishwasher.
- Clean the appliance housing with a damp sponge or cloth.
- Wipe the interior walls with a damp sponge, cloth, or nylon scouring pad and mild detergent if needed.
- Take care not to damage the heating elements.
- Do not immerse the power cord, plug, or appliance in water or any other liquid.
- Do not use abrasive cleaners, steel wool, or scouring pads.
- Dry all parts and surfaces thoroughly before use and storage.
Storage:
- Ensure the appliance is completely cool, clean, and dry before storage.
- Store the appliance in a dry place.
- Store the power cord on the cord storage of the appliance.
- Store the appliance on a stable shelf or in a cupboard, preferably in its original packaging, out of reach of children and pets.
Troubleshooting:
The manual provides a troubleshooting guide for common issues:
- Appliance not working: Check if plugged in, check wall outlet (fuses/circuit breaker).
- Appliance not reaching set temperature: Ensure the door is closed properly.
- Food not fully cooked: Extend cooking time, increase set temperature.
- Food overcooked or burnt: Reduce cooking time, reduce set temperature.