14
NOTE
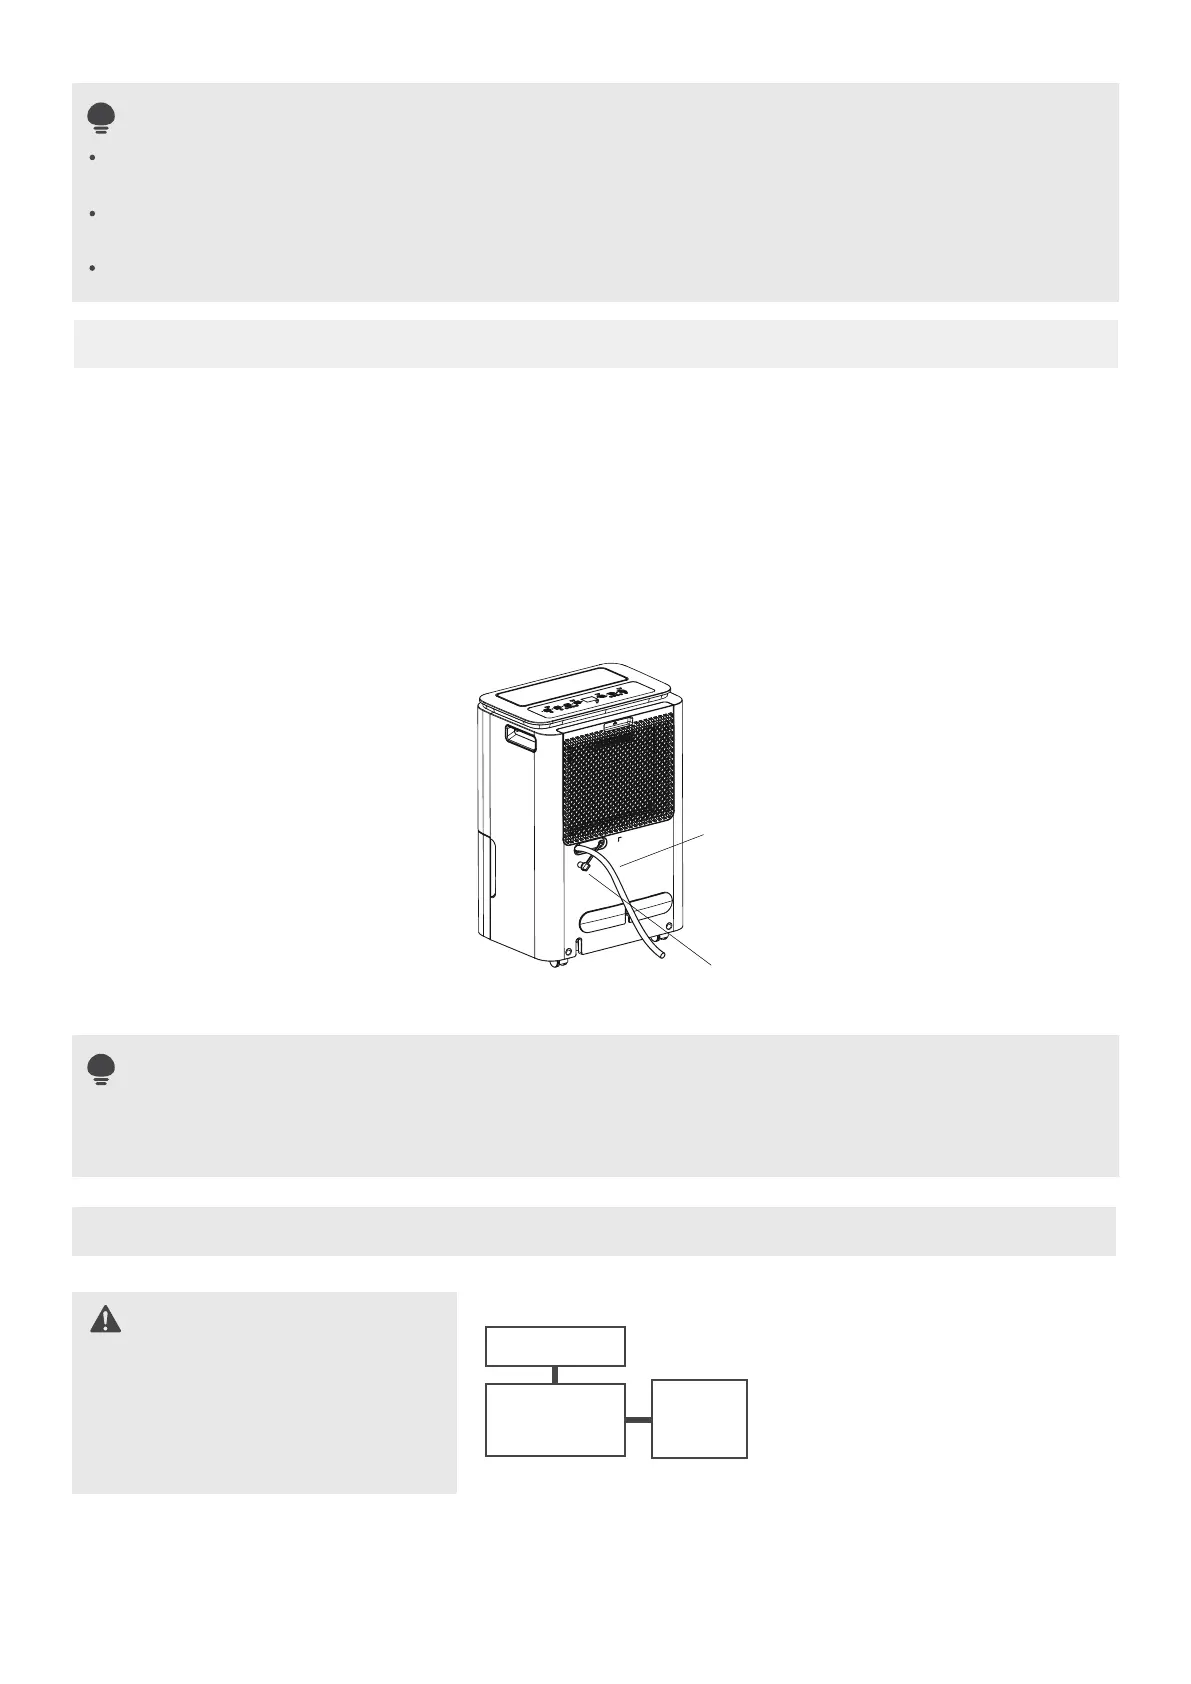
Type 2: water hose drainage (continuous)
When you remove the bucket, do not touch any parts inside of the unit. Doing so may damage the
product.
Be sure to push the bucket gently all the way into the unit. Banging the bucket against anything or
failing to push it in securely may cause the unit not to operate.
When you remove the bucket, if there is some water in the unit you must dry it.
NOTE
Attach the hose to
the drain hose outlet.
Remove the
rubber plug
· Water can be automatically emptied into a floor drain by attaching the unit with a water hose.(not included)
· Remove the rubber plug or cut the cover down from the back drain hose outlet. Attach a drain hose and
lead it to the floor drain or a suitable drainage facility.
· Make sure the hose is secure so there are no leaks.
· Direct the hose toward the drain,making sure that there are no kinks that will stop the warter flowing.
· Place the end of the hose into the drain and make sure the end of the hose is level or down to let the water
flow smoothly. Do never let it up.
· Make sure the water hose is lower than the drain hose.
· Select the desired humidity setting and fan speed on the unit for continuous draining to start.
When the continuous drain feature is not being used,remove the drain hose from the outlet and
reinstall the rubber plug.
Electronic Work
WARNING:
BEFORE PERFORMING
ANY ELECTRICAL OR
WIRING WORK, TURN
OFF THE MAIN POWER
TO THE SYSTEM.
NOTE: The cographs are for
explanation purpose only. Your
machine may be slightly dierent.
The actual shape shall prevail.
DISPLAY
MAIN
CONTROL
POWER
SUPPLY
CORD
EN
 Loading...