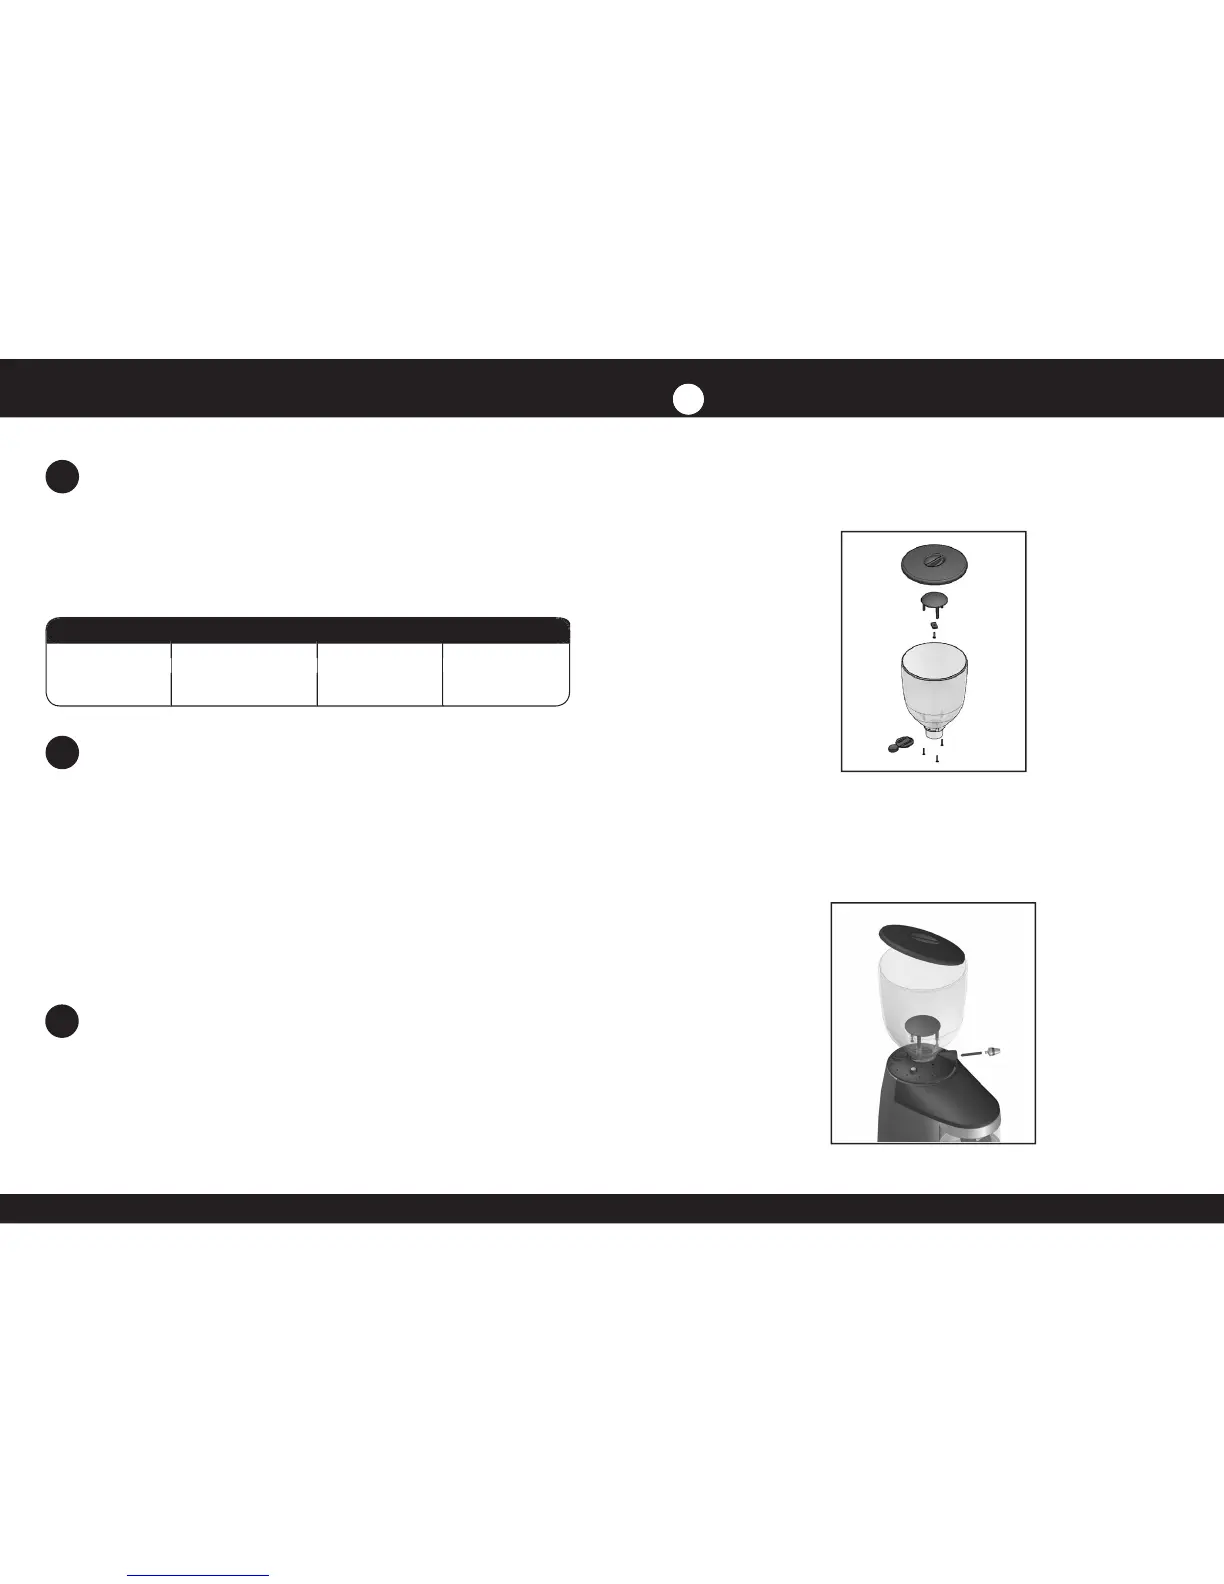
7.1. Preparing the coffee grinder
First, prepare the hopper. Position the hand-protector (3) inside
the hopper and anchor it using the screw provided, as in Fig 1.
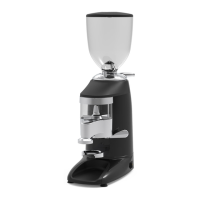
Place the hopper (2) on the grind regulator (6) and check that
the shutter (4) is closed. Anchor the hopper by threading the
hopper safety screw with help of a at-head screwdriver and
nally adjusting the setting roller (5) by hand. Fig. 2.
K-5, K-6, K8, 31.5 / 800 12.1 / 310 16 / 400
6.3. Putting the grinder into place
The grinder should be installed on a smooth flat surface. In order
to guarantee the optimum performance of the appliance, the
minimum dimensions of the work place should be as follows:
K-5, K-6, K8, 31.5 / 800 12.1 / 310 16 / 400
K-5, K-6, K8, 31.5 / 800 12.1 / 310 16 / 400
K-5, K-6, K8, 31.5 / 800 12.1 / 310 16 / 400
K-5, K-6, K8, 31.5 / 800 12.1 / 310 16 / 400
K-5, K-6, K8, 31.5 / 800 12.1 / 310 16 / 400
K-5, K-6, K8, 31.5 / 800 12.1 / 310 16 / 400
Height (in / mm.) Width (in / mm.) Depth (in / mm.)
6.4. Installation of the coffee grinder
Before connecting the coffee grinder, check the following:
• That the data on the features label coincides with those of the
• That the electrical current is appropriate for the machine.
• That the connection point to the power supply network is
protected with appropriate fuses.
• That the equipment is properly connected to a grounded so-
cket in accordance with the applicable safety guidelines.
*The coffee grinder should be used in areas with a room
temperature below 25/30ºC ( 77/86ºF ) and should not be
installed in places (SUCH AS INDUSTRIAL KITCHENS) where
cleaning with water jets is used.