CONGA 9090 AI | 29
ENGLESK
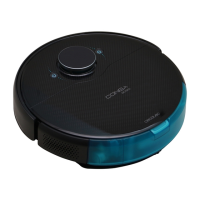
Charging base
Fig. 4.
1. Signal transmission area
2. Charging terminal
3. Charger input
2. BEFORE USE
- Take the product out of the box and remove all packaging materials.
- Make sure all parts and components are included and in good condi-
tions. If any sign of visible damage is observed, contact immediately
with the ocial Technical Support Service of Cecotec.
3. INSTALLATION
Robot and charging base installation. Fig. 5,6.
- Connect the charging base to a power supply and store the remaining
cable. It is important to store the remaining cable at the bottom of the
charging base to avoid it from being dragged and disconnected.
- Place the charging base against the wall, leaving the safety distance
indicated in the below picture.
Note: Ensure a space of at least 0.5 m on both the left and right side of the
charging base, and a space of at least 1.5 m in front of it.
Warning
Do not expose the charging base to direct sunlight.
Hold down the power button for 3 seconds; when the light indicator turns
on, place the robot on the charging base. Fig. 7.
Steady white light: On/Operating and/or charged.
Oscillating orange light: charging and/or back home mode.
Oscillating red light: Error
Steady red light: tank or mop missing
Note
- Take the robot to the charging base if the battery is low. The robot might
not turn on if the battery is very low.
- The robot will automatically turn on when placed on the charging base.
- The robot cannot be turned o during charging.