Setup & Assembly Cont’d
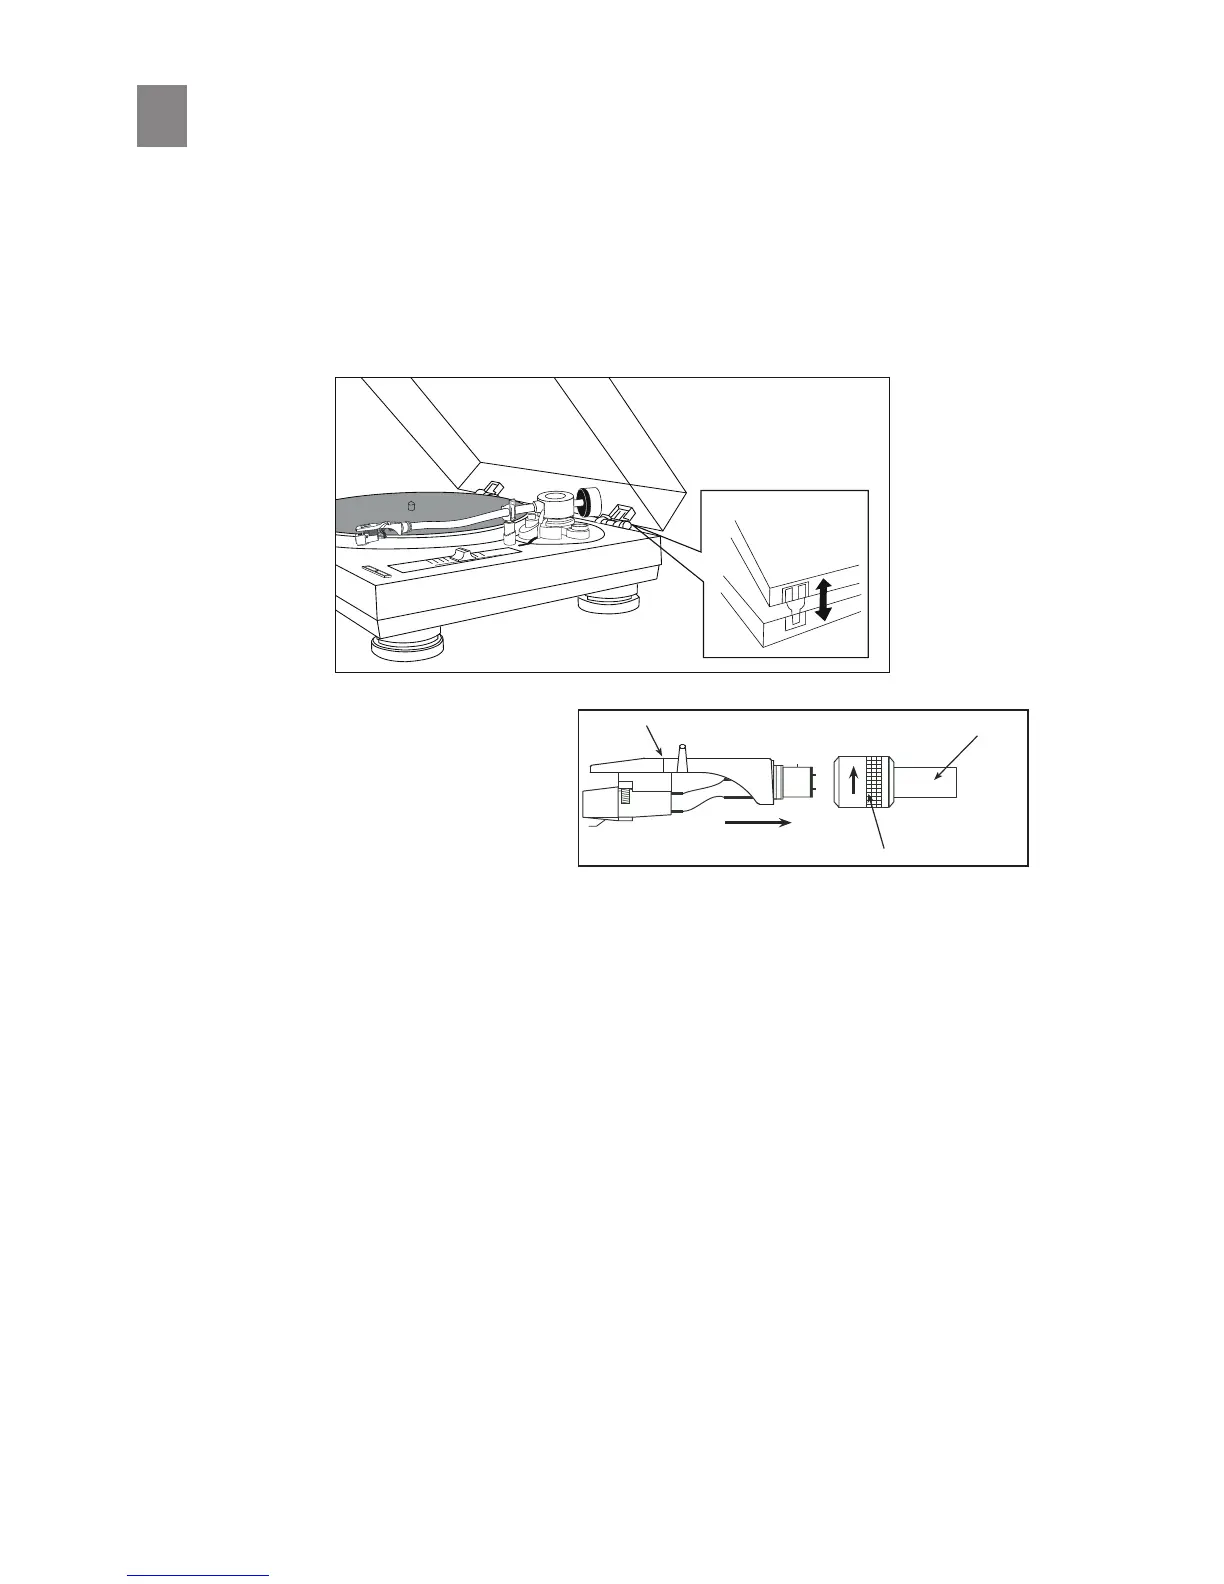
7. Headshell:
Make sure to leave the clear plasc pro-
tecve stylus cover in place.
Gently push the round connector end of
the Headshell into the front end of the
Tonearm making sure to align the locang
pin at the 12 O’clock posion.
6. Dust Cover:
Install the dust cover into the hinge pockets of the upper rear chassis of the main unit. Once properly
inserted, the tabs will securely click into place.
While holding the headshell, push gently into the front end of the tonearm. Simultaneously turn the
headshell locking nut counter-clockwise to rmly secure the headshell into the tonearm. The headshell
will slowly slide in as the nut turns. Tighten nger ght while carefully holding the headshell steadily
horizontal. *Do not over ghten or use any hand tools for this procedure.
5