REMOVING THE BUMP HEAD FROM
THE MOTOR SHAFT
WARNING: Avoid Injury! To
avoid accidental start up: Always
remove the Power Cell before
removing or reinstalling the bump
head.
The bump head can be removed from
the motor shaft to facilitate removal of
trimmer line etc. that becomes
entangled on the motor shaft.
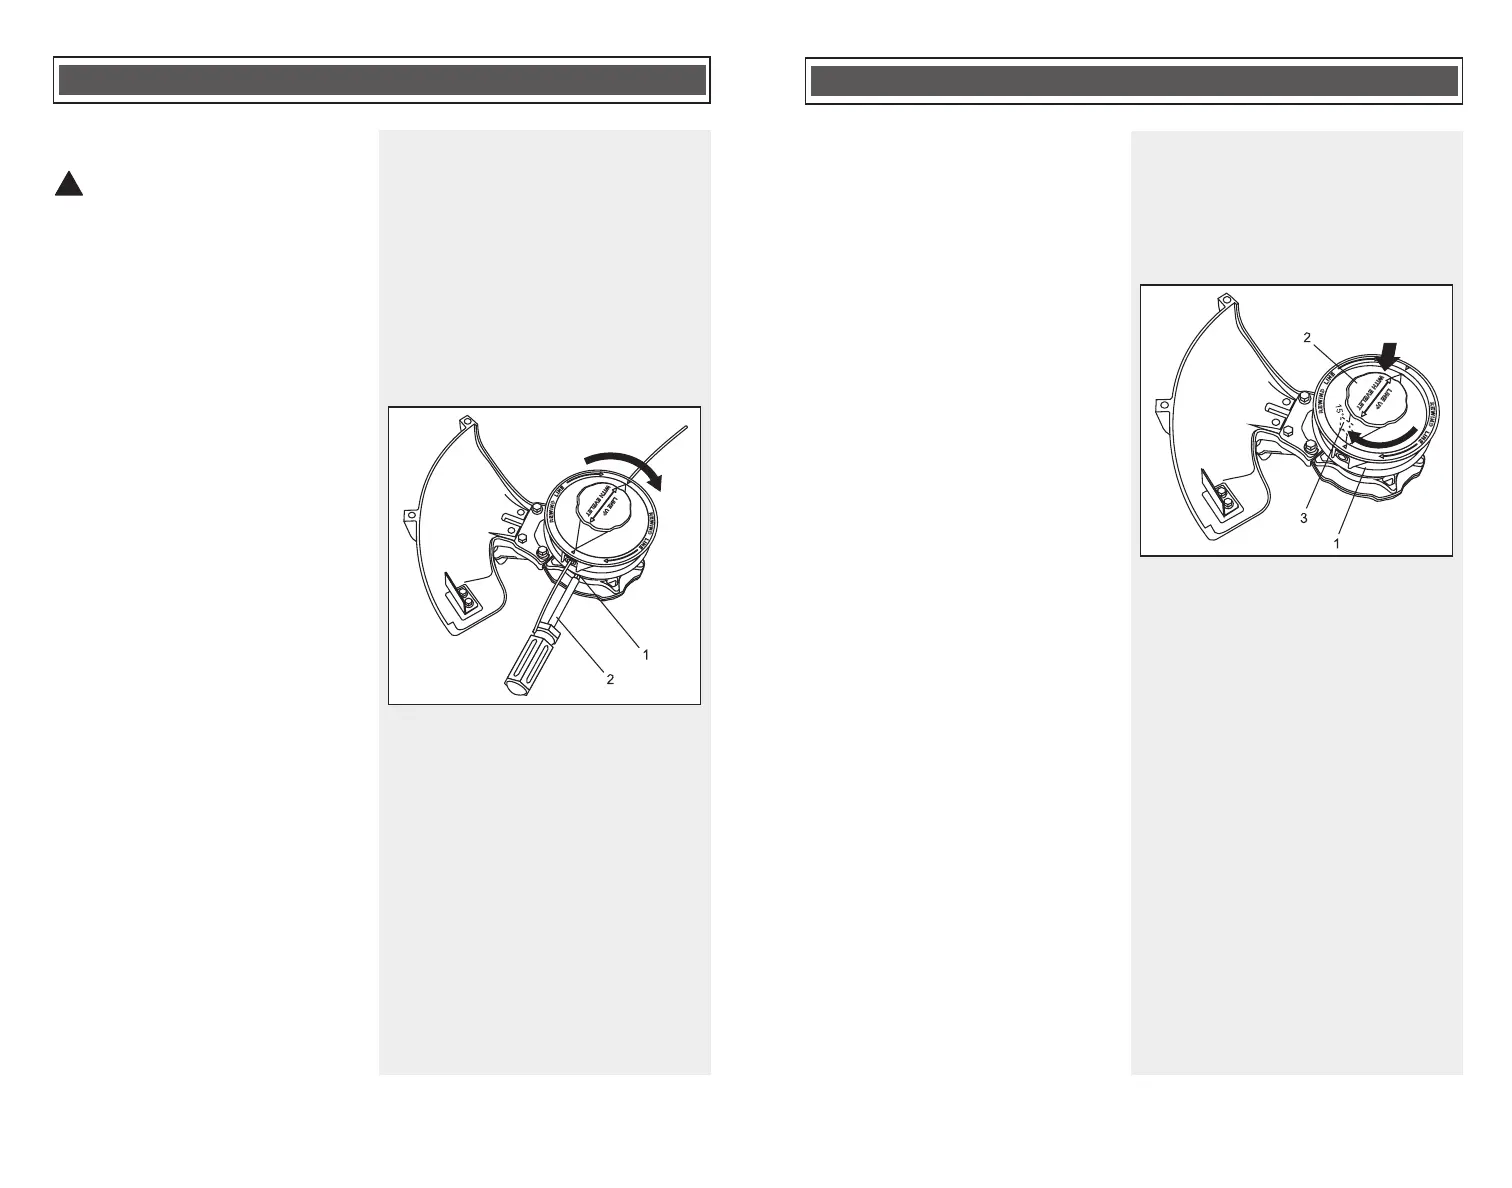
1. Rotate the bump head until the slot
in plastic line guard is aligned with
the matching slot (1) in the lower
motor casting (Fig. 8).
2. Insert an appropriate sized
screwdriver (2) or hex key into the
slot in the casting and into the slot
in the plastic line guard.
NOTE: When the screwdriver is
through both slots, the motor shaft
will be locked.
3. Grasp the bump head with one
hand and turn it CLOCKWISE to
remove it from the threaded motor
shaft. Continue to turn the bump
head until it is removed from the
motor shaft.
NOTE: The motor shaft has a
reverse "left hand" thread.
4. To reinstall the bump head, simply
clean off any tangle line and debris
from the motor shaft and the bump
head and lock the motor shaft as
per items #1 & #2 above. Then
thread the bump head onto the
motor shaft by turning it COUNTER
CLOCKWISE.
23
Le fil peut se casser au niveau de
l’œillet lorsqu’il frappe des débris. Il
peut aussi s’emmêler dans la bobine de
tête. Si tel est le cas, vous devrez retirer
la bobine de la tête :
1. Retirez la pile du taille-bordures,
comme il est indiqué sur la Fig. 7.
2. Tenez le carter de la tête (1) avec
une main (Fig. 6).
3. Saisissez le bouton de la bobine
(2) avec l’autre main et appuyez
fermement sur la bobine pour la
pousser dans le carter à ressort.
4. Tout en poussant fermement la
bobine dans le carter à ressort,
tournez le plus possible le bouton
de la bobine dans le sens horaire
(3).
NOTA : La bobine tournera
d’environ 15 °.
5. Tirez sur la bobine pour la sortir du
carter de la tête.
6. Enlevez le fil de la bobine et mettez-
le de côté. Il peut être réinstallé sur
la bobine s’il n’est pas endommagé.
7. Si le fil est enchevêtré sur l’arbre
moteur, coupez-le prudemment
avec un ciseau, une pince
coupante latérale ou un couteau.
8. À l’aide d’un chiffon propre,
nettoyez tous les débris sur l’arbre
moteur, à l’intérieur du carter de la
tête et sur la bobine.
NOTA : Si la tête et la bobine ne
sont pas nettoyées, la tête ne
fonctionnera pas correctement.
RÉINSTALLATION DE LA BOBINE
VIDE DANS LA TÊTE
Pour replacer la bobine vide dans la
tête, inversez les étapes 2 à 5 ci-
dessus.
NOTA : La bobine doit être vide, et ne
doit PAS contenir de fil.
ASSEMBLAGE ET FONCTIONNEMENT
Fig. 6