23
REINSTALLING THE EMPTY SPOOL INTO
THE BUMP HEAD – cont’d
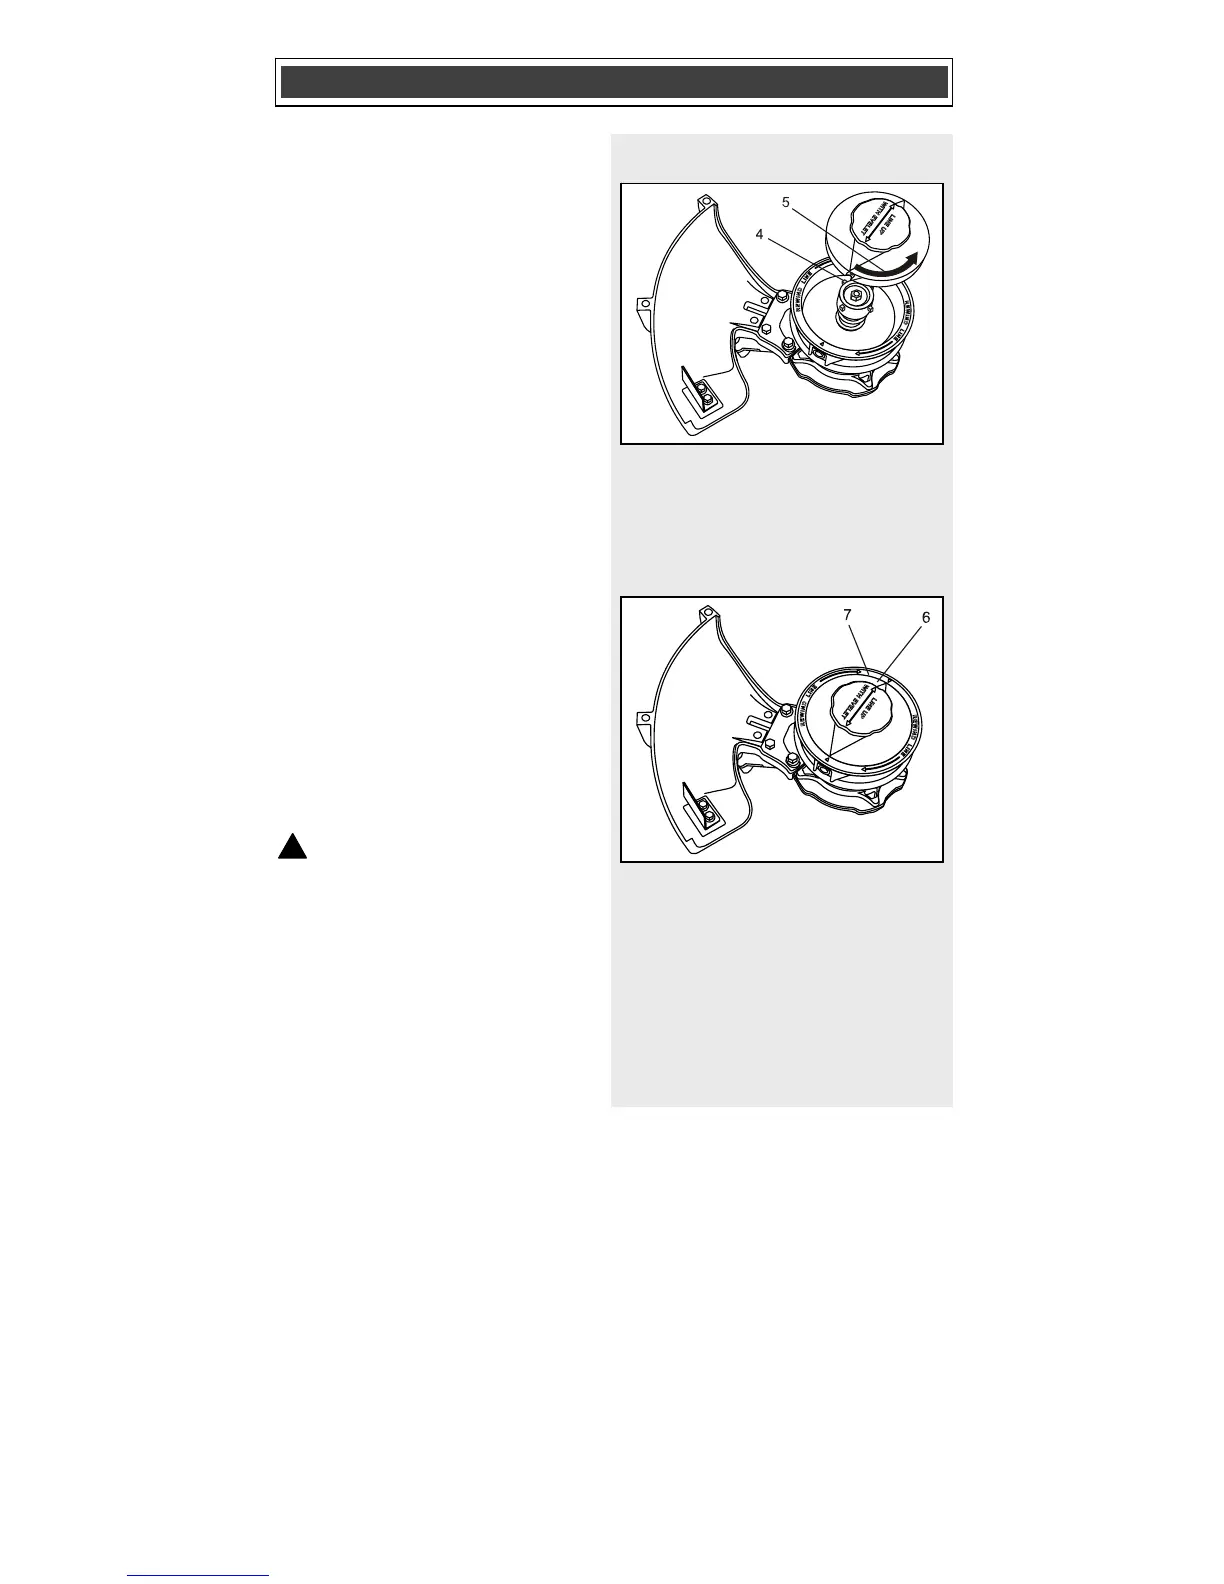
1. Align the four slots in the spool
under side cavity with the four pins
(4) on the bump head shaft and
slide the spool into the bump head
(Fig. 7).
2. Grasp the bump head housing with
one hand.
3. Grasp the spool knob with the other
hand and press the spool firmly
into the spring loaded bump head
housing.
4. While pressing the spool firmly into
the spring loaded bump head
housing, rotate the spool knob
counter clockwise (5) until it will not
turn any further.
NOTES:
a) The spool will rotate
approximately 15° before it is fully
locked into position.
b) Make sure the outer edge of the
spool (6) is evenly positioned within
the bump head (7) (Fig. 7a). If not,
remove the spool and reinstall it
properly.
c) Pull outward on the spool to
make sure it is firmly locked into
position.
WARNING: Make sure the outer
edge of the spool is evenly
positioned within the bump head and
that the spool is firmly locked into
position. If the spool is not properly
locked into the bump head, it could
be violently thrown when the trimmer
is started and cause serious injury.
5. Reinstall any undamaged trimmer
line into the spool as outlined in
Fig.5.
ASSEMBLY AND OPERATING
!
Fig. 7
Fig. 7a
 Loading...