This document is an owner's manual for the Coredy R550 (R500+) robot vacuum cleaner, providing comprehensive information on its operation, maintenance, and troubleshooting.
Function Description
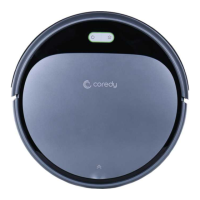
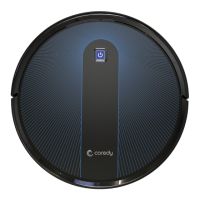
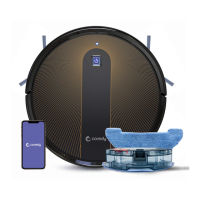
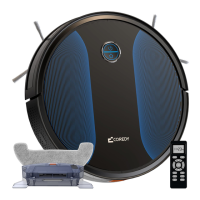
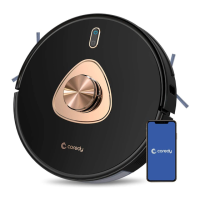
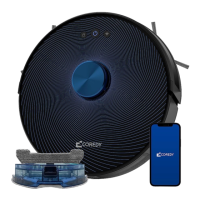
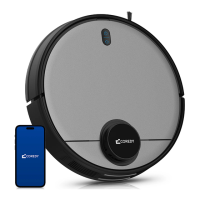
The Coredy R550 (R500+) is a robotic vacuum cleaner designed for indoor use, capable of automatic cleaning, spot cleaning, edge cleaning, single room cleaning, and manual control. It can also perform floor mopping with an optional water tank. The robot is designed to clean an entire level of a home, returning to its charging dock to recharge when the battery is low or after completing a cleaning cycle. It avoids obstacles and drop-offs using various sensors.
Important Technical Specifications
- Product Model: R550 (R500+)
- Input: 19 V ⎓ 0.6 A
- Battery Voltage: DC 14.4 V
- Power Consumption: 28 W
- Battery Type: Li-ion 2600 mAh
- Dust Collector Capacity: 0.5 L
- Cleaning Time: Max. 120 mins
- Charging Time: 180-240 mins
- Charging Dock Input/Output: 19 V ⎓ 0.6 A
Usage Features
The Coredy R550 (R500+) offers several usage features for convenient and effective cleaning:
Control and Operation:
- Dock Button: Sends the robot back to the Charging Dock.
- Power On / Cleaning Button: Press and hold to power on/off; press to start cleaning.
- Indicator Lights:
- Pink: Low Power
- Blink Pink: Charging
- Blue: Full Charging/Standby Mode/Cleaning
- Red (Light or Blink): Troubleshooting
- Remote Control: Provides comprehensive control over the robot, including:
- Mode and time display screen
- Automatic cleaning
- Automatic re-charging
- Direction buttons for manual control
- Start/Pause button
- Clock setup
- Scheduling button
- Spot cleaning
- Edge cleaning
- Small-space cleaning
- Max vacuuming cleaning
Cleaning Modes:
- Auto Cleaning: The robot cleans in a random pattern, touching up edges, chair legs, and other furniture. It continues until an entire level is cleaned or returns to the Charging Dock if the battery is low.
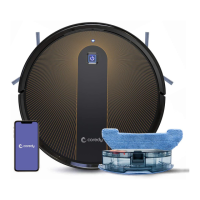
- Floor Mopping Cleaning: (Requires a separately sold water tank and cleaning cloth) The robot can mop floors. Users attach the cloth, fill the water tank, replace the dust bin with the water tank, and start the robot.
- Spot Cleaning: The robot intensely cleans a localized area by spiraling outward about 3 feet (1 meter) in diameter and then spiraling inward. It boosts vacuum power for best results. Activated by placing the robot on debris and pressing the Spot button on the remote.
- Edge Cleaning: After cleaning open areas, the robot cleans along walls and around furniture legs. Can be initiated faster by pressing the Edge button on the remote.
- Max Vacuuming Cleaning: Increases the robot's vacuum power for a deeper clean, activated by the MAX button on the remote. Off by default.
- Single Room Cleaning: The robot intensively cleans one single room for 30 minutes. Users should confine the robot to the room by closing the door. Activated by a dedicated button on the remote.
- Manual Cleaning: Users can direct the robot to clean a particular area using the directional buttons on the remote control (move forward, turn left, turn right, move backward).
Scheduling:
- Cleaning Schedule: Allows customization of cleaning times via the remote control. Requires correct local time, AM/PM setting, and the remote control to be near the robot during setup. Schedule accuracy is every 15 minutes.
- Setting Clock: Press the clock setup button, use arrow buttons to select hour/minute, then press the play/pause button to confirm.
- Setting Schedule: Press the scheduling button, use arrow buttons to select hour/minute, then press the play/pause button to confirm.
- Canceling Schedule: Press and hold the scheduling button for approximately 4 seconds.
Boundary Strip (Sold Separately):
- Allows users to block off specific areas or items the robot should not clean. The robot recognizes the strip and will not cross it.
- Installation: Identify the area to block, cut the strip to length if needed, and apply adhesive tape to lay it flat on the floor.
- Important Notes: Ensure the strip is flat; it may not work if rolled up. Place the strip on the same surface plane as the robot. Be careful not to damage the floor with adhesive tape. Not recommended for carpets. Keep away from objects that emit excessive heat.
Safety Precautions:
- Indoor use only.
- Pick up loose objects (clothing, papers, cords, fragile items) before use.
- Not a toy; supervise children and pets during operation.
- Store and operate in room temperature environments.
- Do not pick up burning/smoking items or spills of bleach, paint, chemicals, or wet substances.
- Use a physical barrier for balconies.
- Do not place anything on top of the robot.
- Be aware of the robot's movement to avoid stepping on it.
- Do not operate in areas with exposed electrical outlets.
Battery and Charging:
- Use only Coredy-approved rechargeable battery packs.
- Charge using a standard outlet; avoid power converters.
- Do not use a damaged Charging Dock cord or plug.
- Charge indoors only.
- Charging Dock may have surge protection.
- Never handle the Charging Dock with wet hands.
- Disconnect from Charging Dock before cleaning/maintenance.
- Ensure voltage rating matches outlet voltage.
- Dispose of used battery packs safely in sealed plastic bags according to local regulations.
- Check battery pack for damage/leakage before each use; do not charge damaged packs.
- Contact Coredy Customer Service for leaking battery disposal.
- Remove battery before disposal.
- Do not crush, dismantle, heat, incinerate, short-circuit, or immerse battery packs in liquid.
- For long-term storage or transportation, charge and remove the battery.
- To extend battery life, keep the robot charged on the Home Base when not in use.
- If storing off the Charging Dock, remove the battery and store the robot and battery in a cool, dry place.
- Shipping Lithium-Ion Batteries: Remove battery, tape metal charging contacts, reinstall battery (with tape), secure battery door, package in original or secure packaging, and ship via ground transportation only.
Maintenance Features
Regular maintenance is crucial for peak performance. The manual provides a detailed schedule and instructions for cleaning various components:
Care Frequency and Replacement Frequency:
- Filter: Clean once per week (twice with pets). Replace every 2-3 months.
- Side Brush: Clean once per week (twice with pets). Replace every 2-3 months (or when visibly worn).
- Rolling Brush: Clean once per week (twice with pets). Replace every 3-6 months.
- Brush Guard: Clean once per month. Replace every 3-6 months.
- Dust Bin: Empty after each use. Replace every 12 months.
- Cliff Sensors, Charging Contacts, Floor Tracking Sensor, Front Driving Wheel, Universal Wheel: Clean once per month. No replacement frequency specified.
Specific Cleaning Instructions:
- Emptying Robot's Bin: Press the release button, remove the bin, open the door, and empty debris.
- Cleaning Robot's Filter: Remove the filter by grasping the white tab. Shake off debris by tapping it against a trash container.
- Cleaning Robot's Side Brush: Remove the brush, clean it and the brush stand, then reinstall.
- Cleaning Robot's Cliff Sensors and Charging Contacts: Wipe with a clean, dry cloth.
- Cleaning Robot's Floor Tracking Sensor: Wipe the round sensor opening on the bottom surface with a clean, dry microfiber or soft cotton cloth. Do not spray cleaning solution directly into the sensor entrance.
- Cleaning Robot's Rolling Brush: Pull release tabs to unlock the brush guard, lift to remove the rolling brush. Clean with the provided cleaning tool or a vacuum cleaner. Reinstall by inserting the fixed protruding end first, then clicking into place. Press down to snap the brush guard into place.
Troubleshooting:
- The robot uses two-tone distress sounds and a blinking/lit red indicator for errors.
- Rebooting: For some errors, rebooting the robot by pressing the power button on the bottom may resolve the issue.
- Indicator Lighting Red (Troubleshooting Chart):
- One beep: Front driving wheel stuck. Action: Clean the front driving wheel, restart.
- Two beeps: Side brush stuck. Action: Clean the side brush, restart.
- Three beeps: Vacuum fan stuck or filter clogged. Action: Empty dust bin, clean filter (tap to loosen debris), ensure vacuum inlet is clear.
- Four beeps: Main rolling brush stuck. Action: Remove and clean main rolling brush and brush guard, restart.
- Indicator Flashing Red (Troubleshooting Chart):
- Two beeps: Bumper stuck. Action: Tap bumper several times to dislodge debris, press bumper 5-10 times to ensure free movement.
- Three beeps: Cliff sensors dirty, robot hanging over a drop, or stuck on a dark surface. Action: Clean cliff sensors with dry cloth, start cleaning in a new location, use boundary strip or physical barrier.
- Four beeps: Battery power low, robot cannot return to charging dock. Action: Manually place robot on charging dock, ensure no obstacles in front of dock, wipe charging contacts on dock and robot with dry cloth.
Frequently Asked Questions (FAQ):
- Robot cannot be activated: Check main power switch, battery charge, remote control batteries, remote range, and try turning off/on the main power switch.
- Remote control does not work: Replace batteries, ensure robot is on and charged, note limited range (5m/16.5ft).
- Robot stops working suddenly: Check for obstacles, low battery, or try turning off/on the main power switch.
- Cannot schedule cleanings: Ensure main power switch is on, time/AM/PM are set correctly, and robot's power is not too low.
- Suction power is weak: Check for obstructions in suction inlet, empty dust collector, clean filters (vacuum or brush), air-dry wet filters.
- Robot cannot be charged: Check if charging base indicator lights up (contact Coredy if not), dust off charging contact pins, listen for a beep when docked (contact Coredy if no beep).
- Robot cannot return to Charging Base: Remove objects within 3ft/1m to the left/right and 6ft/2m in front of the base. Be patient if the base is far away. Clean charging contact pins.
- Rolling brush does not rotate: Clean rolling brush, check if rolling brush and brush guard are installed properly.
- Robot's movements or travel path are abnormal: Clean sensors with a dry cloth, restart robot by turning power switch off and on.
Customer Service:
- US COST FREE Tech Support: +1 (800) 999 8470 (PST Mon-Sun 06:00-24:00)
- UK COST FREE Tech Support: +44 (808) 134 9909 (GMT Mon-Sun 14:00-08:00)
- E-mail: support@coredytech.com
- Website: http://shop.coredy.com
- Social Media: @coredytech (Facebook), @CoredyOfficial (Twitter), @coredy_robotvacuum (Instagram), @Coredy Official (YouTube).