• The grid is rigid.
• The grid is evenly lit. For a backlit glass grid, this is particularly important.
• If using a glass grid, confirm the correct face is towards the camera.
• The cameras are synchronized.
• Correct any potential problems and recalibrate.
Below the calibration scores, the calibration results are listed. Each result is listed with a confidence interval; if the interval
is very high, it may indicate a poor image sequence, even if the error score is low.
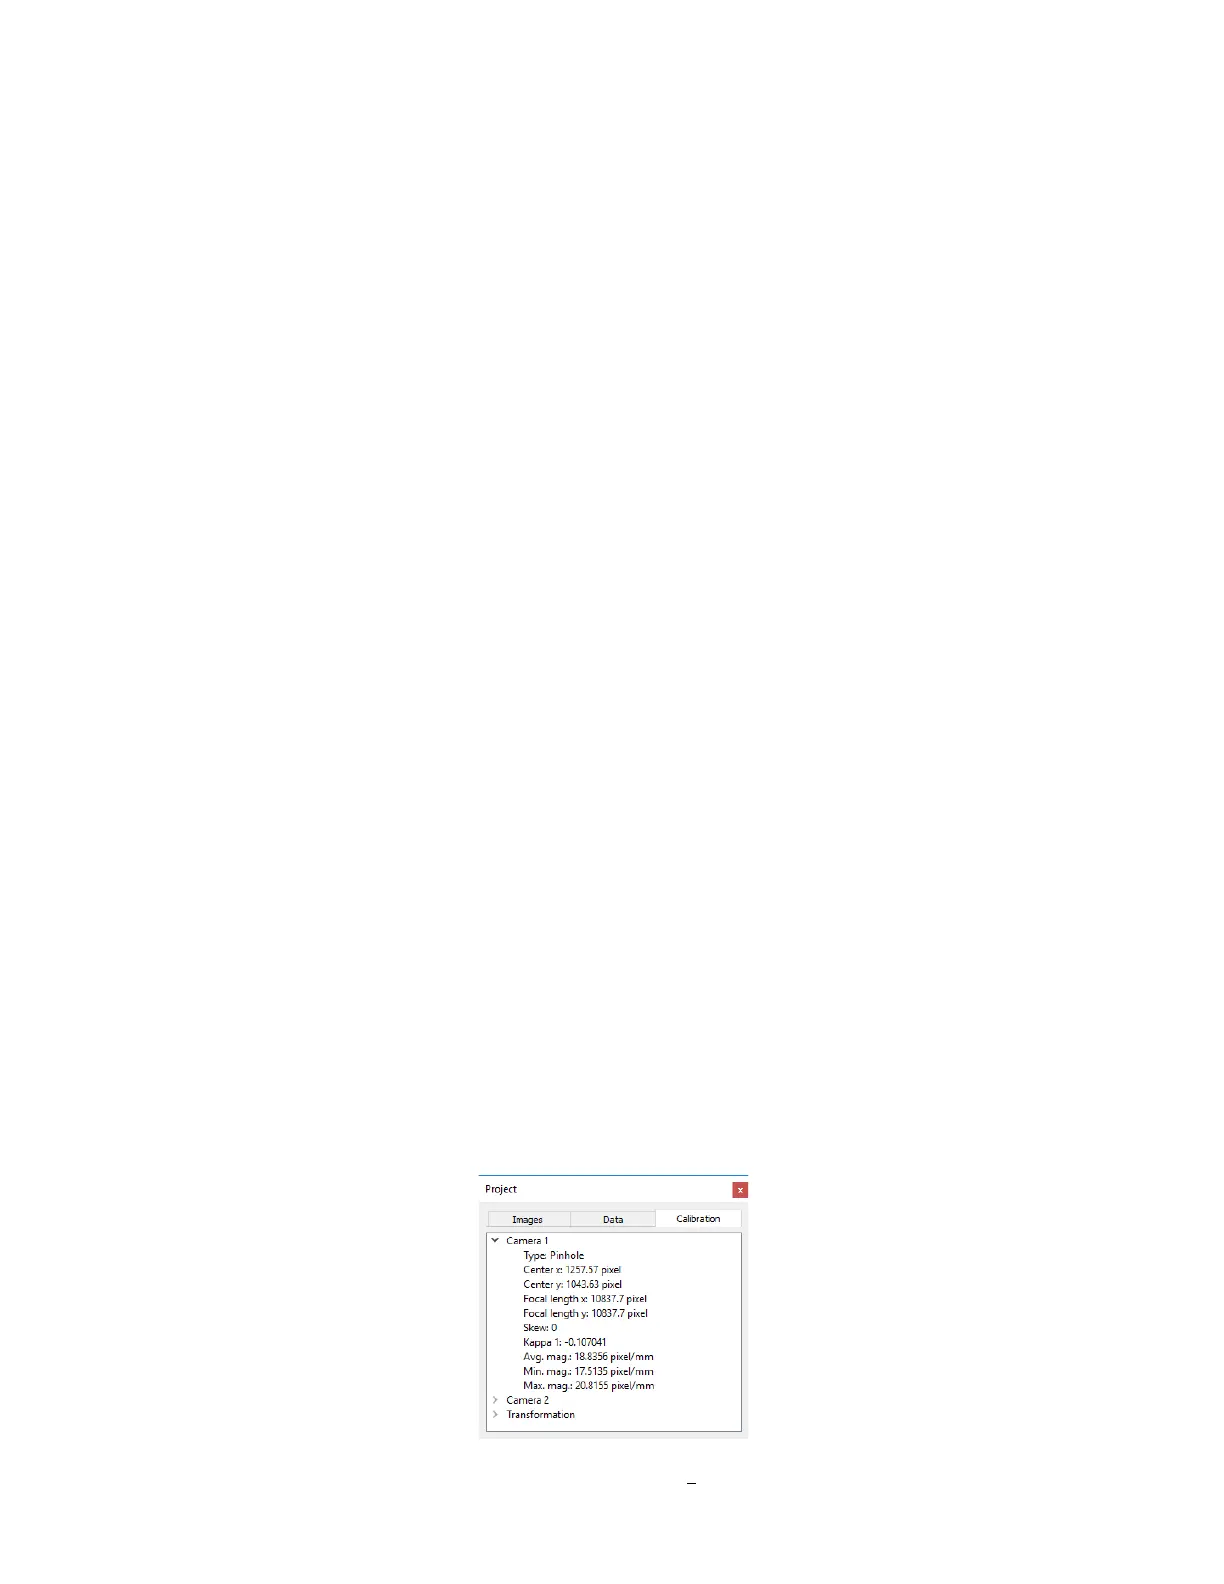
For each camera, the following values can be displayed:
• Center (x,y): the position on the sensor where the lens is centered. It should be roughly in the physical center of
the sensor.
The confidence intervals for center (x) and (y) will generally be higher for long-focal-length lenses. At very small
fields of view and high magnification lenses (70mm and up), the interval may be higher in magnitude than the
value itself – if the centers themselves are reasonable then it’s okay to proceed. If a reasonable center estimate
cannot be obtained, you may need to check the High magnification option (see above).
• Focal length (x,y): the focal length of the lens, in pixels. Multiplying this number by the known pixel size of the
camera will give a number roughly equal to the specified focal length of the lens.
• Skew: indicates the out-of-square of the sensor grid.
• Kappa (1, 2, 3): the radial distortion coefficients of the lens.
• p (1, 2, …): the prismatic distortion coefficients of the lens (if applicable)
• t (1, 2, …): the tangential distortion coefficients of the lens (if applicable)
For the rig as a whole, the following values are given:
• Angles: the three angles between each camera. In general, two angles will be small and one (the stereo angle) will
be larger.
• Distances: the distance between camera 1 and camera 2, measured from camera 1.
When the error score and confidence intervals are acceptable, click Accept to finish. The calibration data will be displayed
in the Calibration tab at left.
To save the new calibration, click the Save icon in the toolbar, or select File… Save, and select a project file name.
 Loading...