SETTING UP THE CAMERAS
POINTING THE CAMERAS
To begin, set your prepared specimen in its testing location. Be aware of the orientation and potential camera placement;
for example, for a dog-bone specimen in a test frame, the prepared face of the specimen should face outwards from the
test frame rather than facing the frame’s columns.
Our test specimen for this example is a small demonstration fixture which is designed to load an aluminum panel in
bending. An air bladder behind the panel can be inflated to provide the load.
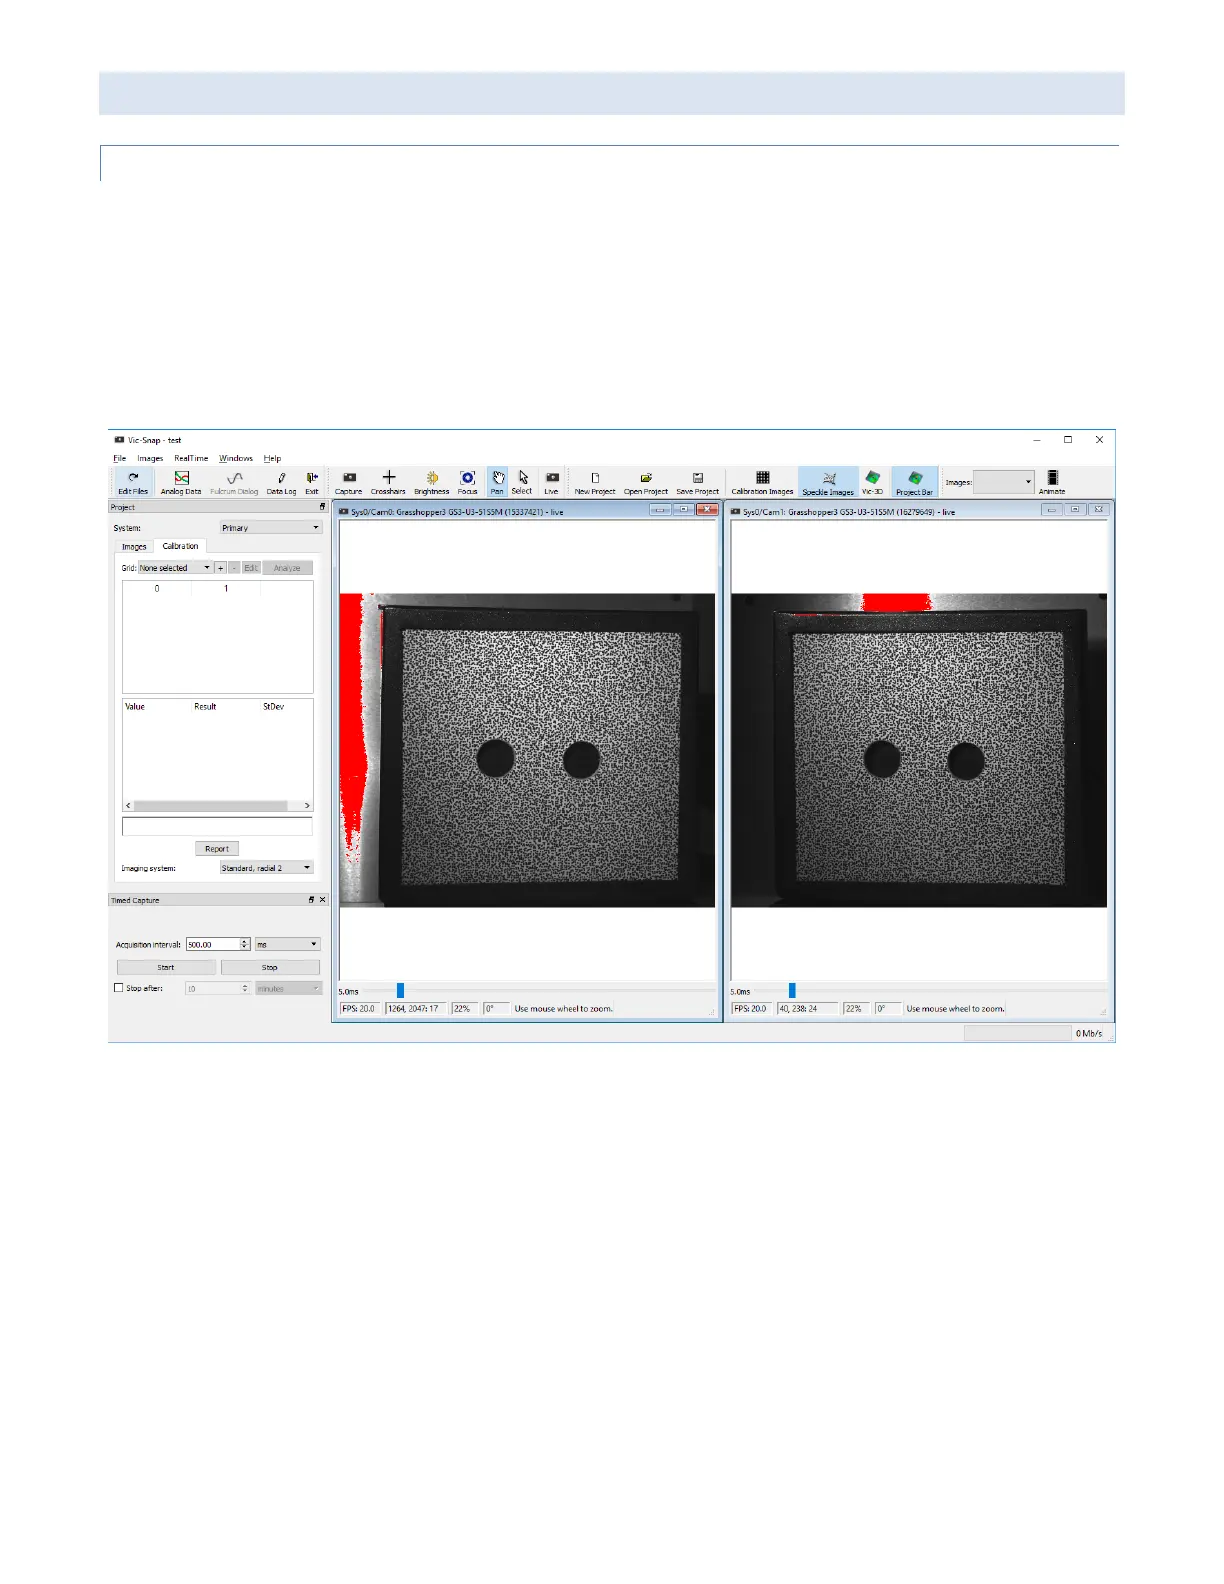
To assist in setting up the cameras, start Vic-Snap to view a live image set.
A window is shown for each camera in the system. The red areas in each image indicate overdrive/saturation, where the
pixel is driven to its highest possible brightness value.
The images can be zoomed by placing the mouse over an image and using the scroll wheel. This is useful for checking focus
or examining details but affects only the display and not the saved image.
To adjust the exposure time, use the large slider at the bottom of each window. The default range is 0-50ms – to select a
higher maximum, or a smaller range (to allow finer adjustments), you can right-click on the slider. Select a preset, or
“Custom” to specify.
After starting Vic-Snap, position the camera rig. The distance between the camera system and the specimen will be
determined by your available lenses; when multiple lenses are available, you should use the shortest one that works for
your setup. In some cases, test or room setup may require you to place the cameras farther away and compensate with
longer lenses; here, there are no such restrictions, so we use 8mm lenses. The short lenses are generally easier to work with
and can give somewhat better results.
 Loading...