20
INSTALL ANTI-TIP BRACKET
IMPORTANT:
•
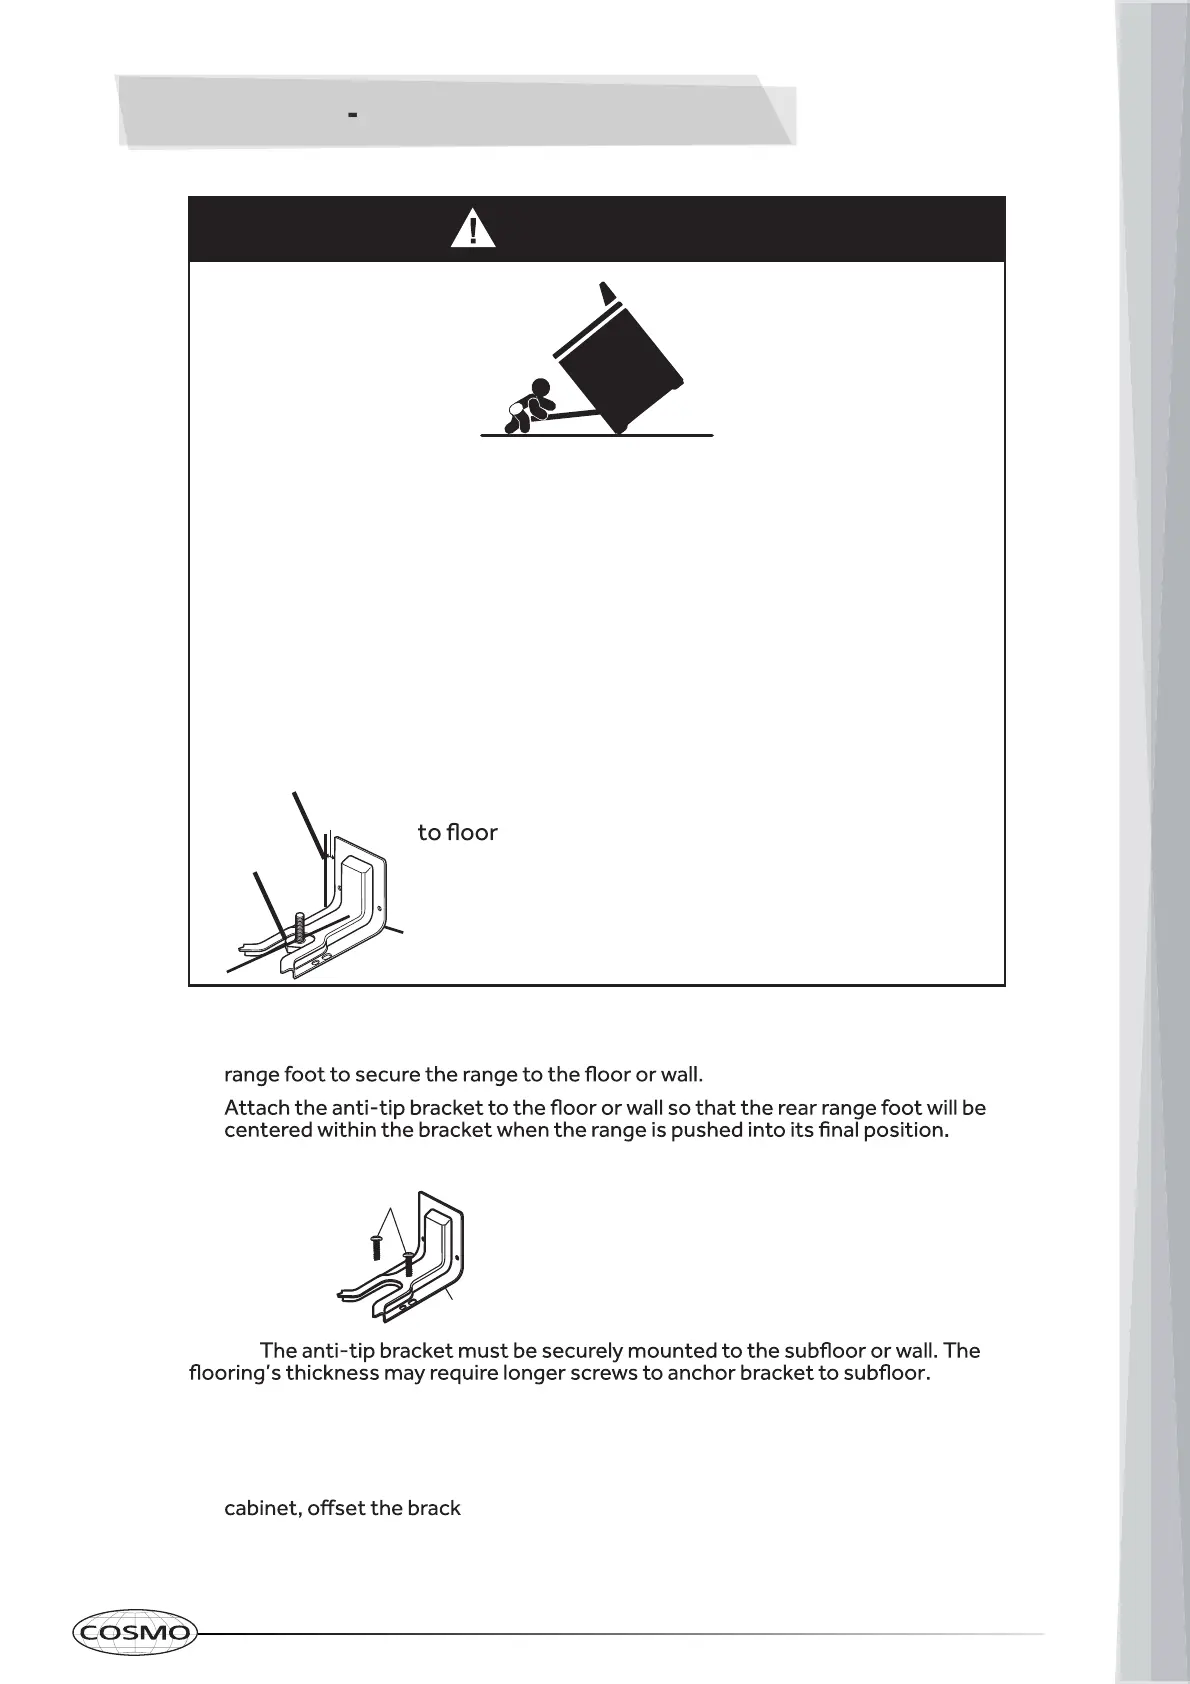
An anti-tip bracket is provided with the range. The anti-tip bracket uses a rear
•
1. Remove the anti-tip bracket and two screws (provided) from the parts bag.
a
b
a 16 x 1⁵⁄₈" Screws (2)
b Anti-tip Bracket
NOTE:
2. Place the bracket so that the back of the bracket is against the rear wall and the
side edge of the bracket is ³⁄₈" to ¹⁄₂" from the adjacent cabinet.
NOTE: If there is no adjacent cabinet, place the bracket so that the edge of the
bracket is ³⁄₈" to ¹⁄₂" in from the range side panel. If the countertop overhangs the
et from the cabinet by the depth of the overhang plus
an additional ³⁄₈" to ¹⁄₂".
WARNING
Tip Over Hazard
A child or adult can tip the range and be killed.
Connect anti-tip bracket to rear range foot.
Reconnect the anti-tip bracket, if the range is moved.
See the installation instructions for details.
Failure to follow these instructions can result in death or serious burns
to children and adults.
Making sure the anti-tip bracket is installed:
• Slide range forward.
• Look for the anti-tip bracket securely attached
and wall.
• Slide range back so rear range foot is under anti-tip
bracket.
Anti-Tip
Bracket
Range
Foot
(For COS-965AGC Only)
 Loading...