FIRST TIME START UP
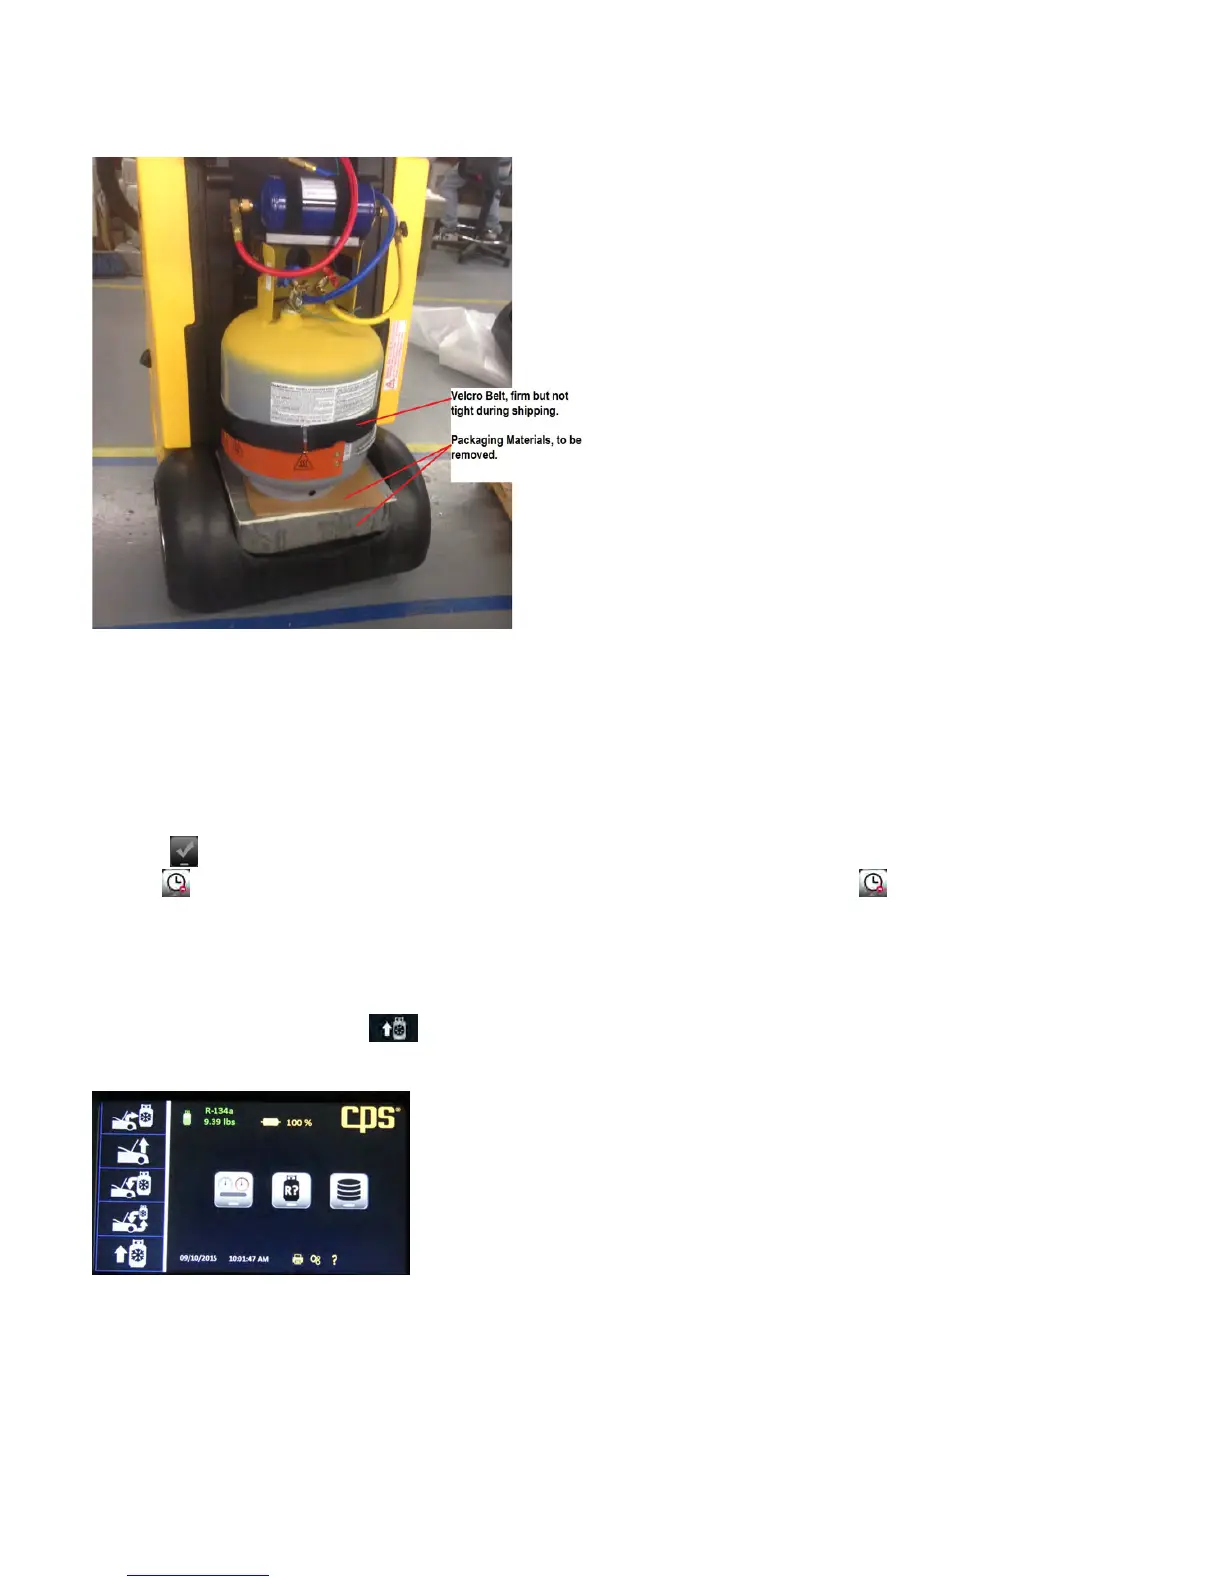
1. Remove the black tank cover on the back of the unit by unscrewing the two thumb screws located on each side of the cover. Remove the
protective packaging from between the storage tank and the scale. See Figure A below.
Figure A: Shipping support to be removed before start up.
2.
Plug the unit into the proper power source. Push the blue lighted power switch. All functions will be operated directly from the 7” Touch
Screen.
3. Press the key to enter your shop information into your unit. This information will appear on certain screens and on print outs.
Pressing will cause the unit to proceed with set up without personalizing your unit. Selecting will cause the unit to ask you later
if you want personalize your FX3030.
4. When personalization has been completed, press OK and the unit will proceed through self-calibration. When complete, the Home
screen will appear.
5. A “NO PRESSURE DETECTED IN THE TANK!” message will appear. Hit Continue to proceed.
6. A “STILL NO PRESSURE DETECTED!” message will appear. Hit Continue to proceed.
7. The main menu will appear. Hit the icon and refer to the Operators Manual for further instructions on how to fill the tank.
Congratulations, your FX Series Refrigerant Management Center is ready to use.
Note: Each time the machine is turned on it MUST be disconnected from a vehicle