THEORY OF OPERATION
OTHER FUNCTIONS
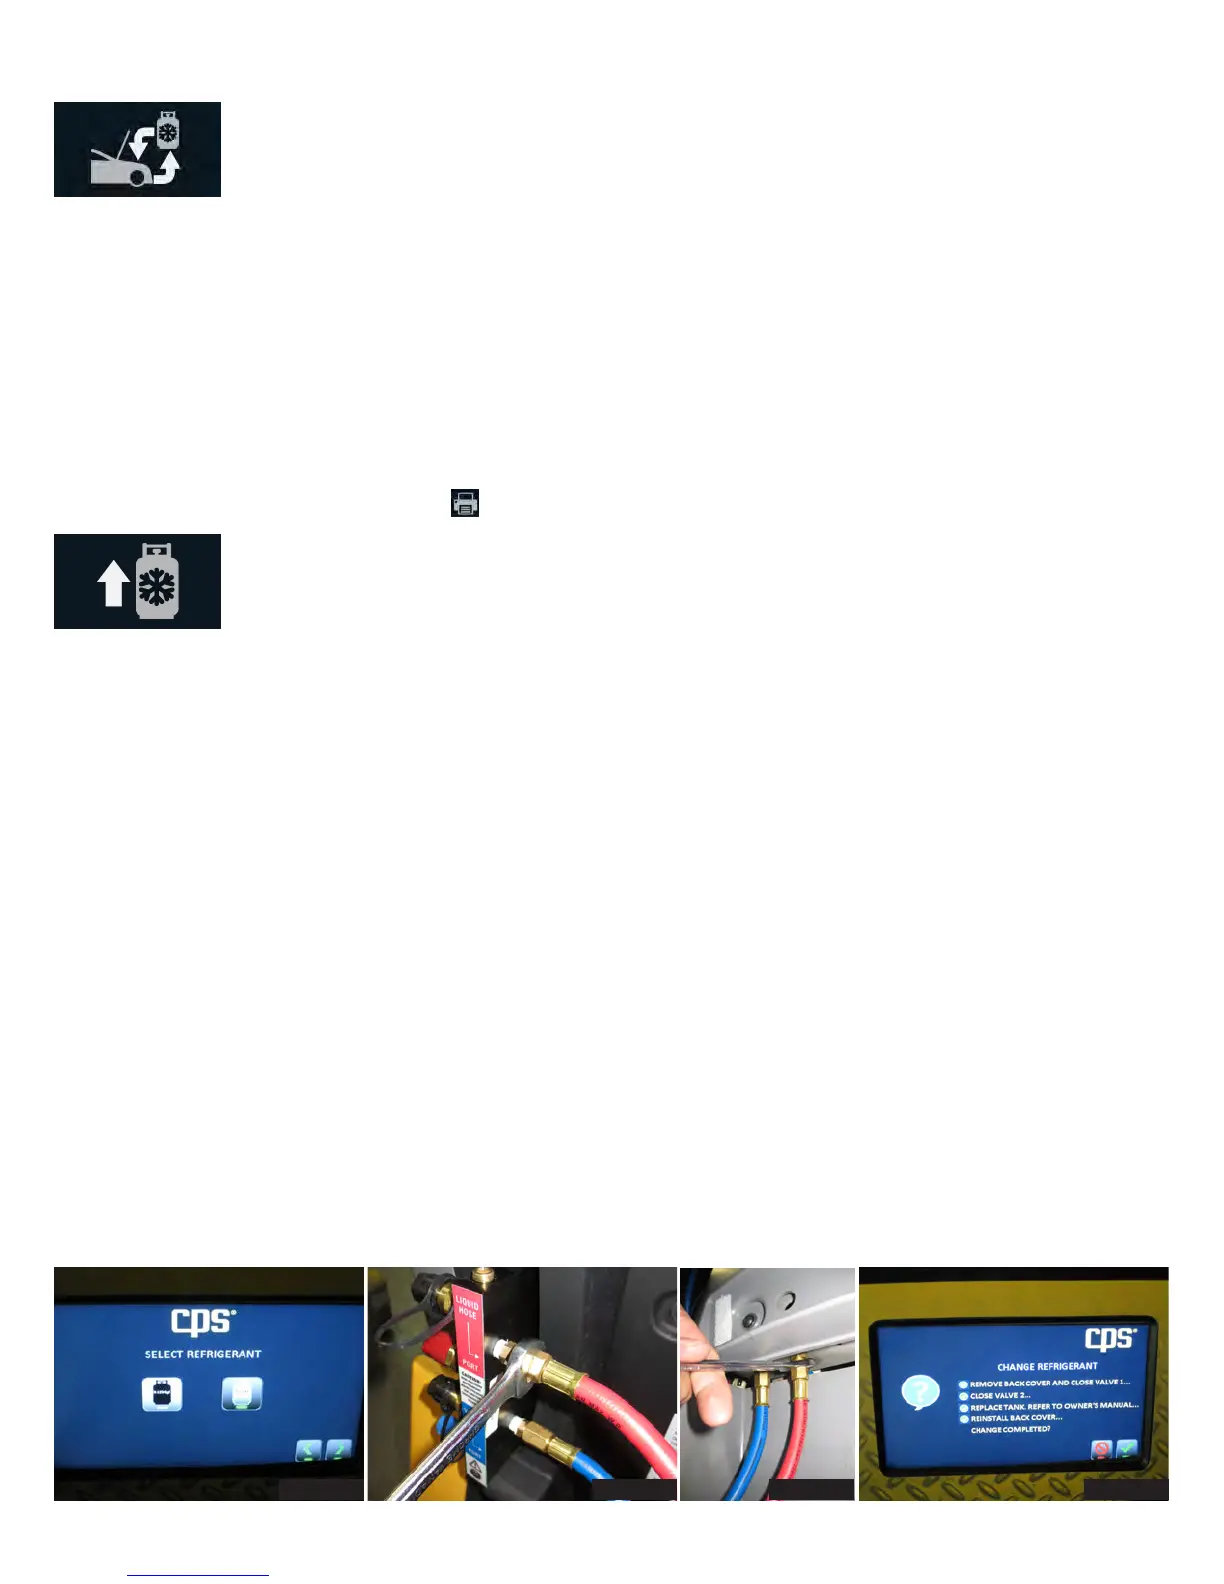
Refrigerant Change
This feature allows the user to switch between R-134a and R1234yf refrigerants for use in differently equipped vehicles. The “Refrigerant
Change” icon first appears on power up as well as in the settings menu.
1. Select the “Refrigerant Change” icon to begin to change refrigerants. Select the refrigerant to be used (Figure 1). Follow the directions
on the screen to remove the back cover and close valves 1 and 2. The screen will remain on until a small purge and a 3-5 minute deep
vacuum is performed on the system to remove any remaining traces of the old refrigerant.
2. Disconnect the heater blanket and ground wire.
3. Remove the tank by using a 9/16” wrench to disconnect the old tank’s liquid feed hose and the vapour return hose from the flush block
(Figure 2).
4. Once the old tank is removed, install the new tank with the red hose on the left side and the filter parallel to the FX unit. Use the same
wrench to attach the two new hoses to the filter bracket. Open all valves and check for leaks. CPS is not responsible for lost refrigerant.
5. Attach the new tank’s heater blanket, reattach the ground wire and reinstall the back cover.
6. On the front of the unit, remove the service cover with a Philips head screwdriver. Loosen the nuts with a 9/16” wrench and replace the
service hoses (Figure 3).
7. Reinstall the service cover and refer back to the screen. The unit will now go through the refrigerant identification process to ensure
proper changeover(Figure 4).
Full Cycle
Select “Full Cycle” to recover, recycle, vacuum, leak check and charge the vehicle AC system. The display will prompt you to enter the vehicle
charge amount. As in the “Charge” sequence, the database may be used to retrieve the charge amount for most vehicles sold in North
America.
The full cycle process begins with a refrigerant purity test and the vehicle system. This is required for SAE2843 for R1234yf only. If the
system passes the purity test, the machine will proceed with recovery.
The Full Cycle process continues after recovery with pre-charge vacuuming and leak testing. Leak testing is required under SAEJ2843 for
R1234yf systems. The system is first vacuumed. After vacuuming, the 5-minute vacuum test is performed. If vacuum is held, the unit will
proceed to adding 15% of the selected charge amount to the system. Using a SAE J2913 approved leak detector, inspect the evaporator(s)
for leaks and answer the displayed questions. If the system passes leak detection, the machine will continue charging the remaining 85%. If
the leak tests fail, the machine will recover any refrigerant and return to the Home screen. After the leak is repaired, the process can be run
again. The results may be printed by pressing the icon visible on the Home screen after Full Cycle is complete.
Tank Refill
Select “Tank Refill” to add refrigerant to the internal storage tank. It is suggested that at least 4.5 lbs or 2 kg of refrigerant be available in the
storage tank to begin any operation. If less is observed, choose this operation to add refrigerant to the internal tank. This operation transfers
refrigerant in the liquid state to the internal storage tank. The Refrigerant amount transferred in this mode is not counted toward the filter life.
Start by connecting the red hose to the liquid port on the cylinder. For virgin cylinders with one port, turn tank upside down once connected
and tank valve is opened. The Unit will then go through the refrigerant identification process. If the new refrigerant is determined to be con-
taminated, the unit will purge the sample and not allow the Tank Refill function to continue. If the refrigerant is determined to be acceptable,
follow the directions on the display until the process is completed.
Figure 1 Figure 2 Figure 3 Figure 4
 Loading...