9
SECURING TO SHOP
FLOOR
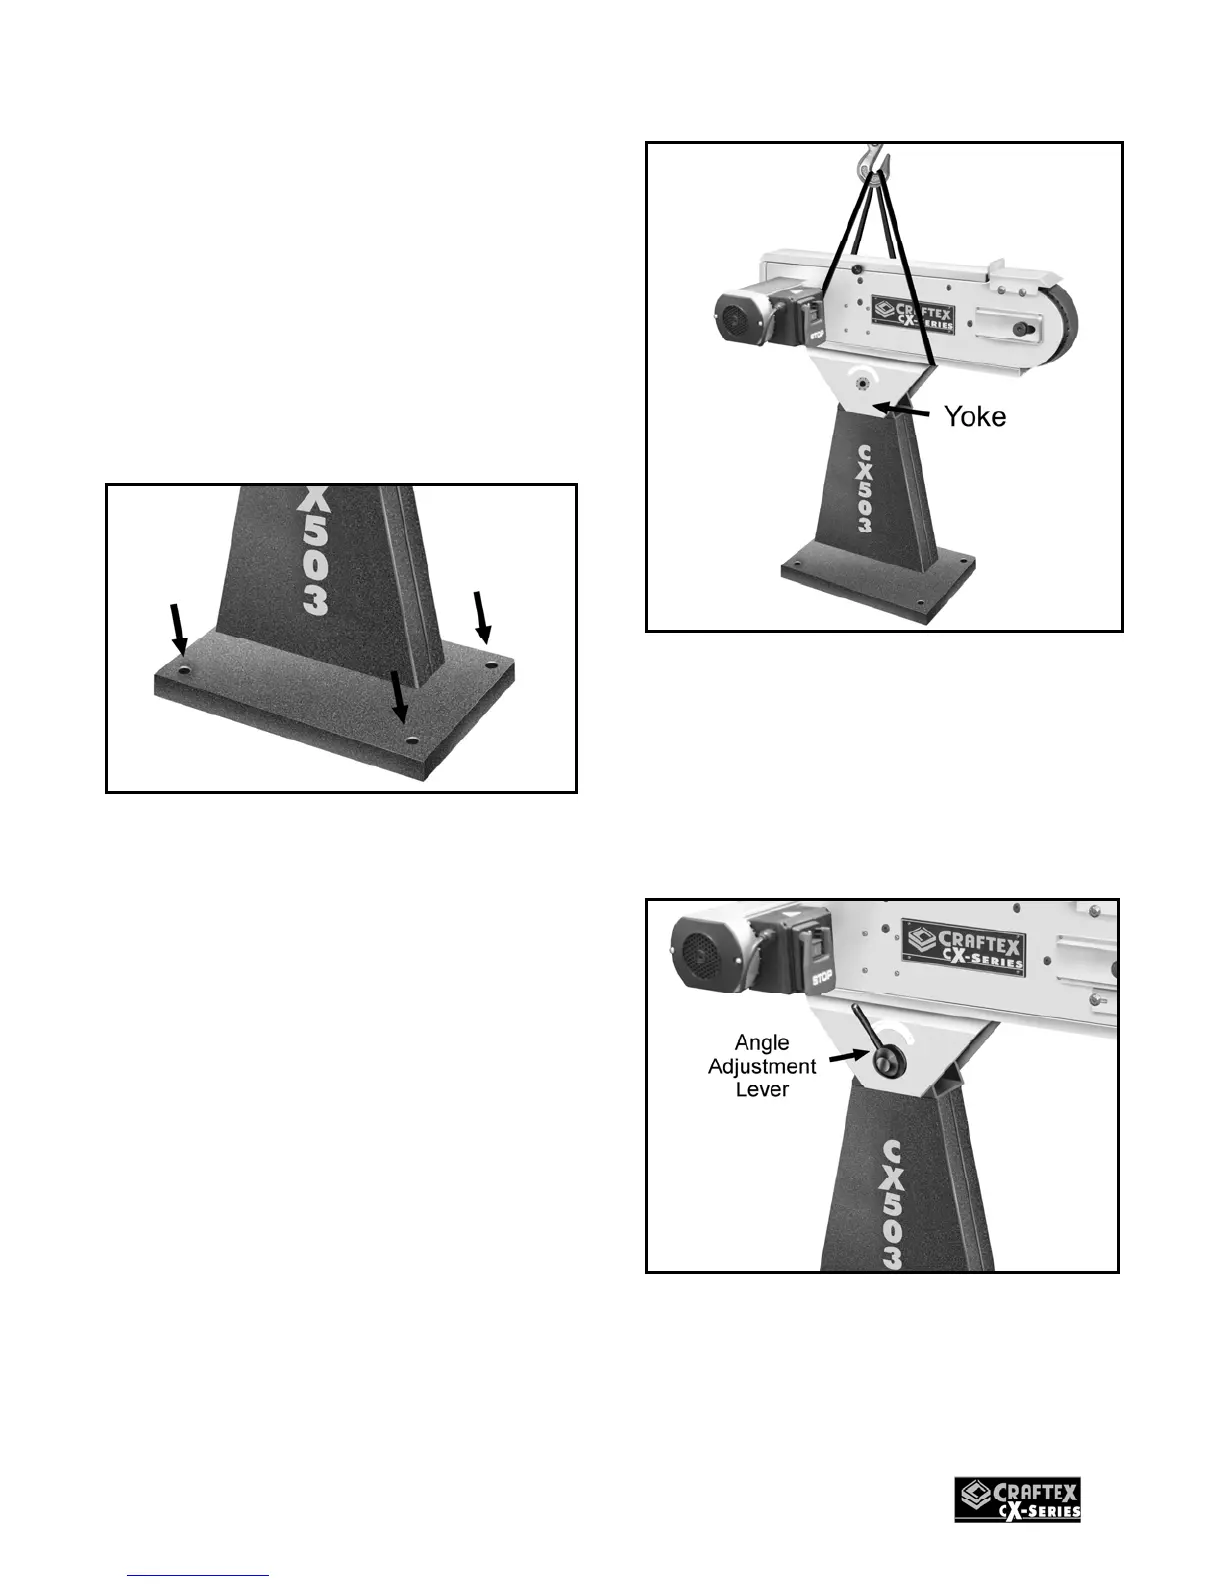
The CX503 features four securing holes on
its base which allows securing the machine
to the shop floor. Floor securing hardware
does not come with the machine.
When securing the machine to the shop
floor, make sure to level the machine with a
precision level.
Figure-4 Floor mounting holes
MOUNTING THE SANDER
To mount the sander onto the base, you
need to get the help of two persons
completing this step.
To mount the sander:
Place the base upright on the floor.
Lift the sander with the help of two
assistants or a fork truck and spread the
yoke on the sander, positioning it onto the
base as shown in figure-5.
Figure-5 Positioning the sander on the base
Now slide the bolt through the hole on the
sander and the base. Thread the angle
adjustment lever onto the bolt and tighten
the sander in position on the base. See
figure-6.
Figure-6 Tightening angle adjustment lever
onto the bolt